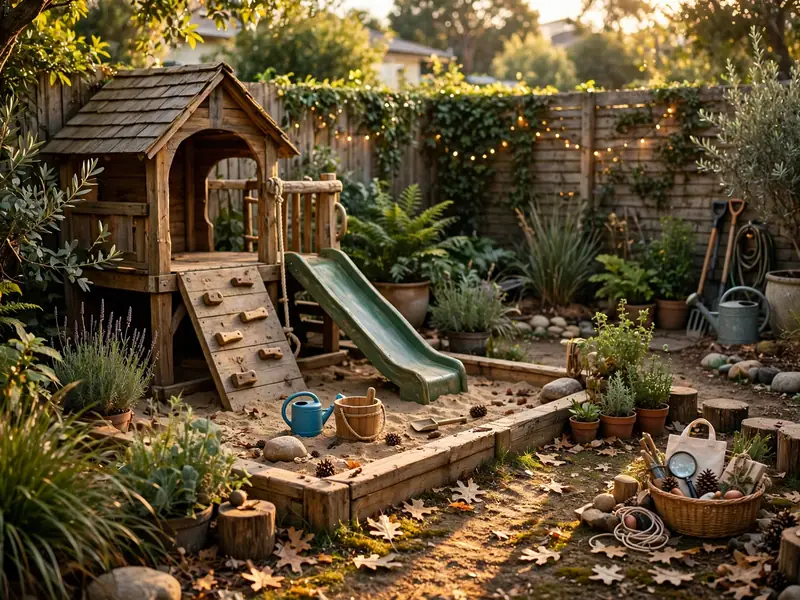
A plain corner of lawn holds a child’s attention for a few minutes at best. Toys scattered across the grass do not read as an invitation; they read as mess, and the play drifts back indoors before it has really started.
A theme fixes that. Give a corner a story, a few props that belong to it, a boundary that marks where the world starts and a sign that names it, and children step inside the story on their own. Themed corners also rotate cheaply: when the obsession changes, the props change with it.
Here are 16 themed play areas for real backyards, from a dinosaur dig to a market stall. Each one is built from a handful of props, most of them already in the shed, and goes up in a single afternoon.
The Play Area Formula That Keeps Themed Looking Cohesive
- One theme per area, fully committed: five dinosaur things beat fifty random toys for pulling a child into the story.
- A boundary makes it a place: edging, a rug, a hedge or a painted line tells the imagination where the world starts.
- Props kids can move: loose pieces they can carry, bury, build and serve with keep the area alive for weeks.
- A sign names the world: one small painted or chalked sign at the entrance makes it official.
For example: a sand corner edged with logs (boundary), buried plastic dinosaurs, brushes and buckets inside (movable props), a wooden sign reading Dino Dig at the path (named), and nothing else dinosaur anywhere else in the yard (one theme) turn two square metres into the favorite destination.
| # | Idea | Best For | Budget |
|---|---|---|---|
| 1 | Dinosaur Dig Area in a Sand Corner | Paleontologists aged three to eight | Low |
| 2 | Construction Site Area with Blocks and Cones | Builders with big plans | Low |
| 3 | Fairy Garden Area Under the Smallest Tree | Small magic, close up | Low |
| 4 | Pirate Ship Area Built Around a Sandbox | Sailing the sand sea | Mid |
| 5 | Water World Splash Area on the Patio | Summer headquarters | Low to mid |
| 6 | Mini Farm Area with Rows and Crates | Farmers of vegetables and toys | Low |
| 7 | Moon Landing Area with Craters in the Sand | Astronauts in training | Low |
| 8 | Music Garden Area with Outdoor Instruments | Noise with a home | Low to mid |
| 9 | Jungle Safari Area in the Tall Plants | Explorers on the path | Low |
| 10 | Art Studio Area Under a Shade Cloth | Masterpieces, outdoors | Low |
| 11 | Post Office and Delivery Area with Mailboxes | Letters to everyone | Low |
| 12 | Obstacle Arena Area with Marked Start and Finish | Races with a record book | Low |
| 13 | Beach Area with Sand, Shells and a Shade Umbrella | The seaside, inland | Low |
| 14 | Castle Area with Turrets from Crates and Flags | Knights and queens | Low to mid |
| 15 | Vet Clinic Area for Stuffed Animals | Gentle pretend care | Very low |
| 16 | Market Stall Area with Baskets and Play Food | Shopkeepers and chefs | Low |
1. Dinosaur Dig Area in a Sand Corner
Pick the sunniest unused corner, about 2 by 2 metres, and edge it with six log rounds, 30cm long, sunk halfway into the soil so the border reads clearly. Inside, spread washed play sand 15cm deep and bury eight plastic dinosaurs, two fossil-print rocks and a handful of pebbles just under the surface. Add two stiff brushes, a metal sieve and a galvanised bucket for finds. A pine plank sign, 40cm wide, painted cream with green letters reading Dino Dig, hangs on two posts at the entrance.
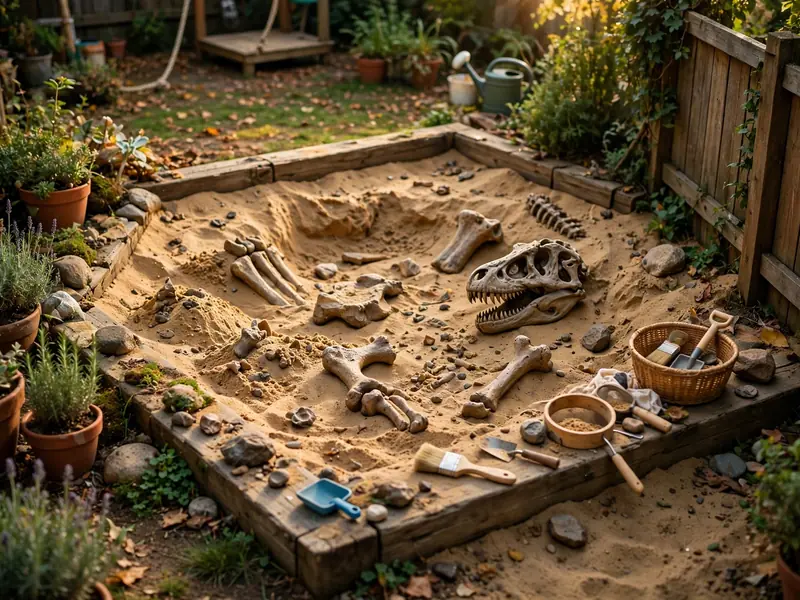
Fit check: kneel in the sand and brush a full arm’s sweep in every direction; if your elbow hits the edging, widen the corner by 30cm before the kids start digging.
2. Construction Site Area with Blocks and Cones
Claim a flat patch near the fence, roughly 2.5 by 2 metres, and outline it with a border of painted house bricks laid in a soldier row. Fill the middle with pea gravel 8cm deep, then park the fleet: one yellow dump truck, one digger, twenty wooden blocks in mixed lengths, six orange mini cones and three hard hats on pegs. A plywood sign screwed to the fence, stencilled Site Office in black on safety yellow, marks headquarters, with a clipboard and pencil hanging beside it for permits.
Style note: keep every prop in the same three colours, safety yellow, orange and bare wood, and the gravel pit reads as a designed site instead of a toy spill.
3. Fairy Garden Area Under the Smallest Tree
Choose the smallest tree in the yard and ring its trunk with a circle of white-painted stones, about 1.2 metres across. Inside the ring, press a 30cm terracotta saucer into the mulch as a pond, add three tiny resin houses with red toadstool roofs, a bottle-cap path and two miniature chairs cut from bark. Hang one small wooden door, 15cm tall and painted lavender, against the trunk at ground level. The sign is a flat pebble at the circle’s edge, lettered in white paint: Fairy Lane.
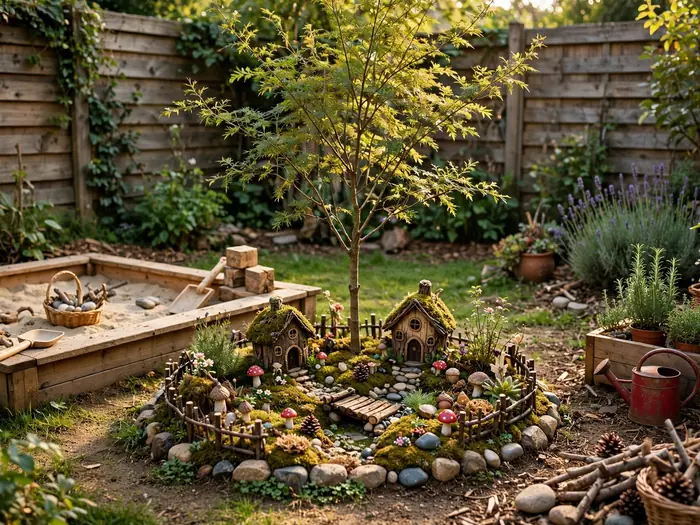
Easy swap: trade the resin houses for painted pinecones and acorn-cap bowls when you want the whole garden built from things the yard itself provides.
4. Pirate Ship Area Built Around a Sandbox
Centre the world on the existing sandbox and treat its rim as the ship’s deck edge. Hoist a mast from a 1.8-metre garden pole lashed to one corner, flying a black flag with a white skull painted by the crew. Set a ship’s wheel cut from plywood at the front rim, two treasure chests (lidded storage boxes) in the sand, and a plank walkway leading out to the grass. A sign on the mast reads Captain’s Orders: Dig for Gold, in chalk that changes daily.
Seasonal swap: in winter the ship becomes an ice explorer’s base, swap the flag for a white one, bury foil-wrapped ‘supplies’ in the sand, and chalk new orders for an expedition to the pole.
5. Water World Splash Area on the Patio
Claim the sunny stretch of patio, about 3 by 2 metres, and edge it with a blue outdoor mat so wet feet know the boundary. Inside, line up a water table at toddler height, a 40-litre tub of boats and funnels, three watering cans in rising sizes and a stool for the harbour master. If you are planning backyard playground ideas for later, this corner proves the patio spot. A sign by the door reads Splash Zone: Towels Required.
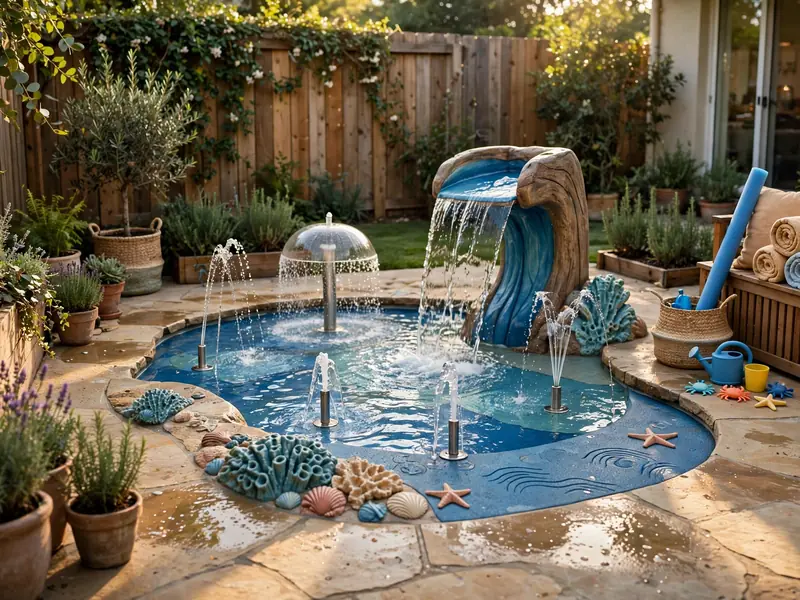
Why it works:
- Water holds attention longer than any toy, and refills are free.
- Everything lives inside one mat, so cleanup is a sweep and tip.
- Graduated cans and funnels grow with the child, from pouring to canal building.
6. Mini Farm Area with Rows and Crates
Mark out a garden plot of 2 by 1.5 metres with a low border of bricks and fill it with real topsoil in three neat rows. Plant the rows with fast, forgiving crops the farmers own: radishes, lettuce and one sunflower at the head of each row. Beside the plot stand two wooden crates as the barn, a toy tractor, and a bucket-and-trowel set hanging from a post. The sign on the post, painted red with white letters, reads Sunny Acres Farm: Open Every Day.
Budget note: seeds cost pennies and the crates and bricks are classic curb finds, so the whole farm usually comes together for the price of one bag of topsoil.
7. Moon Landing Area with Craters in the Sand
Give the astronauts a grey world: rake a sand or gravel patch of about 2.5 metres across into a shallow bowl and ring it with pale rocks as the crater field boundary. Press five bowl-shaped craters into the surface, scatter silver-painted stones as moon rocks, and plant a small flag on a dowel at the centre. Add a cardboard rocket box with a cut door at the edge. Like a good adventure playground, it runs on imagination more than kit. A foil-lettered sign at the path reads Moon Base: Report to Mission Control.
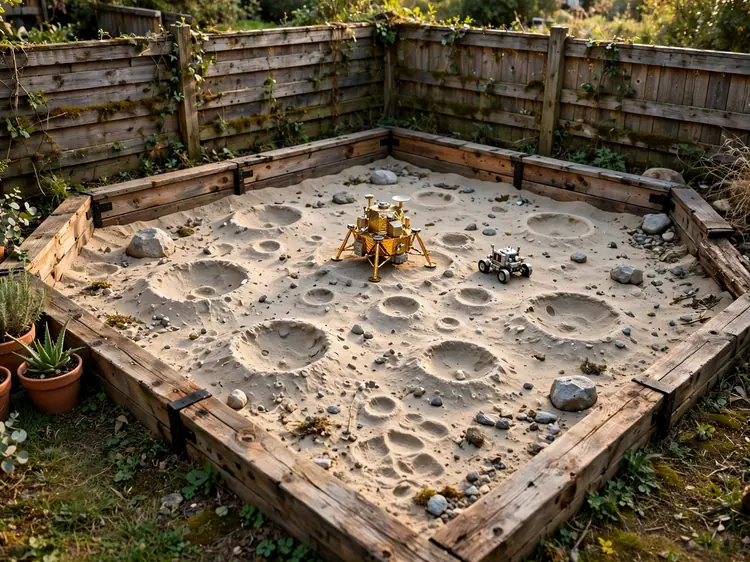
The formula: cratered sand base + silver moon rocks and flag + a foil-lettered sign naming the base.
8. Music Garden Area with Outdoor Instruments
Hang the instruments along one fence panel, about 2 metres wide, with stepping stones as the stage floor and a hedge or planter as its boundary. Mount a pot-and-lid drum set on a pallet, hang four lids as cymbals, fix a xylophone of copper pipes cut to descending lengths, and stand two rain sticks in a bucket. A chalkboard sign hung centre-stage reads The Garden Band: Now Playing, leaving room for the day’s set list.
Get the look:
- Main piece: a pallet drum kit of pots and lids.
- Supporting piece: copper-pipe xylophone and lid cymbals along the fence.
- Texture or material: warm metal, wood and stone underfoot.
- Finishing touch: the chalkboard marquee with today’s set list.
9. Jungle Safari Area in the Tall Plants
Use the tallest planting in the yard and thread a mulch path, 60cm wide, through it to make the trail. Border the path with fern pots and bamboo clumps so walls of green close in, and hide six toy animals at eye level among the leaves. Give each explorer binoculars and a clipboard safari sheet at the trailhead. Fans of natural outdoor playground ideas will recognise the trick: real plants do the theming. A wooden sign at the entrance reads Safari Trail: Animals Ahead.
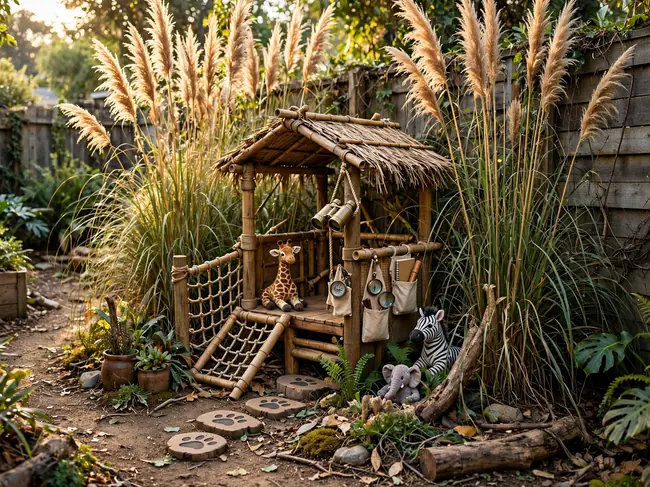
Color note: the palette is layered greens, deep in the shade and lime where the sun breaks through, with the toys’ browns and oranges as the only bright spots, like real animals glimpsed at dusk.
10. Art Studio Area Under a Shade Cloth
Stretch a cream shade cloth over the quiet corner by the shed, about 2.5 by 2 metres, and lay a washable outdoor rug beneath it as the studio floor. Set an easel made from two hinged boards at the centre, a caddy of chunky chalks and washable paints on a low table, and a washing line strung between two posts for drying work. Clip finished pieces along the line as the gallery. A painted board sign over the easel reads Open Studio: Artists Welcome.
Texture note: canvas shade overhead, a flat woven rug underfoot and smooth chalk on rough boards give hands three different surfaces to work across in one small studio.
11. Post Office and Delivery Area with Mailboxes
Build the post office along a short run of fence, about 1.8 metres, edged by a painted white line on the ground as the counter boundary. Fix two mailboxes at child height, one red for posting and one blue for sorting, with a slotted sorting shelf between them. Stock the counter with envelopes, sticker stamps, a date stamp and a delivery bag. A routed wooden sign above the mailboxes reads Village Post Office, and a small bell on the counter rings for service.
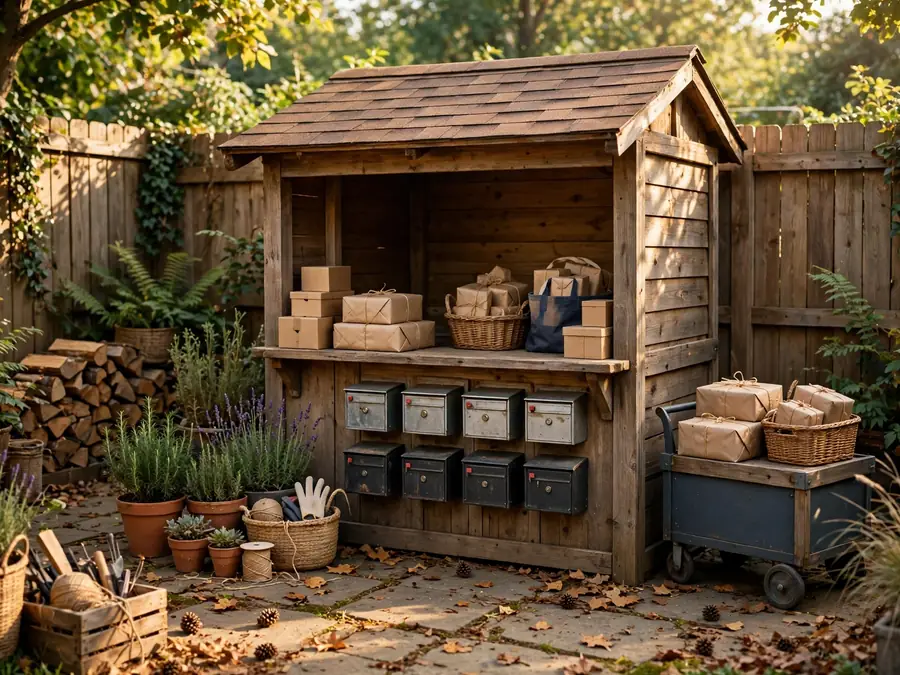
Best for: letter writers aged four to seven with cousins, grandparents and neighbours expecting deliveries.
12. Obstacle Arena Area with Marked Start and Finish
Lay the arena on the flattest lawn strip, an oval about 6 by 3 metres, marked with a white rope boundary pegged at the corners. Build six stations inside: two pool-noodle hurdles, a tunnel of hoops, a balance line of flat boards, three cones to weave, a beanbag toss and a tyre hop row. Paint a start arch from two poles and a banner, and keep a record book on a stump at the finish. The sign on the arch reads Arena Record Attempts Daily.
Space note: leave a full metre of run-off past the finish arch and between each station, so racers spill onto grass, not onto the next obstacle.
13. Beach Area with Sand, Shells and a Shade Umbrella
Pour a sand area of about 3 by 2 metres inside a border of driftwood-style logs, set on the part of the lawn you can see from the kitchen window. Scatter twenty shells through the layer, add a striped beach umbrella tilted at the corner, three buckets, a sieve and two deck chairs in canvas and wood. It borrows the relaxed edge of your favourite backyard garden ideas without planting a thing. A sign on a post by the umbrella reads The Beach: No Shoes, No Rush.
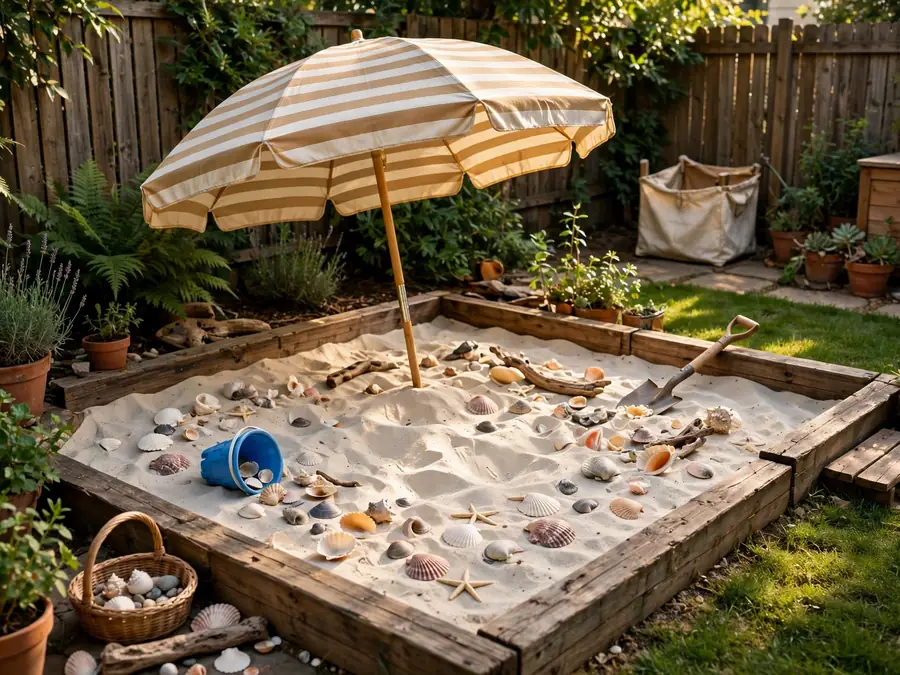
Fit check: sit in each deck chair and check the umbrella’s shade still covers your lap at midday; tilt it once, mark the angle on the pole, and reset it in seconds.
14. Castle Area with Turrets from Crates and Flags
Raise the castle on a flat corner against the fence, stacking six wooden crates two high at each end as turrets inside a boundary of grey-painted stones. String a bunting of purple and gold flags between the turrets, hang a cardboard shield painted with the family crest at the gate gap, and lay a red outdoor rug as the great hall floor. A drawbridge plank leads in from the grass. The sign above the gate, in gold paint on dark wood, reads Castle Rules: Be Brave, Be Kind.
Style note: repeating the same purple and gold on flags, shield and a painted door mat is what turns stacked crates into a castle worth defending.
15. Vet Clinic Area for Stuffed Animals
Set the clinic on the porch or a shaded patch, about 1.5 metres square, with a white sheet draped over a low table as the examination room and a row of small chairs as the waiting area. Stock the table with a toy stethoscope, bandage rolls, a clipboard of patient charts and three soft patients already in beds made from shoeboxes and flannels. A calm sign at the entrance, blue letters on white, reads Paws and Claws Clinic: Walk-ins Welcome.
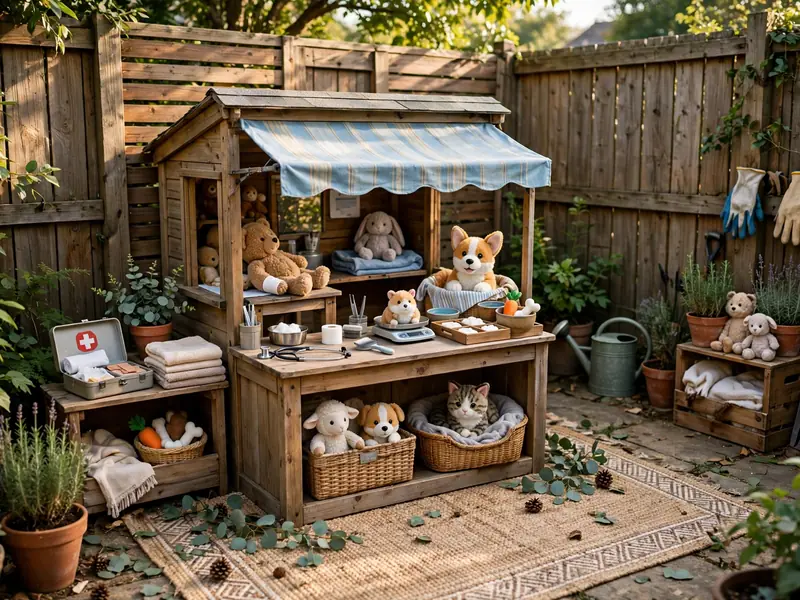
Easy swap: swap the patient charts for a grooming brush and ribbon box and the clinic becomes a pet salon between appointments.
16. Market Stall Area with Baskets and Play Food
Build the stall from a table or two crates under the porch roof or a pop-up canopy, a frontage about 1.5 metres wide edged by a striped awning cloth. Line the counter with six baskets of play food sorted by colour, a set of scales, paper bags and a till box with coin tokens. Hang price cards on pegs above each basket. A cheerful sign across the awning reads Sunny Street Market, with Open chalked on a small board each morning.
Seasonal swap: in December the stall becomes a Christmas market, swap play vegetables for baubles and pinecones, add fairy lights to the awning, and chalk Hot Chocolate on the board.