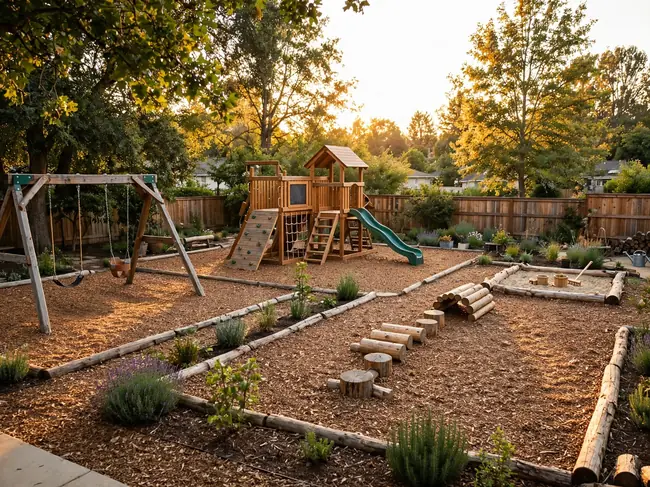
Most backyard playgrounds are never planned — they accumulate. A swing set arrives one birthday, a slide the next, a trampoline the summer after, each dropped wherever it fits on the day. Soon swing arcs cross walking routes, mulch migrates across the lawn, and the whole collection looks less like a playground and more like a yard sale.
Real parks feel different because they are planned before they are filled. Fall zones stay empty, loud play and quiet play sit apart, one surface runs underneath everything, and adults can see the whole space from one spot. Those layout decisions — not the equipment — are what make a playground feel calm, safe and finished.
These 20 ideas are those decisions, translated for a home yard: where pieces go, what stays empty, and how the space grows with your kids. Most cost nothing but thought and a tape measure, and every one can be applied to equipment you already own.
The Playground Layout Formula That Keeps Busy Looking Calm
- Zones before equipment: mark quiet, active and toddler areas on a sketch before a single piece is placed.
- Fall zones are sacred: the empty safety space around swings and slides is part of the design, never storage or seating.
- One surface, one border: a single contained surface under everything keeps the area safe, tidy and easy to maintain.
- Plan the tenth year, not the first: leave a growth strip empty now so bigger pieces can arrive without a rebuild.
For example: swings along the long north edge with their fall zone kept empty (zones, safety), a slide and dome grouped on one bark rectangle inside timber edging (one surface), a toddler corner near the patio, and a two-metre grass strip left empty at the far end (growth) make a playground that still works in five years.
| # | Idea | Best For | Budget |
|---|---|---|---|
| 1 | One Mulch Rectangle That Unites the Whole Set | The tidy foundation | Mid |
| 2 | Swings on the Long Axis, Slides Off the Side | No collision paths | Low |
| 3 | The Six-Foot Fall Zone Kept Empty All Around | Safety by emptiness | Very low |
| 4 | A Quiet Zone Placed Far from the Loud Zone | Mixed ages, one yard | Very low |
| 5 | Toddler Corner Inside the Same Fence Line | Little ones, included safely | Low |
| 6 | Shade Sail Angled over the Slide’s Landing | Cool landings all day | Mid |
| 7 | Sight Lines from the Kitchen Window, Planned First | Supervision by design | Very low |
| 8 | Rubber Path from the Gate to the Playground Edge | Clean shoes, clear route | Mid |
| 9 | Border Edging That Keeps Mulch In and Mowers Out | The crisp outline | Low to mid |
| 10 | Climbing Pieces on the North Side for Afternoon Shade | Sun-smart placement | Very low |
| 11 | A Storage Chest at the Playground’s Edge | Loose parts, housed | Mid |
| 12 | Ground Anchors Hidden Below the Mulch Line | Firm frames, no trip bars | Low |
| 13 | Two Entrances So Games Never Deadlock | Flow for running games | Very low |
| 14 | The Slope Used for the Slide, Not Fought | Hills as features | Low to mid |
| 15 | Spectator Bench Built into the Playground Border | Adults inside the action | Mid |
| 16 | Drainage Slope That Keeps the Mulch Pit Dry | No swamp after rain | Mid |
| 17 | Room-to-Grow Strip Left Empty on Purpose | Future pieces, planned | Very low |
| 18 | Color-Coded Zones Painted on the Border Timbers | Rules kids can see | Low |
| 19 | The Inspection Walk: A Monthly Five-Minute Route | Safety as a habit | Very low |
| 20 | Sound Buffer Planting Along the Neighbor Fence | Happy neighbors | Low to mid |
1. One Mulch Rectangle That Unites the Whole Set
Start with a tape measure, not a shopping list. Mark one rectangle, about 7 by 5 metres for a swing-and-slide set, and let every piece of equipment live inside it. Lay woven landscape fabric over levelled ground, then spread shredded bark or engineered wood fibre 25–30 cm deep across the whole rectangle. One continuous surface means one fall standard everywhere, one mowing edge, and no islands of grass wearing bald under busy feet.
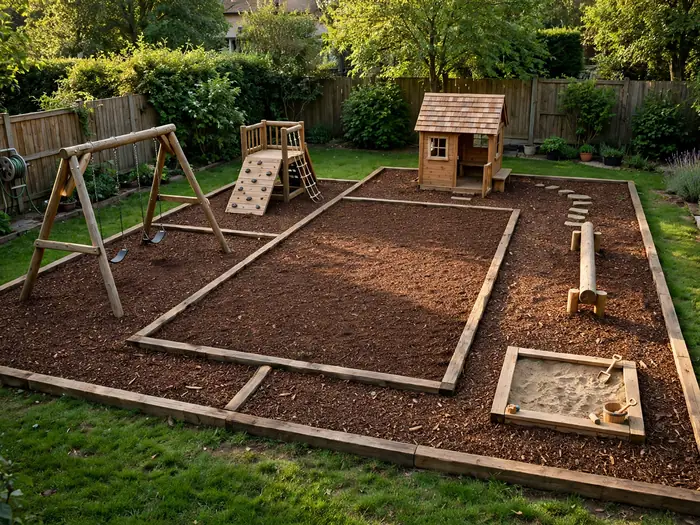
Texture note: Bark fibre feels springy and stays put under swings, while rubber mulch reads tidier but runs hotter in sun; whichever you choose, keep the texture consistent right up to the border — mixed surfaces trip small feet and look patched.
2. Swings on the Long Axis, Slides Off the Side
Swings are the one piece whose movement you can predict exactly, so give them the long straight edge of the yard. Set the swing frame parallel to the longest fence, its seats swinging along that axis, never across a walkway. Then angle the slide off the side of the climbing frame so its exit lane lands at ninety degrees to the swing path. The two traffic streams cross an empty corner instead of each other. Allow the full swing arc — roughly twice the top bar’s height, front and back — before anything else earns a place nearby.
Best for: long, narrow yards where one straight equipment wall leaves the rest of the lawn free for games.
3. The Six-Foot Fall Zone Kept Empty All Around
Safety space is a layout line, not leftover space. Before equipment goes in, chalk a border 1.8 metres — six feet — out from every swing arc and slide exit, and treat everything inside it as floor, not land. No storage boxes, no bench, no planter, no parked trike earns a spot inside the line, because a falling child needs the full distance to land in soft surface. If the yard cannot give a piece its full fall zone, the answer is a smaller piece, not a squeezed one.
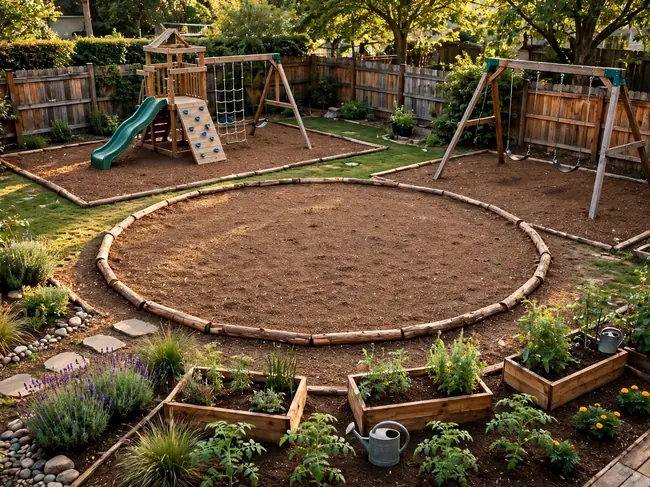
Space note: Measure the fall zone from the equipment’s outermost moving point — a swing at full stretch, not at rest — and recheck it after every piece arrives.
4. A Quiet Zone Placed Far from the Loud Zone
Put the noisiest equipment and the quietest corner at opposite ends of the yard, on the diagonal if the space allows. The trampoline and basketball hoop anchor the loud zone; the sandbox, play kitchen and a bench anchor the quiet one. A hedge, a storage fence or the slide structure can sit between them as a sound break. Toddlers nap-play and older kids read or build in the quiet end without shouting over bouncing balls, and nobody has to police the volume because the distance does it.
Fit check: Stand in the quiet zone while someone bounces a ball in the loud one; if you must raise your voice to chat, add distance or a divider before placing furniture.
5. Toddler Corner Inside the Same Fence Line
Give under-threes their own corner inside the main playground rather than an exile across the yard. A 3 by 3 metre corner near the patio, marked by a knee-high picket divider with a latch gate, holds a mini slide with a 90 cm platform, a low balance beam and a sand table. Their fall zones scale down with the equipment, and a soft rubber-tile pad under the corner ties it visually to the big-kid mulch next door. Toddlers play included but un-trampled, watching through the pickets.
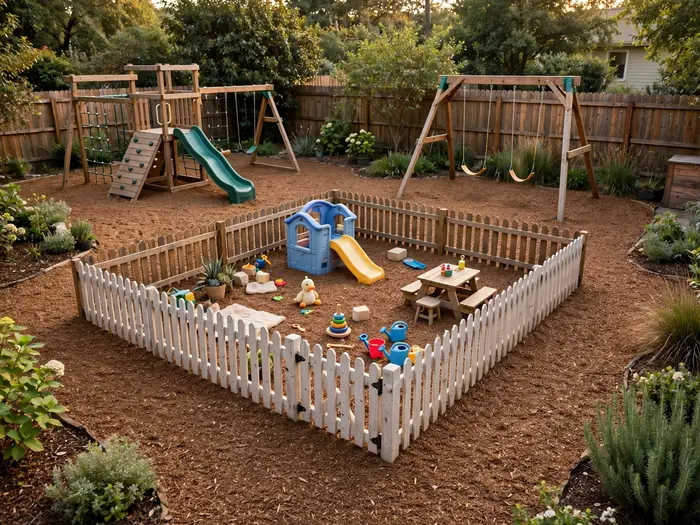
Style note: Paint the little picket divider the same colour as the main border timbers — sage green or warm grey — so the corner reads as a designed room, not a barricade.
6. Shade Sail Angled over the Slide’s Landing
Shade belongs over landings, not over everything. A slide’s exit is where children pause, regroup and sit, and a sun-baked metal or plastic chute burns by noon. Stretch a triangular sail, about 3.6 metres a side, over the landing end only: the high corner at 2.6 metres tilts down to 2.1 metres toward the west, blocking afternoon sun and shedding rain off the fall zone. The same zone thinking shapes good outdoor play area ideas of every size — cover the pause points, leave the moving parts open to the sky.
Easy swap: No posts to spare? Clip a rectangular shade cloth between the climbing frame and the fence with carabiners for one season before committing to fixed poles.
7. Sight Lines from the Kitchen Window, Planned First
Plan the view before the equipment. Stand at the kitchen window or back door — wherever adults spend time — and mark what that spot must see: every fall zone, every gate, every corner. Tall pieces, like the climbing frame, go on the far side of the yard so they never block the low equipment behind them, and nothing tall stands between the window and the toddler corner. Swings read safest side-on, where you can judge the arc; end-on, a swinging child disappears behind the frame at the top of every swing.
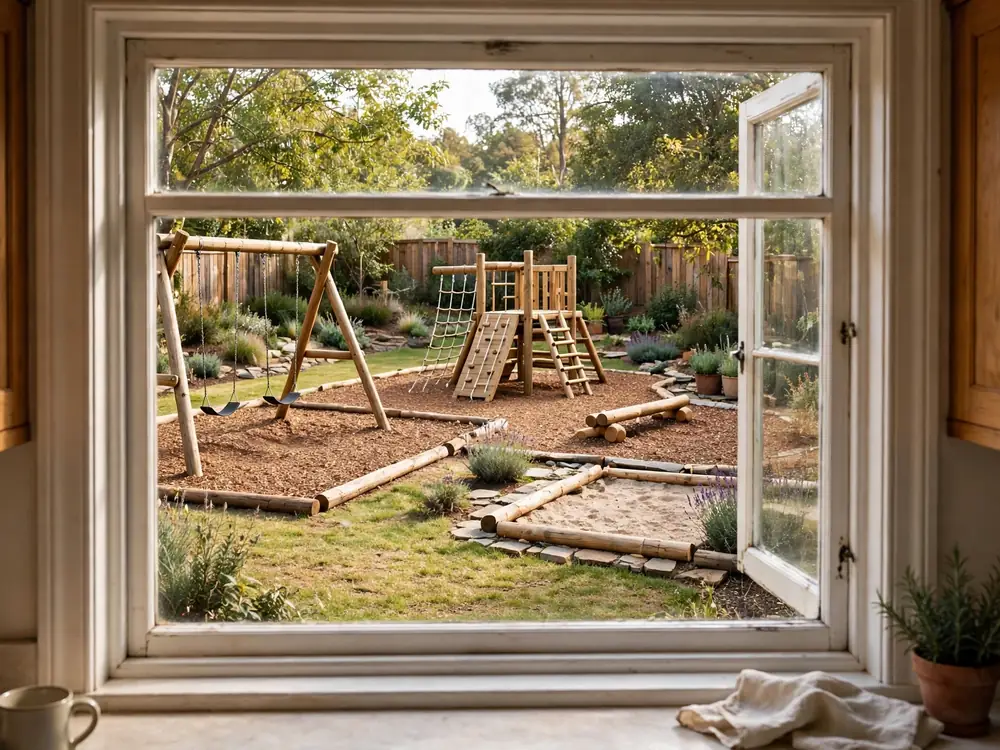
Seasonal swap: In winter, when darkness falls before dinner, clip two solar spotlights along the sight line so the same window view works at 5 p.m. in December.
8. Rubber Path from the Gate to the Playground Edge
Give feet a route and they will stop inventing unofficial ones. A path of rubber pavers, 90 cm wide, from the back gate straight to the playground border keeps the traffic off the flower beds and out of the swing arc. The path’s edge meets the mulch border flush, so trikes and scooters roll in without a lip to catch. In rainy months the route stays firm while the lawn turns to sponge, and shoes arrive at one mat instead of every corner of the yard.
Why it works:
- Shoes stay cleaner, so the mulch stays in the pit
- Traffic crosses the swing arc at one visible point only
- The firm surface works for strollers, trikes and grandparents
9. Border Edging That Keeps Mulch In and Mowers Out
A playground surface without a border is a surface on the move. Set edging — 15 cm landscape timbers, a low brick soldier course or flexible steel strip — around the whole pit, sitting about 10 cm above the mulch so kicked bark stays in and mower wheels stay out. Round or chamfer the top edge where it doubles as a balance beam, because it will. Every playground, from school grounds to park corners, starts with this unglamorous line: it is what keeps the soft surface soft, deep and inside its territory.
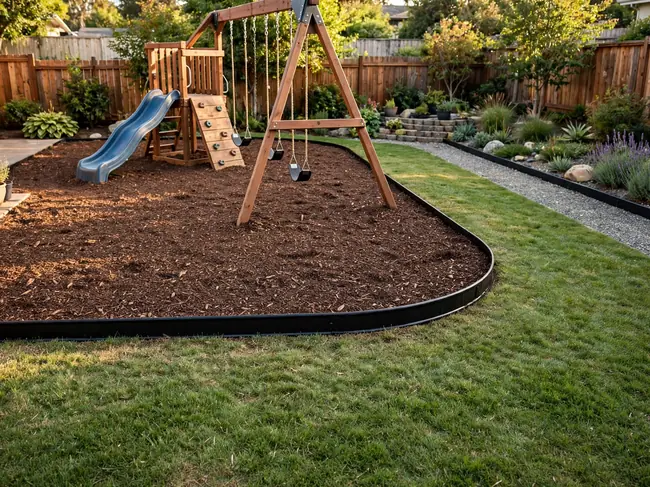
Budget note: Second-hand bricks or offcut decking boards make a border for a fraction of new timber — spend the saving on extra mulch depth instead.
10. Climbing Pieces on the North Side for Afternoon Shade
In the northern hemisphere, the north side of the yard collects afternoon shade from the house and fence just when climbing gets busy. Put the dome, climbing wall and monkey bars there, where grips and bars stay cool enough to hold and west-facing metal never reaches burn temperature. Leave the open south stretch for the surface that tolerates sun — the mulch pit warms and dries fastest there after rain. It costs nothing to rotate the plan ninety degrees on paper, and it decides whether the climbing zone is usable at 4 p.m. in July.
The formula: dome in the shaded north corner + monkey bars across the shade + summit flag on top
11. A Storage Chest at the Playground’s Edge
Loose parts need an address or they migrate across the yard. Site a storage chest, 1.2 metres long, outside the border at the quiet-zone end, its lid opening away from the fall zones. Balls, bats, sand toys and the wobble board live there; a label on the lid tells kids what belongs inside. Placing it at the edge — not inside the pit — keeps the lid’s swing clear of play and makes tidy-up a two-minute job, not an excavation.
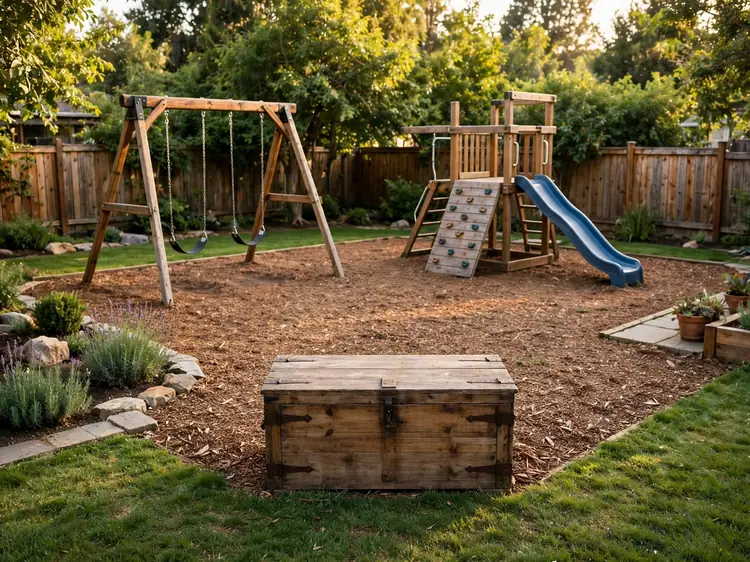
Get the look:
- Main piece: lidded deck chest in weatherproof resin, forest green
- Supporting piece: three bins inside so toys sort themselves
- Texture or material: smooth resin that hoses clean
- Finishing touch: a cushion on the lid for seating
12. Ground Anchors Hidden Below the Mulch Line
Most frames arrive with anchor options, and the layout decision is where those anchors end up. Auger-style anchors screw 40–50 cm down beside each leg, then straps pull tight below the mulch line, so no metal crosses the surface where children land. Skip above-ground concrete collars: they stop the wobble but plant a hard trip block inside the fall zone. It is the invisible choice that separates planned backyard playground ideas from hopeful ones, and it leaves only a monthly bolt-check above ground.
Color note: Mark each buried anchor point with one flat coloured disc — bright yellow works — flush in the mulch, so checks find them fast without changing the yard’s calm green-and-timber palette.
13. Two Entrances So Games Never Deadlock
One entrance turns every chase game into a traffic jam. Instead, leave two gaps in the border edging, each about 90 cm wide, at opposite corners of the pit. Running games flow in one side and out the other, queues for the slide form inside rather than at a gate, and a fallen child can be reached from two directions. The gaps future-proof the layout too: any piece added later gains a route in that never crosses the swing arc, so the playground keeps flowing as it grows.
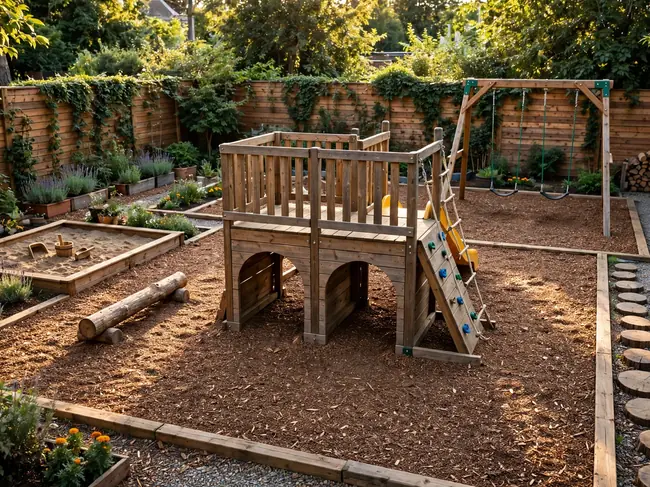
Texture note: Cap each gap with a strip of rubber matting over compacted gravel — firm under running feet where loose mulch would scatter and thin out.
14. The Slope Used for the Slide, Not Fought
A slope is a free slide waiting to be claimed. Instead of levelling the bank, set an embankment slide into it: the chute, about 3 metres long, lies directly on the graded earth, so there is no high platform and no long fall beside it. A stepped path of flat stones zigzags up the side for the climb. At the bottom, level one landing pad of mulch, two metres clear, where the grade flattens out. The hill does the work that a tower’s legs and ladder would otherwise have to do.
Best for: sloping suburban yards where levelling the bank would cost more than the slide itself.
15. Spectator Bench Built into the Playground Border
Build the adults’ seat into the plan instead of dragging chairs onto the mulch. Replace one 1.8-metre stretch of border timber on the quiet side with a bench: a 45 cm-high seat of smooth decking boards, its back against the lawn and its face to the action. Sitting on the border line keeps adults inside the playground’s social space but outside every fall zone, and a coffee can rest on the wide top rail. Spectators become part of the layout — close enough to referee, comfortable enough to stay.
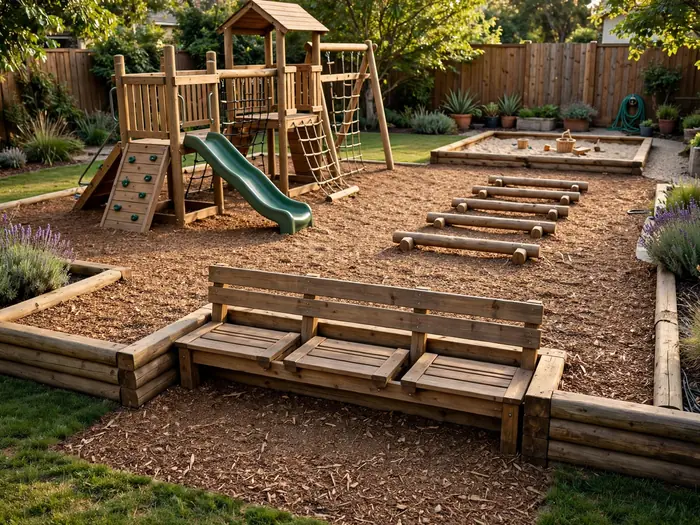
Space note: The bench replaces border, so it costs zero play space — just keep its front legs outside the slide’s fall zone by the width of the timber itself.
16. Drainage Slope That Keeps the Mulch Pit Dry
Mulch pits fail from underneath: a flat base holds rain like a bathtub. Before the fabric goes down, grade the base with a gentle two-percent fall — about 2 cm per metre — toward one low corner. There, a gravel-filled trench under the border carries water out to the lawn instead of letting it pool under the slide landing. The surface still reads flat to the eye, balls do not roll away, but after a storm the pit drains in an hour instead of staying sour and spongy for three days.
Fit check: Before surfacing, run a hose at the high corner for five minutes; water should reach the drain trench without pooling anywhere a child would land.
17. Room-to-Grow Strip Left Empty on Purpose
Children outgrow layouts faster than equipment wears out. When you draw the plan, reserve a strip about two metres wide along the far end and leave it empty — lawn games and blankets only, nothing planted, nothing built. That strip is where the climbing frame lands in four years and where monkey bars extend when legs get longer. Borrowed from modern backyard landscaping ideas, an empty band reads as design, not waste — and because it was protected from day one, upgrades slot in over a weekend, not a redesign.
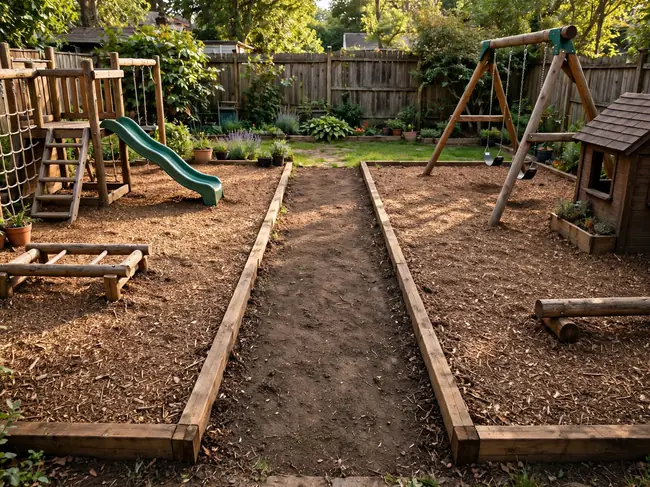
Style note: Edge the empty strip with the same border timber as the pit, so it reads as a planned terrace waiting its turn, not a forgotten gap.
18. Color-Coded Zones Painted on the Border Timbers
Turn the border into the rulebook. Paint the edging timbers in three exterior colours matched to your zones — strong blue along the active equipment, calm green by the quiet corner, warm yellow around the toddler area. The colour does wayfinding and decoration in one coat: children learn that yellow borders mean gentle play faster than any spoken rule, and guests’ kids read the yard instantly. Touch up the paint each spring, and let the colours repeat on the storage chest and bench so the layout reads as one scheme.
Easy swap: Not ready to paint timber? Clip coloured pool noodles over the border edges — blue, green, yellow — for a one-season trial that peels off in minutes.
19. The Inspection Walk: A Monthly Five-Minute Route
Safety checks happen when they are easy, so lay the inspection route into the plan. Leave a clear 60 cm path around the outside of the border — no shrubs, no stored bikes — so an adult can walk the perimeter in five minutes with a wrench in one pocket. The route passes every anchor point, every S-bolt and the mulch-depth gauge nailed inside the border: if the surface has dropped below the marked line, it gets topped up that week. A playground you can walk around is a playground that gets checked.
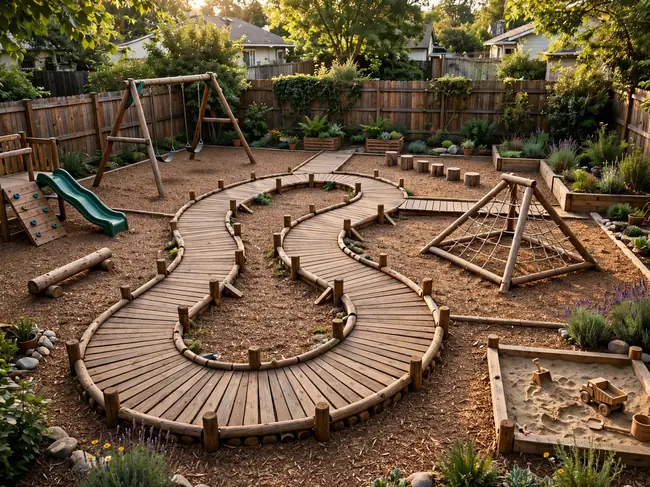
Seasonal swap: In autumn, extend the same route to rake leaves off the surface weekly; in spring, the walk doubles as the deep-check that opens the season.
20. Sound Buffer Planting Along the Neighbor Fence
Playground noise has a planting solution. Along the fence behind the loud zone, plant a dense evergreen screen — cherry laurel, viburnum or clumping bamboo in a 60 cm-deep bed — so leaves and stems sit between the shouting and the neighbours’ patio. A fence alone reflects sound back into your yard; foliage absorbs and scatters it. Keep the planting outside the fall zones and the inspection path, and the buffer doubles as the backdrop that makes the playground look settled rather than installed.
Why it works:
- Foliage absorbs sound that a bare fence reflects straight back
- The screen softens the playground’s outline against the garden
- Neighbours hear less, so play can run later into the evening