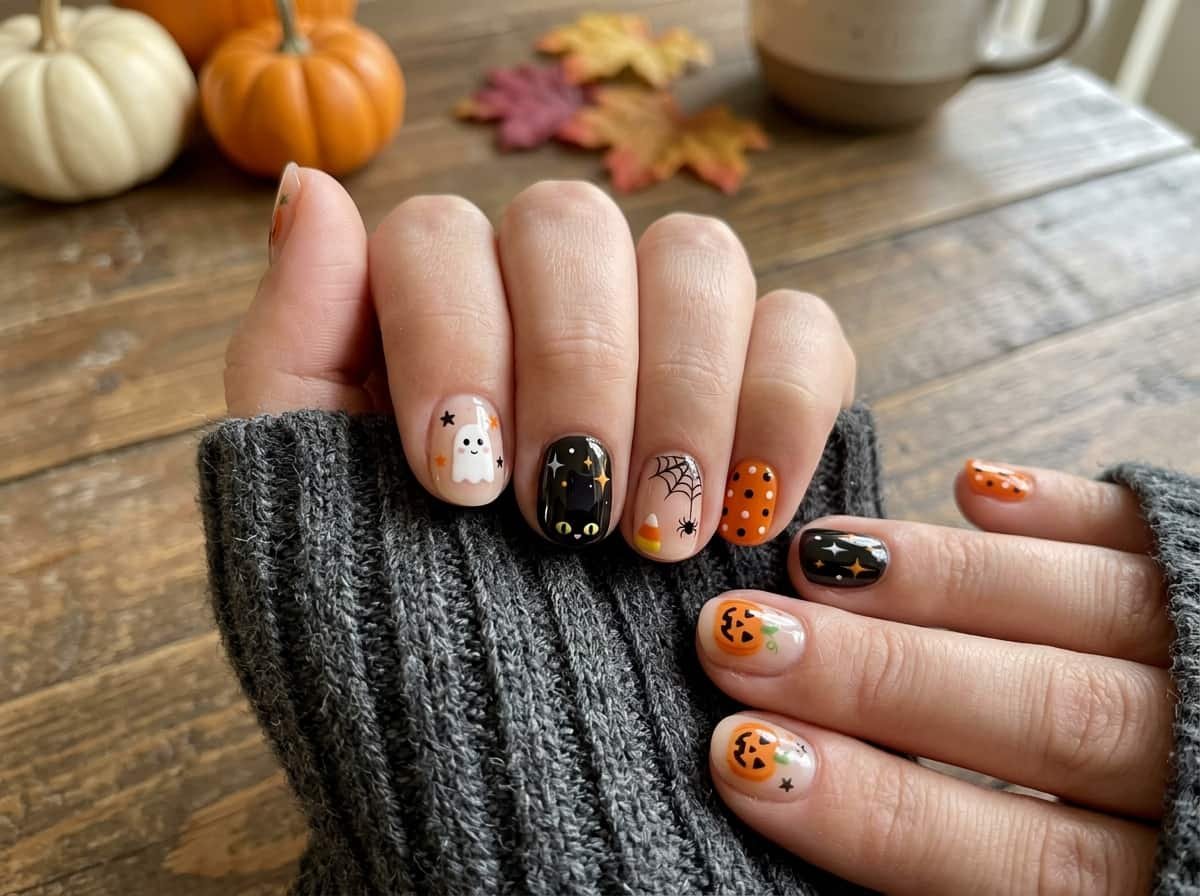
Short nails get a bad reputation at Halloween. You scroll through spooky manicure photos, see long coffin shapes covered in 3D charms, and think, “That’s not going to work on my nails.” Then you either skip the holiday look entirely or settle for one boring coat of black polish.
Here’s the better way to think about it: short nails are not a limitation; they’re a design advantage. This guide gives you cute Halloween nail ideas for short nails that are easy to do at home, look polished, and don’t need a salon budget or a steady hand like a surgeon’s.
1. Why Short Nails Are Perfect for Halloween Designs
Short nails give you a small canvas, and a small canvas forces smart choices. Instead of cramming ten things onto each nail, you pick one idea and let it breathe. That’s exactly why short Halloween nails often look cleaner and more modern than overdone long sets.
They’re also practical. Short nails chip less, survive daily life better, and don’t get in the way when you’re carving pumpkins, handing out candy, or typing at work. A spooky manicure should be fun to wear, not a hassle to protect.
| Old Rule | What Works Better Now |
|---|---|
| You need long nails for nail art | Short nails make small, sharp designs look intentional |
| More decoration means more impact | One clear detail per nail looks more stylish |
| Halloween nails must be dark and scary | Soft, cute and cozy shades are just as festive |
| Complex designs need a pro | Simple shapes done neatly beat messy complicated art |
2. Prep Your Nails Before You Start
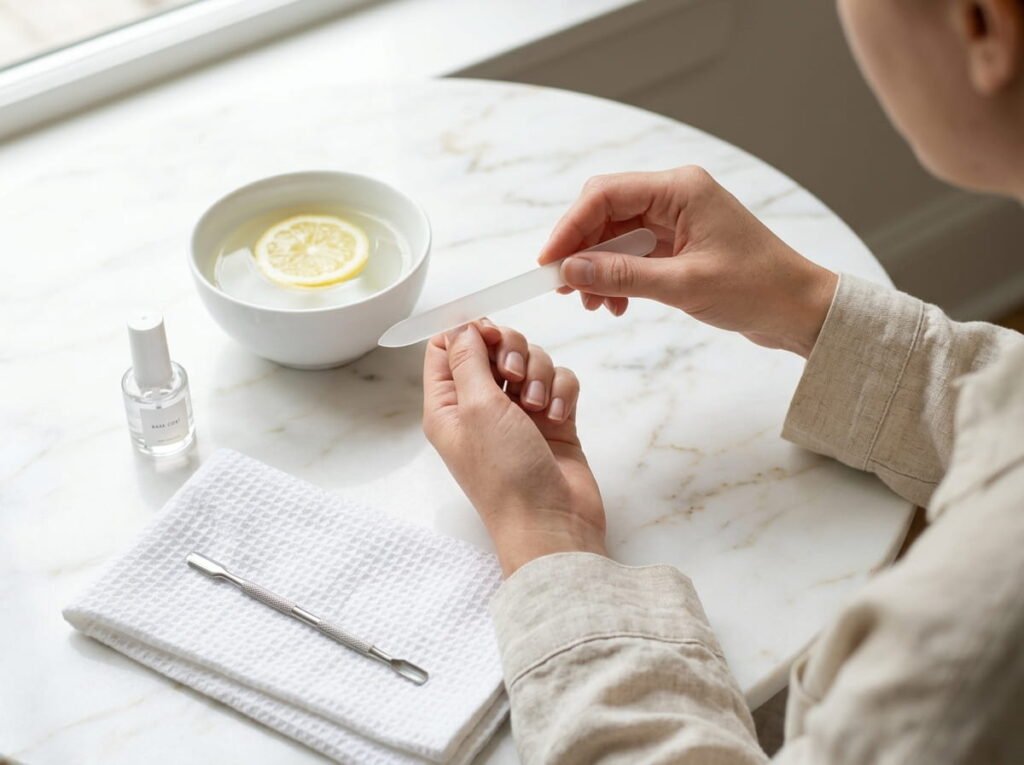
Great nail art starts before the first drop of polish. Shape your nails with a gentle file, keeping the edges even, and push back your cuticles after a warm soak. Wipe each nail with a little rubbing alcohol or polish remover so no oil is left behind.
Short nails show every flaw, so clean edges matter more than fancy tools. A smooth base makes even a simple design look professional.
Beginner Note: Always apply a thin base coat first. It protects your natural nails from staining, especially when you use dark shades like black.
3. Simple Supplies You Need for Easy Nail Art
You don’t need a drawer full of products. A few basics will cover every design in this list, and most of them cost very little.
| Item | What to Look For | Why It Works |
|---|---|---|
| Base and top coat | Quick-dry, glossy formula | Protects color and keeps designs smooth |
| Polish colors | Black, white, orange, plus one soft fall shade | Covers every idea below with just a few bottles |
| Dotting tool | A fine tip, or a toothpick | Makes ghosts, eyes and tiny details easy |
| Thin nail brush | Very fine bristles | Gives you steady web lines and clean tips |
| Striping tape | Optional, any thin tape | Helps with straight French tip edges |
| Gold detail option | Gold polish or tiny foil flakes | Adds a glam touch to dark bases |
You can also use a sharpened toothpick or a clean pin instead of specialty tools. Easy Halloween nail art is mostly about patience, not equipment.
4. Classic Black and Orange French Tips
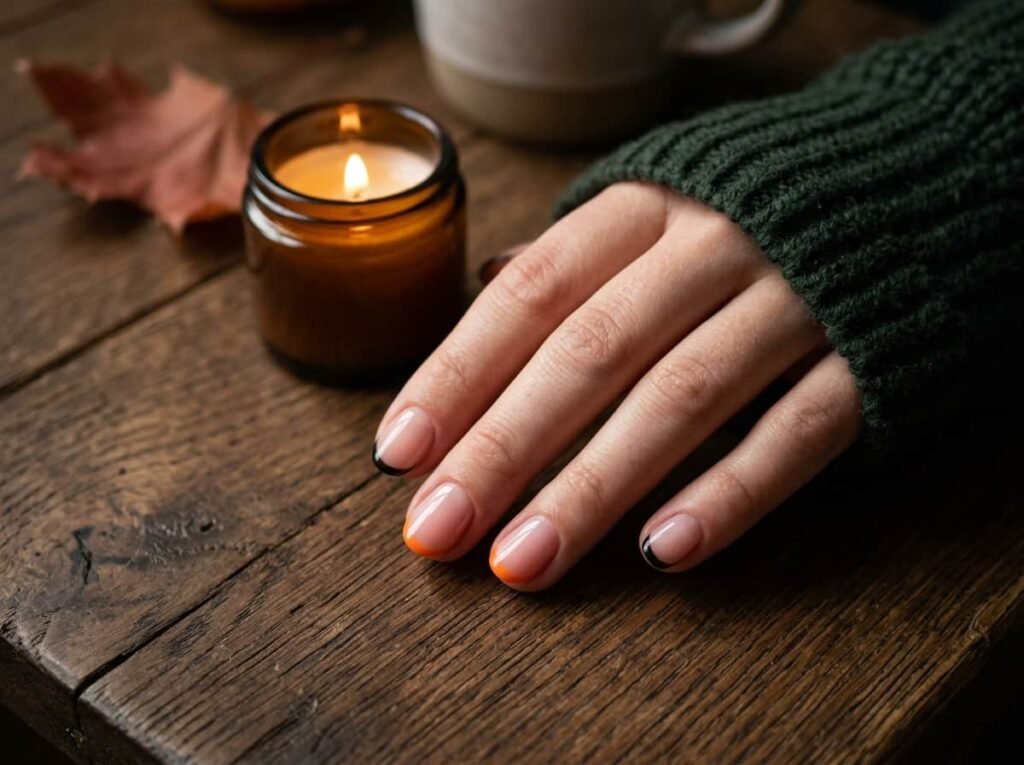
If you want the easiest entry into Halloween nail ideas for short nails, start here. Paint a sheer or nude base, then add a thin black tip on most nails and an orange tip on a couple of accent fingers.
Keep the tip line slim. On short nails, a thick tip can make your nails look even shorter, while a thin line makes them look neat and a little longer.
5. Tiny Ghost Accent Nails
Ghost nails are the cutest option on the list. Paint one or two nails in a dark base like black or deep charcoal, then use a dotting tool to create a small white ghost shape with a rounded top and a wavy bottom edge.
Add two tiny black dots for eyes and you’re done. Leave the other nails in a solid color so the ghosts feel like a playful surprise instead of clutter.
Quick Tip: Let the black base dry fully before you draw the ghost. Wet polish makes the white bleed and ruins the shape.
6. Cute Pumpkin Nails in Soft Fall Shades
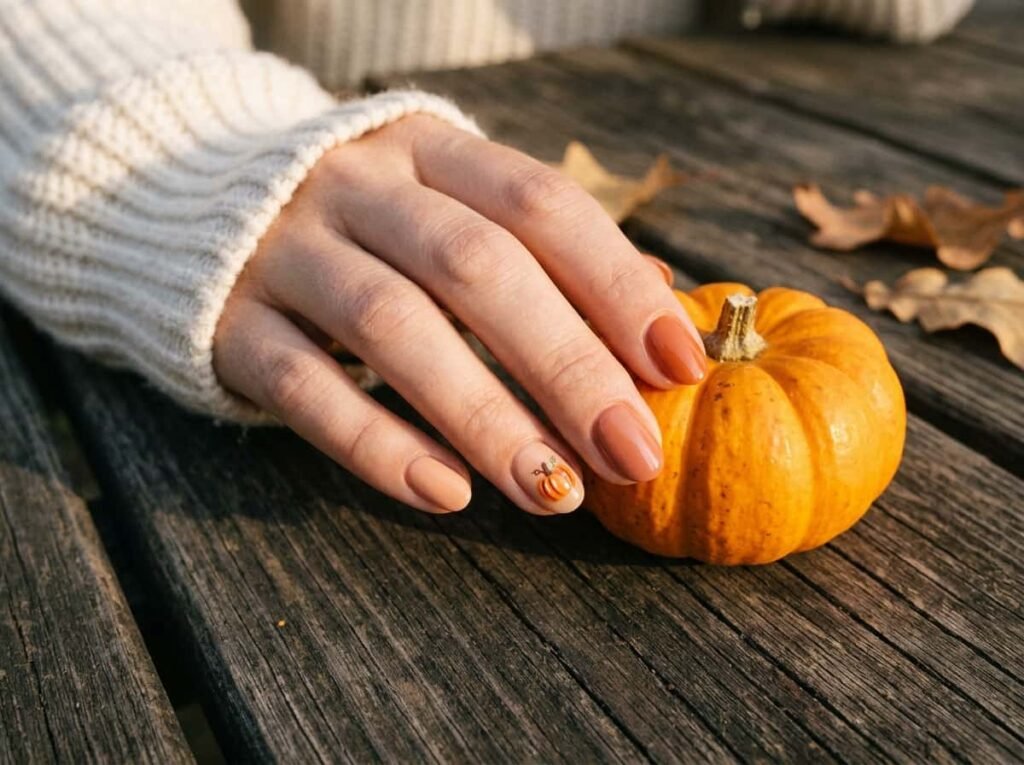
Pumpkins don’t have to be loud neon orange. Try a muted burnt orange, a creamy peach, or a dusty terracotta as your base, then add a small pumpkin outline on one nail with a thin green or brown stem.
This is a lovely option if you want a cute Halloween manicure that still looks wearable to the office or a family dinner. The soft shades feel more like autumn than a costume party.
7. Minimal Spider Web Nails
A spider web looks complicated, but the minimal version is simple. On a dark or sheer base, draw a few thin curved lines from one corner of the nail like a fan, then connect them with tiny curved bridges.
On short nails, less is more. Three or four lines are enough to say “spooky” without turning the nail into a tangle.
If a design starts to feel too busy, try one of these swaps:
- If a full web feels like too much, try a half web in just one corner instead.
- If every nail has art, try keeping nine plain and giving one the web.
- If the lines look shaky, try a toothpick dipped in polish instead of a brush.
- If black feels harsh, try a deep plum or navy base with white web lines.
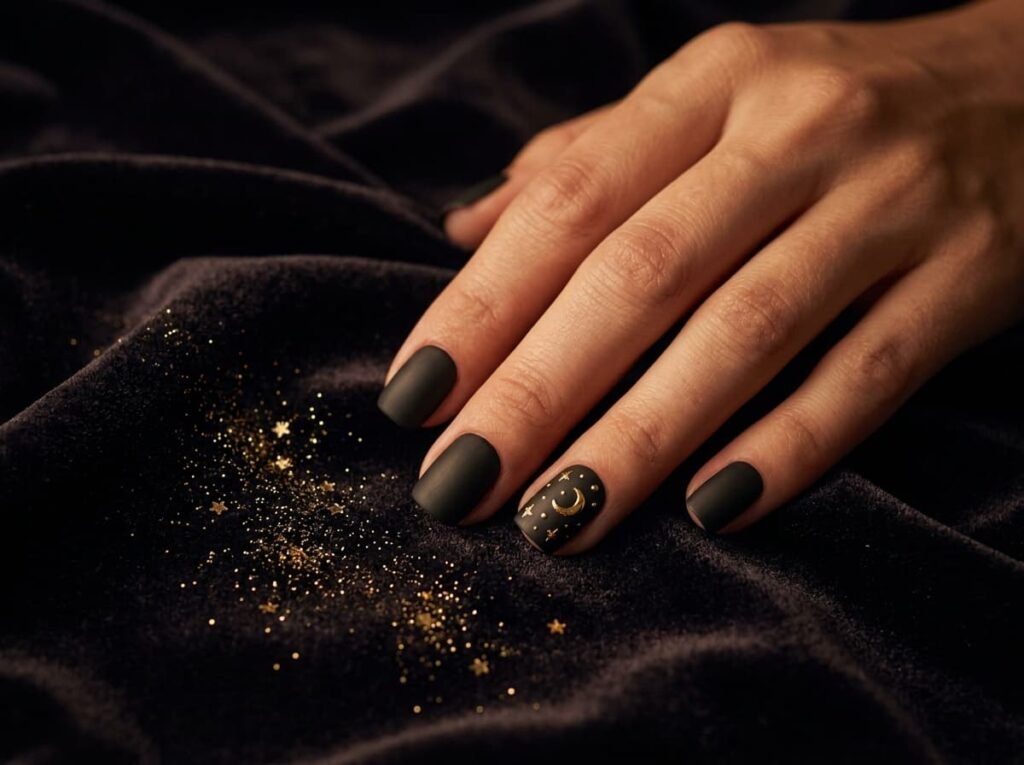
8. Matte Black Nails with Gold Details
This one feels elegant instead of spooky. Paint all nails black, then apply a matte top coat to flatten the shine. Add a tiny gold detail on one nail only, such as a crescent moon, a small star, or a thin line near the cuticle.
That single gold accent is the key. When you give one element permission to stand out, the whole manicure looks designed rather than decorated.
9. Candy Corn Gradient Nails
Candy corn colors are naturally cheerful. Paint a yellow base, then add a band of orange across the middle and a white tip at the end. Blend the edges lightly with a makeup sponge dabbed on the nail for a soft gradient.
If blending feels tricky, keep the bands crisp instead. Straight stripes look sweet and graphic, and they take less skill than a smooth fade.
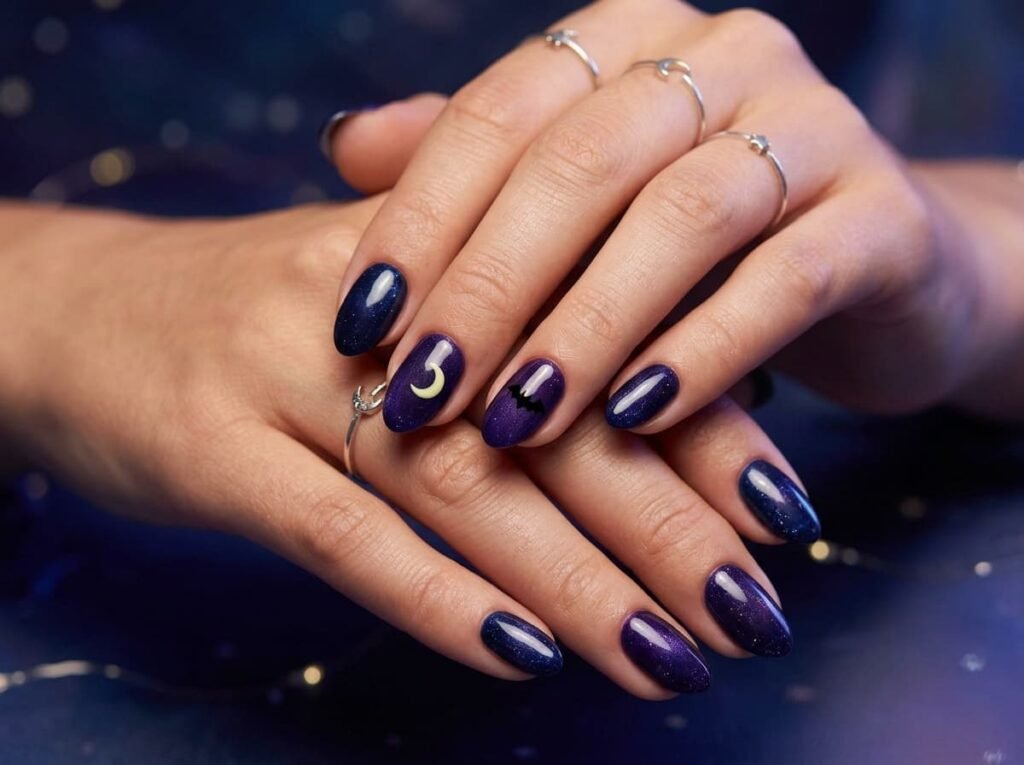
10. Dainty Bats and Moons for Short Nails
Small bat silhouettes look great on short nails because they don’t need much room. Paint a deep purple, navy or black base, add a pale moon with a dotting tool, then draw a tiny bat shape with a thin brush across it.
Keep the bat small and place it off-center. A little negative space makes the nail look airy, not crowded.
Your Repeatable Halloween Formula
Once you know the pattern, you can mix any idea here without thinking too hard: base color + one accent nail + finishing top coat.
| Occasion | Formula | Why It Works |
|---|---|---|
| Office or school | Nude base + thin orange French tip + glossy top coat | Subtle but still festive |
| Halloween party | Black base + ghost accent + white dots | Playful and photo-friendly |
| Cozy family night | Terracotta base + one pumpkin + gold line | Warm and soft |
| Date night | Matte black + gold moon accent | Elegant and a little mysterious |
| Quick last-minute | Orange base + black tip on ring finger | Takes ten minutes, still looks planned |
11. How to Make Your Halloween Manicure Last Longer
A good manicure lasts when you treat the edges well. Seal every classy nail with top coat, and run the brush along the free edge of the tip. This “capping” step helps stop chips before they begin.
Reapply a thin layer of top coat every two or three days, and wear gloves for dishes and cleaning. Keep your cuticles moisturized with oil, since dry skin makes any manicure look tired faster.
Pro Tip: Avoid using your nails as tools to open cans or peel stickers. It’s the fastest way to chip a fresh design.
FAQ: Halloween Nail Ideas for Short Nails
What are the best Halloween nail ideas for short nails? Simple, small designs work best: French tips, ghost accents, tiny pumpkins and minimal webs. Choose one detail per nail and keep the rest clean.
Can beginners do Halloween nail art at home? Yes. Start with a solid color and add a single accent nail using a toothpick or dotting tool. Easy Halloween nail art improves quickly with a little practice.
How do I make my short nails look longer with nail art? Use thin lines, vertical details, and nude or sheer bases. Avoid thick tips and heavy designs that crowd the nail.
Do I need expensive tools to do this? No. A toothpick, a thin brush and a few basic polishes are enough. Specialty kits are optional, not required.
How do I keep my manicure from looking messy? Let each coat dry fully, keep designs small, and finish with a clean top coat. Simple shapes done neatly will always look better than complicated ones done in a rush.
12. Final Thoughts on Your Spooky Short Nail Look
You don’t need long nails to have a fun, stylish Halloween manicure. Short nails reward careful, simple choices, and that’s what makes these designs feel fresh and wearable.
This week, pick just one idea from the list, maybe the ghost accent or the black and orange French tip, and try it on a single nail first. You’ll see how easy it is, and the rest of your spooky set will follow naturally.