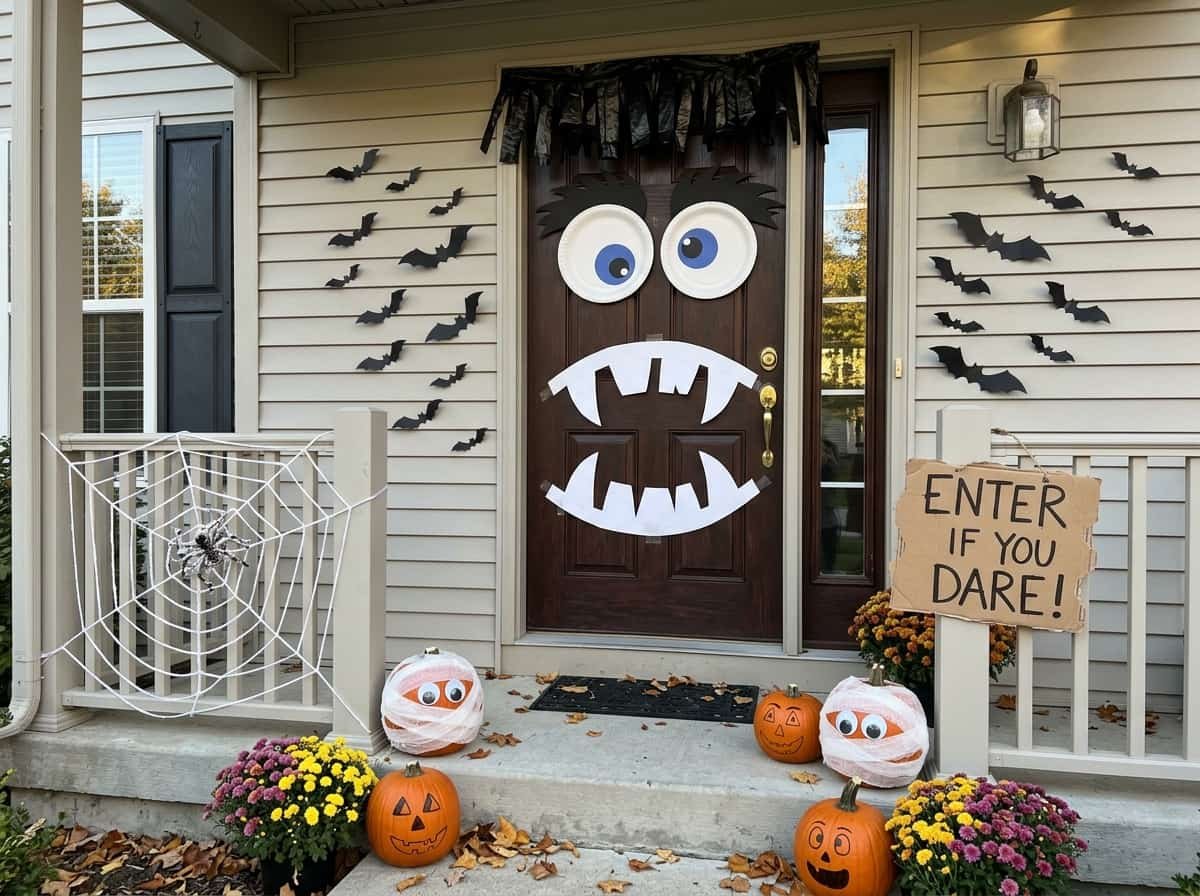
You walk up to your front door on October 28th and it looks exactly like it did in July. Meanwhile, the neighbors have glowing pumpkins, cobwebs, and a giant spider. You want that spooky welcome too, but store-bought decor is pricey, and big projects eat your whole weekend. Sound familiar? You are not alone, and there is an easier way.
The idea is simple: treat your door like one small canvas. Pick one craft, gather a few basic supplies, and finish it in a single afternoon. These DIY Halloween door decorations are made with paper, yarn, gauze, and things you may already own. Let’s get your door ready.
1. Why a DIY Halloween Door Is Worth the Effort
A handmade door tells people something a store-bought one cannot: someone here loves this season. Your door is the first thing guests, trick-or-treaters, and delivery drivers see. When it looks fun and a little spooky, it sets the mood before anyone even rings the bell. And because you made it yourself, it looks like your home, not a copy of every other house on the street.
DIY also saves money. Most of these projects cost less than one ready-made wreath. You can pick your colors, your size, and your level of scary. Want cute for the kids? Go with mummies. Want eerie? Try spider webs. Better still, these crafts are low-pressure, so even a first-time crafter can finish one without stress.
Quick Tip: Pick just one or two projects from this list. A door with one strong idea looks better than a door crowded with ten.
2. Simple Supplies to Gather Before You Start
Before you begin, take ten minutes to gather everything in one place. Nothing slows a craft afternoon down like hunting for the glue gun halfway through. Most of what you need is cheap, easy to find, and may already be in your craft drawer. Use the table below as your shopping list, and shop your own home first.
| Supply | What to Look For | Why It Works |
|---|---|---|
| Craft paper and cardstock | Black, orange, white, and brown in medium weight | Holds shape on a door without tearing |
| Hot glue gun | Low-temp version with extra sticks | Bonds fast, so projects finish in minutes |
| Gauze or cheesecloth | Off-white or light gray rolls | Gives a worn, wrapped look with no sewing |
| Yarn or twine | Black yarn, plus natural burlap twine | Easy to cut, tie, and stretch into webs |
| Removable hooks and tape | Damage-safe, rated for your door type | Protects paint and lets you reuse hooks next year |
3. Paper Bag Ghost Door Hanger
Start with the easiest craft on the list. A paper bag ghost takes about twenty minutes, costs almost nothing, and looks charming. Take a white or brown lunch bag, stuff it lightly with newspaper, and tie a ribbon near the top to make the head. Draw two big oval eyes and a small round mouth with a black marker. Then loop a piece of string through the top and hang it right at eye level. That’s it. Your first ghost is ready to greet visitors.
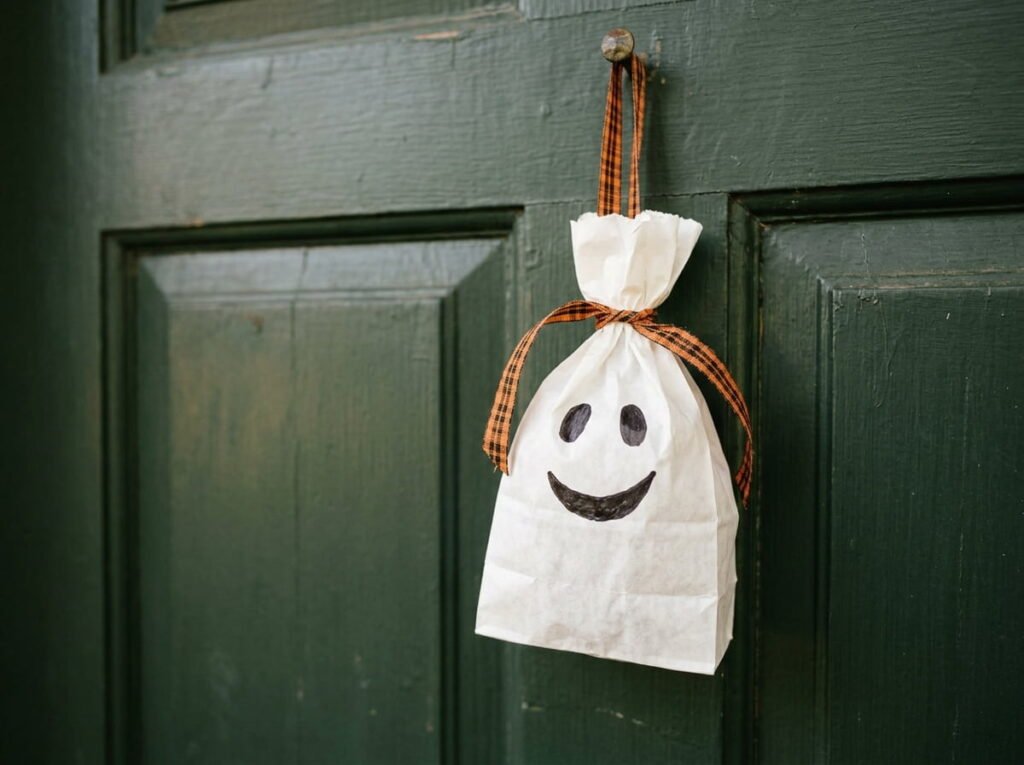
Make three in different sizes for a friendly little ghost family. Slightly crooked faces look best. They give each ghost its own personality.
4. Cute Mummy Door with Gauze and Googly Eyes
Mummies are playful rather than scary, which makes them perfect for homes with young kids. Cover your door, or just a large cardboard rectangle, with strips of gauze. Criss-cross them at slightly different angles and glue the ends down. Leave a narrow gap near the top for the eyes, then stick on two big googly eyes. Add a little black felt behind the gap so the eyes pop. The messier the wrapping, the better it looks. Perfect wrapping is not the goal here.
If you want an even faster version, use white crepe paper streamers instead of gauze. They tear easily and are very forgiving for beginners.
5. Spooky Spider Web Doorway with Black Yarn
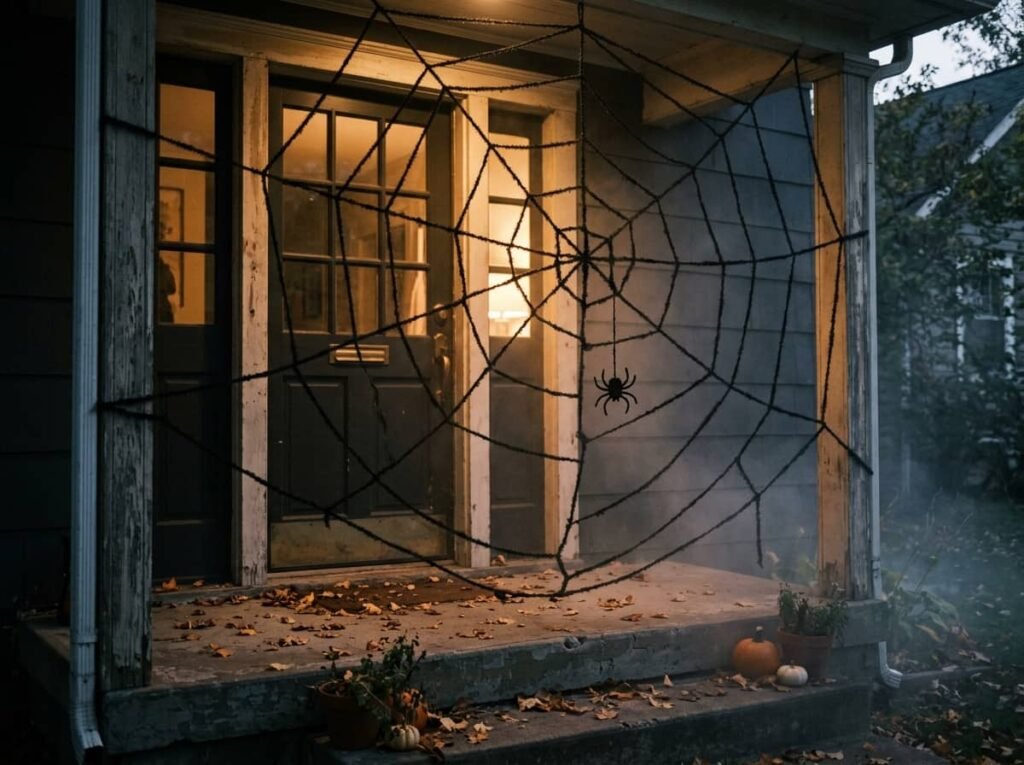
Here is a craft that looks far harder than it is. Run strands of black yarn from the top corners of your door frame down to the center, then connect them with shorter strands in a circle pattern. Use small pieces of tape or tacks to hold each point. Step back, check the shape, and adjust. Finish by hanging a plastic or paper spider in the middle of the web. In an hour or less, your doorway looks like it belongs in an old haunted house.
Beginner Note: Do not worry about perfect geometry. Real webs are uneven, and a slightly lopsided one looks more natural.
6. Pumpkin Patch Wreath in Under an Hour
A wreath is the classic way to dress up a door, and this version skips the pricey floral shop. Start with a simple grapevine or foam wreath base. Glue on small faux pumpkins, dried leaves, and a few sprigs of fall greenery. Cluster the pumpkins on one side rather than spacing them evenly. This gives the wreath a natural, gathered look, as if it grew that way. Tie a wide ribbon in black or burnt orange at the bottom for a finishing touch.
Hang it with a removable over-the-door hook so you do not drill into your door.
7. Black Cat Silhouette Door Display
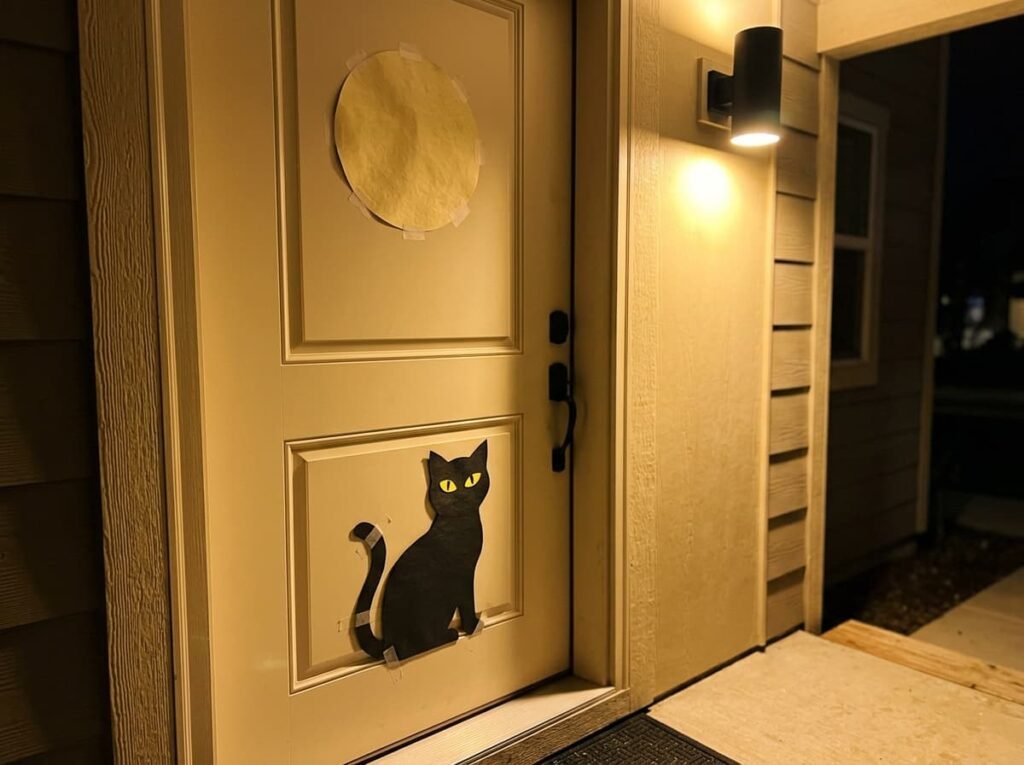
Sometimes the simplest idea has the biggest impact. Cut a large cat silhouette from black poster board, sitting with its back arched and its tail curled. Give it bright yellow or green circles for eyes. Tape the cat to the upper half of your door, or place it in a window beside the door so the porch light makes it glow. You can also cut a few smaller cats, bats, and a moon from the same board to build a quick scene.
Older ideas say a door needs lots of layers to look festive. A newer approach says otherwise. See how the two compare:
| Old Rule | What Works Better Now |
|---|---|
| Fill every inch of the door with decor | Choose one bold shape and leave breathing room |
| Use lots of bright, mixed colors | Stick to black, orange, and one soft neutral |
| Buy everything new each year | Reuse and refresh handmade pieces |
| Match every item perfectly | Let handmade quirks show your personality |
8. Hanging Bats Garland from Craft Paper
A bat garland adds movement, and it is one of the quickest crafts here. Fold black craft paper accordion style, trace a simple bat wing shape on the top, and cut it out. When you open it up, you get a chain of linked bats in one go. Hang the garland across the top of your door frame or loosely down the side. Even a short garland looks great, and the paper moves slightly in the breeze.
Want more depth? Cut bats in two sizes and glue the small ones on top of the larger ones. Add tiny white dots for eyes with a gel pen.
9. Witch Legs Sticking Out of Your Door
This one gets the most laughs from the neighborhood. Make a pair of witch legs from striped tights stuffed with plastic bags or newspaper. Add black shoes made from poster board or old boots, and tuck the stuffed legs under the top edge of the door or above it so they seem to stick out. Use a bit of orange or purple fabric as a skirt hem. The silly pose is the whole point.
If a project like this feels like too much, try something smaller. If full legs feel too big, make a single boot hanging off the door frame. If striped tights seem hard to find, use paper strips wrapped around rolled newspaper. If the pose looks odd, tilt one foot sideways. If it takes too long, skip the shoes and add a witch hat on the door instead.
10. Glowing Jack-O’-Lantern Face Door Cover
Turn your whole door into one big pumpkin. Cover it in orange paper or fabric, then add a face cut from black paper: triangle eyes, a small nose, and a wide toothy grin. At night, shine your porch light or a string of warm lights behind the paper features to create a glow. This is your “one element that stands out.” Let it be the star, and keep everything else around it quiet and simple.
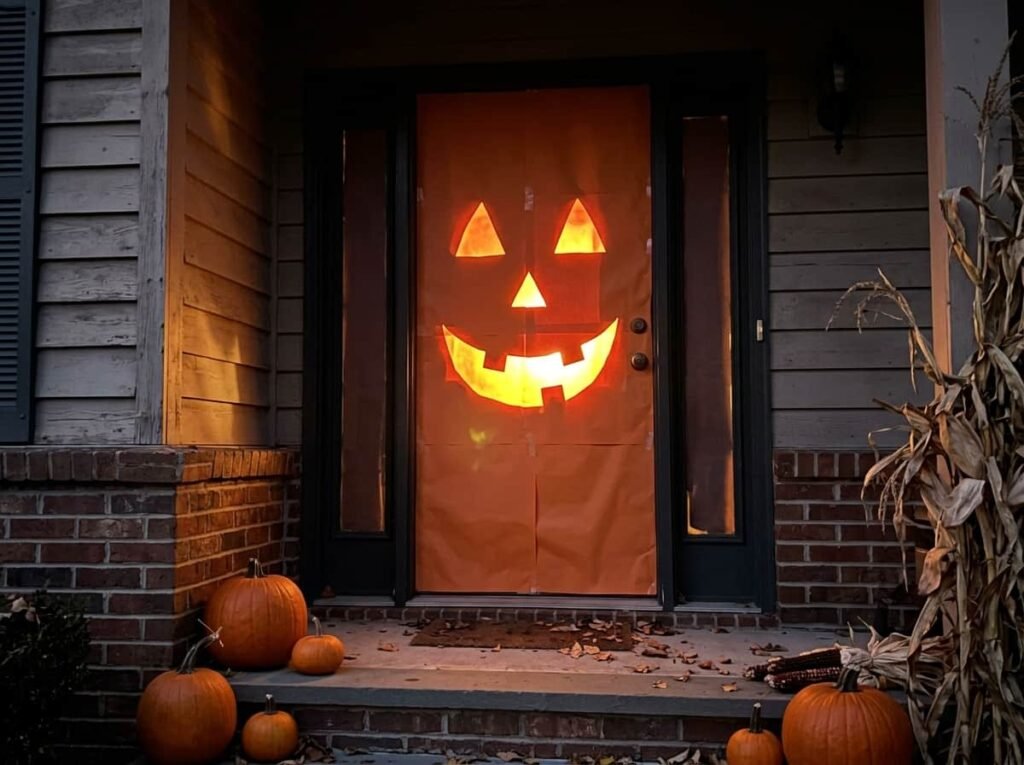
Keep the rest of your porch calm: a pair of plain pumpkins and a doormat are plenty.
11. Rustic Burlap Halloween Door Banner
When you want a softer, easier look, burlap is your friend. Cut a long rectangle of burlap, fold one end into a pointed or swallowtail shape, and glue on felt letters that spell “BOO” or “HELLO, PUMPKIN.” Slide a wooden dowel or stick through the top fold and hang it with twine. Burlap does not fray badly, so you can skip hemming. It also gives your door a warm, farmhouse feel that suits both Halloween and the rest of fall.
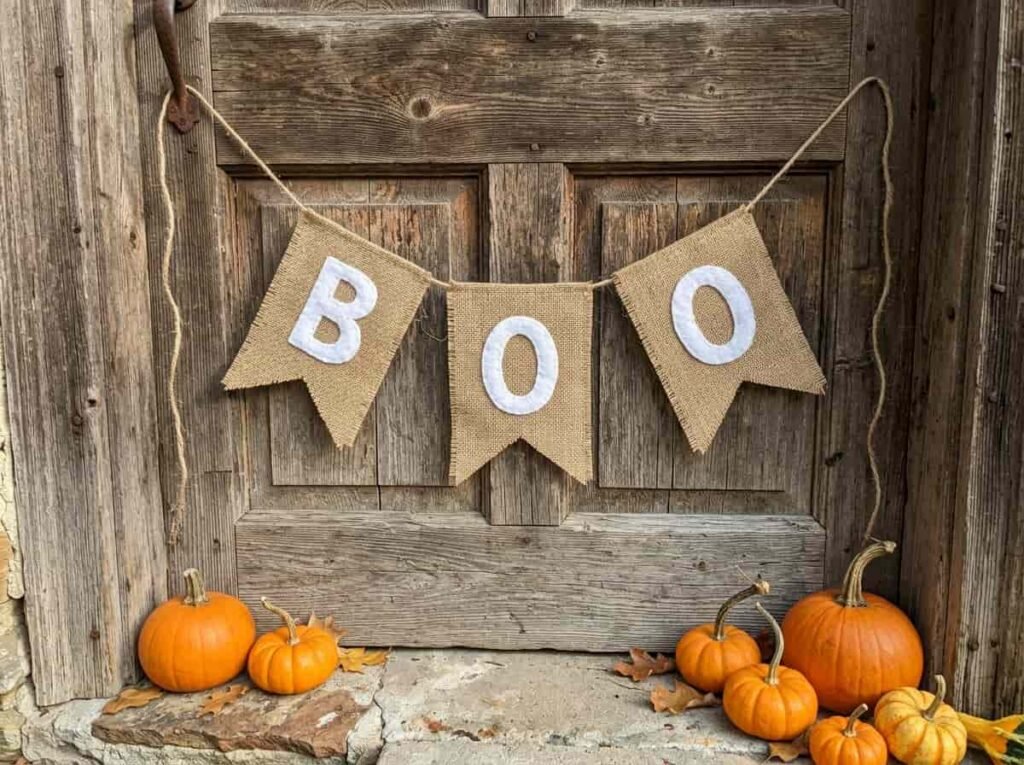
You can switch the felt letters to leaf shapes after Halloween and keep the banner up through Thanksgiving.
12. Tips to Make Your DIY Door Decor Last All Season
Handmade decor needs a little care, especially if your door gets rain or wind. Use clear tape rated for outdoors, seal paper pieces with a light coat of clear spray, and tuck your door decor under a porch roof when possible. Check your pieces every few days and glue down any loose edges. A quick fix now saves a whole redo later.
Once you know a few crafts, you can mix them with a simple formula: base + accent + finishing touch. Use the table below as a quick guide.
| Situation | Formula | Why It Works |
|---|---|---|
| Kid-friendly porch | Mummy door + paper ghosts + orange ribbon | Playful, not frightening |
| Spooky teen party | Spider web + bat garland + dim lights | Layers feel eerie and moody |
| Quick weeknight update | Black cat silhouette + small pumpkin | Takes about thirty minutes |
| Farmhouse style | Burlap banner + pumpkin wreath + twine | Warm and natural together |
| Apartment door | Paper bag ghost + removable hook wreath | Light, easy to remove |
Pro Tip: Take a photo of your finished door in daylight and at night. Lighting changes everything, and you will see right away what needs adjusting.
Frequently Asked Questions
What are DIY Halloween door decorations? They are handmade items you make at home to dress up your front door for Halloween, such as paper ghosts, yarn webs, wreaths, and banners. They usually cost much less than store-bought decor and let you choose your own style.
Can beginners make these projects? Yes. Crafts like the paper bag ghost, bat garland, and cat silhouette need only scissors, glue, and paper. Start with the easiest one and build up to bigger ideas like the witch legs.
How do I make my door decor look more polished? Stick to two or three colors, hang pieces at eye level, and keep one focal point. Clean, even spacing makes simple crafts look intentional.
Do I need expensive supplies? Not at all. Paper, yarn, glue, and a few household items cover most of these projects. Check your recycling bin and craft drawer first.
How do I keep decor from damaging my door or blowing away? Use removable hooks and outdoor-safe tape, and hang pieces on the side of your door that is sheltered from wind. Lightweight paper projects also do well indoors on the inside of the door.
13. Final Thoughts on Your Halloween Door Makeover
You do not need a big budget or a free weekend to make your door feel festive. A few simple supplies and one good idea are enough to turn an ordinary entryway into something people smile at.
Today, pick one craft from this list and gather its supplies. By tonight, you could have your first piece hanging on the door.