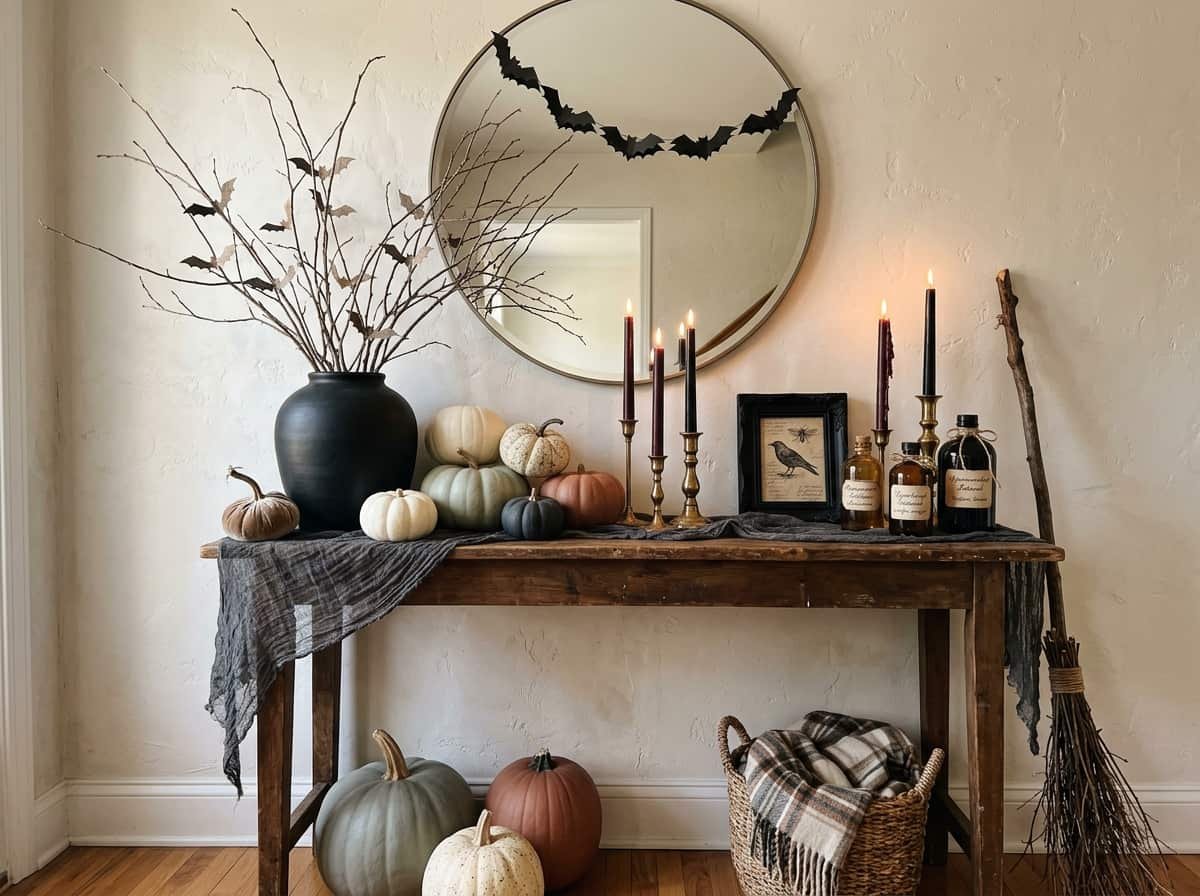
You walk into a boutique in October, and everything looks effortless: a few dark bottles, a gold-trimmed frame, soft candlelight. Then you look at your own shelf, packed with bright plastic skeletons, and wonder where it went wrong.
The truth is that boutique decor isn’t about spending more. It’s about restraint, finish, and styling. Anyone can learn those three things, and they cost almost nothing.
This guide shows you how to build DIY Halloween decor on a budget that looks polished and intentional. You’ll learn what to reuse, what to paint, and how to arrange it all like a stylist.
What Makes Halloween Decor Look Boutique Instead of Cheap
Why Cheap Decor Looks Cheap
Cheap decor usually fails for the same reasons: too many colors, shiny plastic, and no plan. The good news is each problem has a simple fix.
| What Looks Cheap | The Boutique Fix |
|---|---|
| Bright neon plastic | Matte paint in black or deep tones |
| Scattered small props | Grouped displays with breathing space |
| Mixed random colors | Two or three colors, repeated |
| Everything on the floor level | Varied heights and layers |
Notice that none of the fixes require a bigger budget, only better choices.
The Boutique Look Starts With a Limited Palette
Pick two main colors plus one metallic. Black, ivory, and antique gold is a classic combination. Deep plum with black also works beautifully. Sticking to a tight palette makes inexpensive pieces look like they belong together.
Shop Your Home Before You Shop the Store
Jars, Bottles, and Candlesticks You Already Own
Look through cabinets for glass jars, old bottles, and candlesticks.
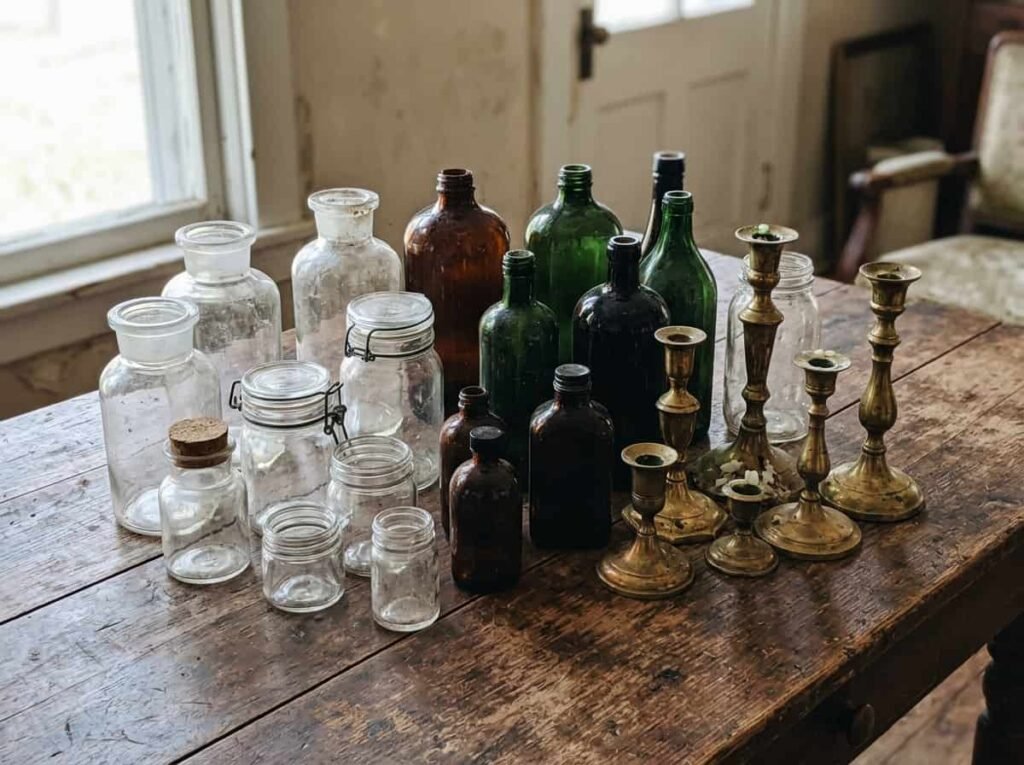
A coat of paint or a handwritten label turns ordinary glassware into spooky apothecary pieces.
Old Frames, Books, and Trays Worth Reusing
Mismatched frames, worn books, and wooden trays are perfect for Halloween styling. Paint frames black, wrap books in dark paper, and use trays to corral small items. These pieces add the layered, collected look that boutiques are known for.
Where to Find Cheap Materials Worth Upgrading
Thrift stores, dollar shops, and your recycling bin are full of raw material.
For more inspiration, browse these dollar store Halloween crafts that already look expensive. Always choose plain shapes, because they’re easiest to transform.
Paint and Finish Tricks That Add Instant Value
Matte Black Spray Paint Changes Everything
One can of matte black paint can unify plastic skulls, thrifted vases, and old frames. Matte hides the cheap shine that gives plastic away. Spray outdoors, use thin coats, and let everything dry fully before styling.
Aging Techniques for an Antique Look
Antique finishes make new items look old and valuable.
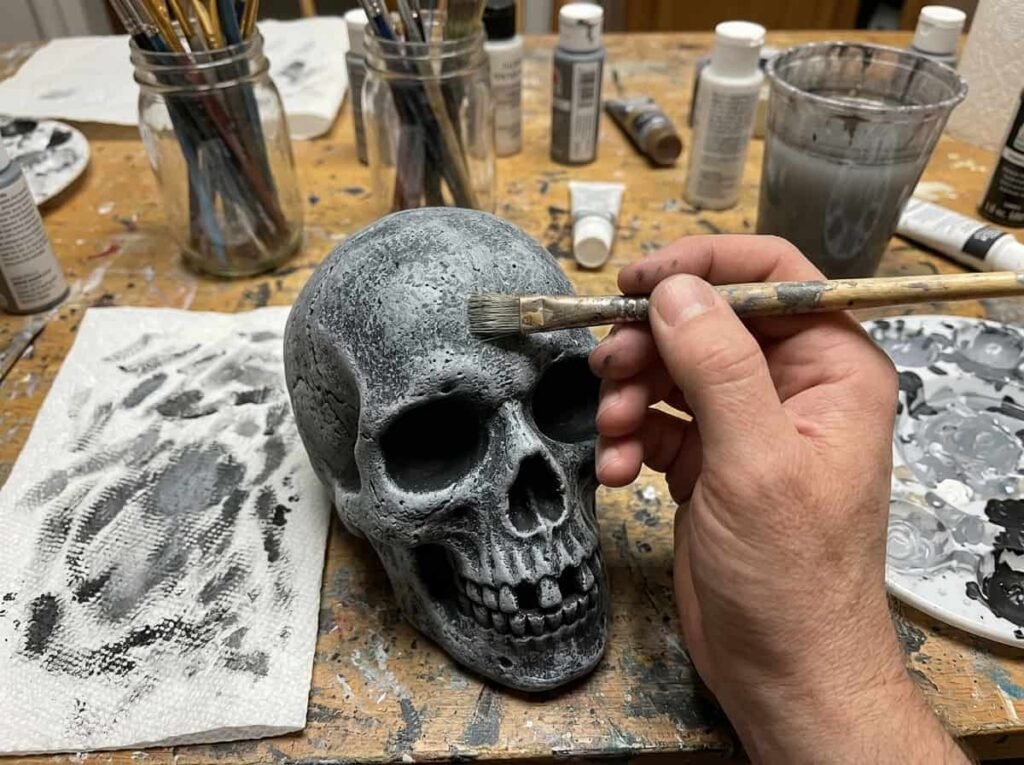
Dry-brush a lighter shade over dark paint, then wipe back the excess. Tea staining paper works too.
Gold Accents That Feel Luxe
A touch of gold makes dark decor look expensive. Rub gold wax or paint on frame edges, candlestick rims, or bat wings. Keep it subtle, because a little shimmer goes a long way.
Easy DIY Projects With a Designer Feel
Apothecary Jars With Handwritten Labels
Fill clean jars with dried leaves, cotton, or fake moss.
Add aged paper labels with names like “Raven Feather” or “Midnight Dust.”
Paper Bats and Moths in Frames
Cut black paper bats or moths and mount them in simple frames, leaving generous space around each one. A set of three on a wall looks like gallery art and costs almost nothing.
Cardboard Tombstones and Faux Stone Finishes
Cardboard can pass for real stone with the right paint.
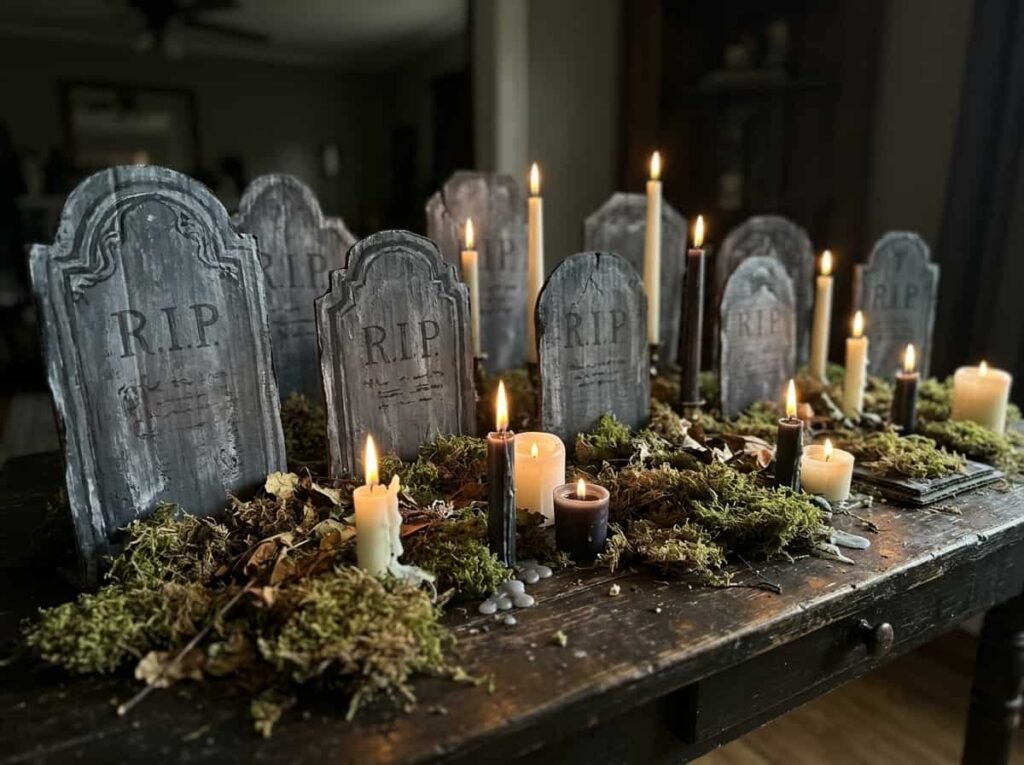
Use a sponge to dab gray and black together, then add white highlights on the edges.
DIY Candle Holders From Everyday Items
Spray tin cans, glass jars, or small bowls in matte black or gold, then set a candle inside. Group a few at different heights. They look handmade in the best way.
Style It Like a Pro
Group Items in Odd Numbers
Groups of three or five look more natural than pairs.
Place the tallest item in the back and let the others step down in front.
Mix Heights, Textures, and Materials
Combine glass, metal, paper, and fabric in one display. Add height with books or boxes underneath. Variety in texture gives the eye something to enjoy, even when the colors stay simple.
Create One Focal Point Per Room
Choose one standout piece in each room, such as a large framed print or a candle cluster.
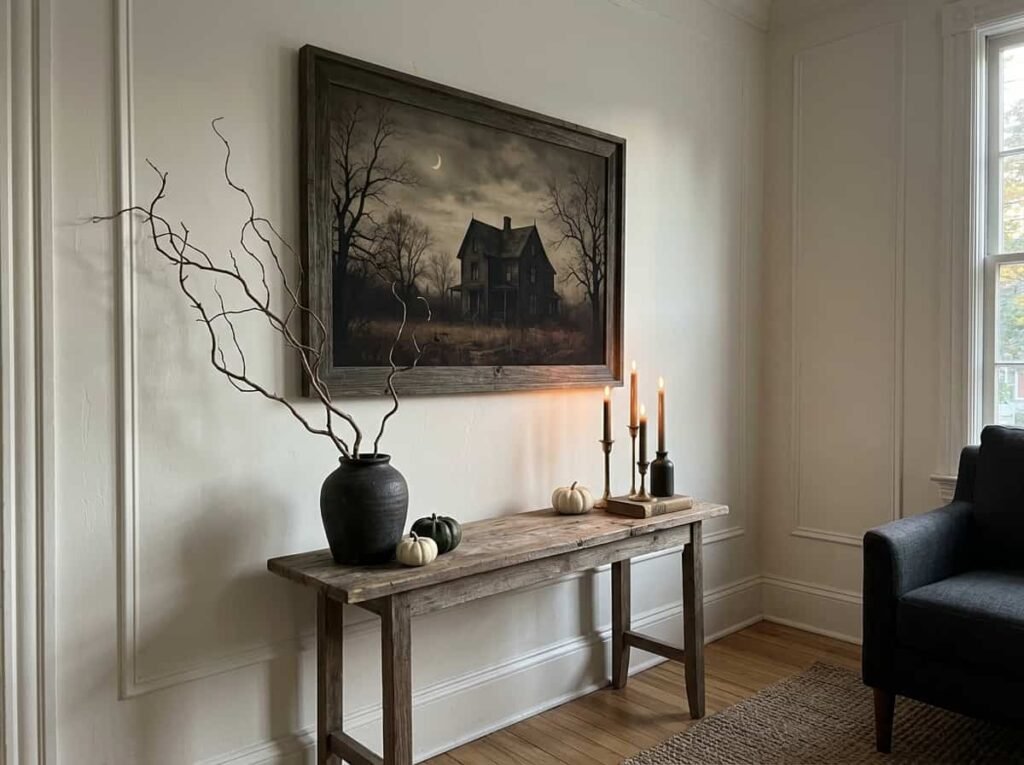
Everything else supports it quietly. Too many stars make a room look busy.
Pro Tip: Squint at your display. If one thing doesn’t stand out, remove a few items until it does.
Boutique Halloween Decor for Every Corner
Entryway and Front Door
Keep the entry simple: a wreath of dried branches, a black lantern, and a neat doormat. For the outside of your door, these DIY Halloween door decorations take just an afternoon.
Mantel and Fireplace Styling
Style the mantel in layers.
Start with a mirror or frame at the back, add candles in the middle, and finish with branches or small pumpkins.
Dining Table and Kitchen Counter
Use a dark runner, a few candles, and a bowl of dried leaves or pumpkins. Skip busy themed tableware. Simple plates and one statement centerpiece look more refined than a full themed set.
Bookshelves and Console Tables
Swap a few shelf items for Halloween pieces.
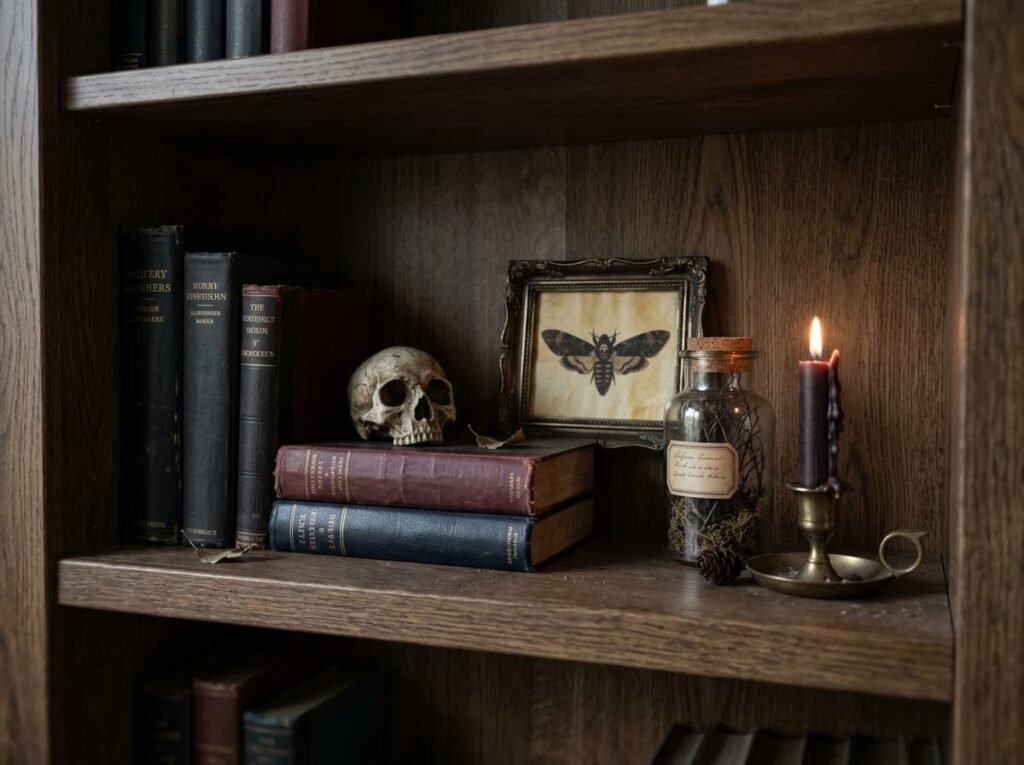
Leave plenty of empty space so each piece stays visible and intentional.
Lighting and Finishing Touches That Elevate the Look
Warm Candlelight and LED Alternatives
Warm light is the biggest boutique secret. Use real candles with care, or flameless LED candles for safety. Choose warm white, not cool white, and place lights where they create soft shadows.
Natural Elements Like Branches and Dried Leaves
Natural touches add depth that plastic can’t.
Gather fallen branches, spray them black or leave them natural, and place them in tall vases. They’re free and instantly elegant.
Spend Less Without Losing Style
Where to Splurge and Where to Save
Spend a little on pieces people notice most, and save on everything else.
| Item | Splurge or Save | Why |
|---|---|---|
| Candles and lighting | Splurge a little | Light sets the whole mood |
| Spray paint and finishes | Splurge a little | Good finish hides cheap bases |
| Jars, vases, frames | Save (thrift) | Paint transforms them |
| Paper and cardboard crafts | Save | Cost almost nothing |
Storing Your DIY Decor for Next Year
Wrap fragile pieces in paper and store them in labeled boxes.
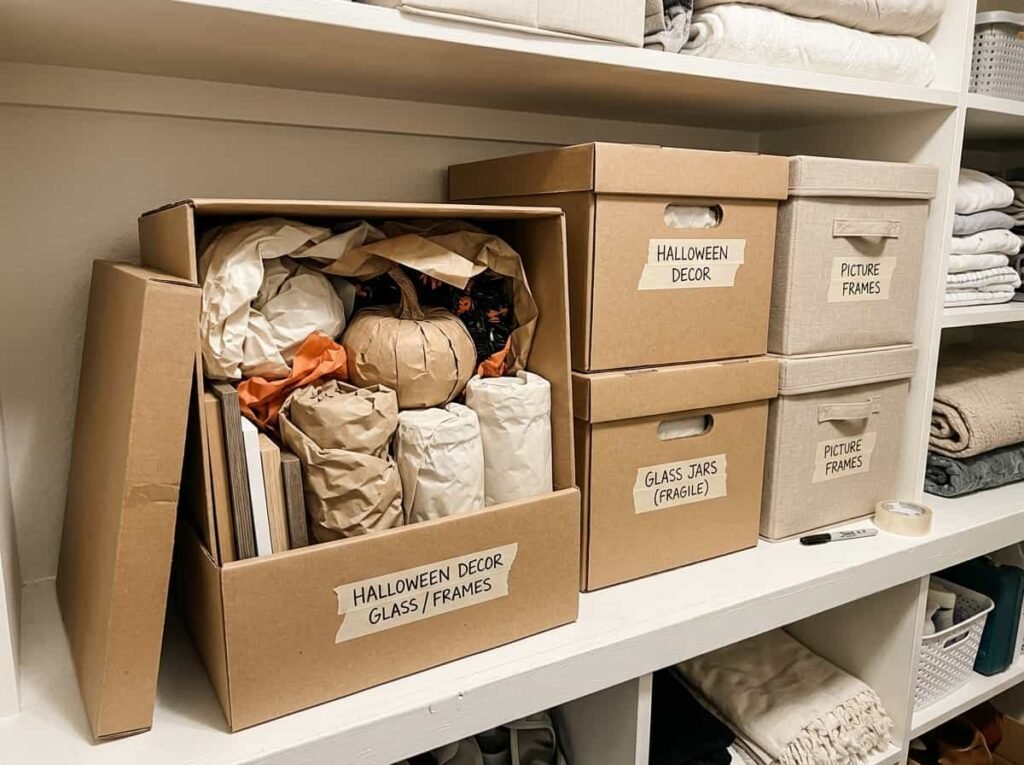
Keep paint-dried items away from heat and damp. Good storage means next year’s decorating costs even less.
Frequently Asked Questions
How do I make cheap Halloween decorations look expensive?
Paint them in a matte finish, stick to two or three colors, and group them in odd numbers. Add warm lighting and a single focal point. These steps matter more than the price of the items.
What colors look most elegant for Halloween decor?
Black, ivory, and antique gold is a timeless combination. Deep plum, forest green, and charcoal also look sophisticated. Avoid bright orange everywhere, and use it as a small accent instead.
How much should I spend on DIY Halloween decor?
There’s no fixed number, but you can do a lot with a small amount. Start with items you own, then spend a little on paint, candles, and one or two key pieces. Setting a limit before you shop keeps things focused.
Final Thoughts
Boutique style comes from smart choices, not big spending. Pick a tight palette, upgrade what you already own, and style it with care. This week, choose one shelf, paint three items black, and group them with a candle to see the difference.