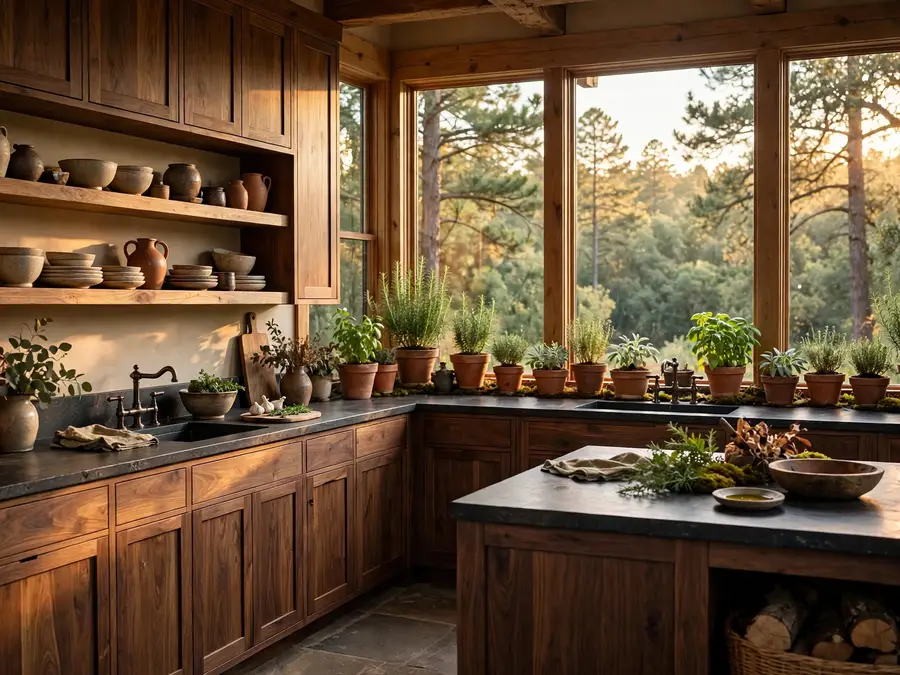
Most kitchens that reach for a woodland feel end up either too dark — a cave of brown cabinets — or too cute, with themed knick-knacks doing the talking instead of the materials. The wood looks flat, the counters fight it, and within a year the room feels dated rather than rooted.
The kitchens that get it right treat the room like a forest floor: a few honest materials, layered in the right order, with something alive in the mix. That is the whole secret behind a forest kitchen that still works hard at dinnertime — real wood grain, matte stone, and herbs you actually cook with.
Below are 20 ideas that build that feeling piece by piece: cabinets, counters, shelves, herbs and one small eat-in corner. Most start from basics you already own — wooden boards, plain stoneware, a few pots of herbs — arranged with more intention, not more shopping.
The Forest Kitchen Formula That Keeps Earthy Wood Looking Warm, Not Heavy
- Wood first, everything else second: choose one honest wood with the grain left visible under a matte finish, and let it anchor every other choice in the room.
- Colour comes from materials, not paint charts: pull the palette from walnut brown, stone grey, fired clay and the green of living herbs instead of matching swatches.
- Keep the work path clear: herbs, boards and crocks live at the edges of counters, never inside the sink-to-stove path you walk a dozen times a day.
- One layer must lift away: keep a single changeable layer — a runner, a herb variety, a stack of boards — that can swap in minutes without tools or drilling.
Picture it working together: walnut-stained shaker cabinets under a honed grey stone counter, two oak shelves holding cream stoneware, and basil and rosemary in terracotta pots along the sill — everything else in the room simply supports that picture.
| Idea | Best For | Key Material |
|---|---|---|
| 1. Walnut-stained shaker cabinets | Full cabinet runs | Stained walnut |
| 2. Open oak shelves | Small kitchens | White oak, iron |
| 3. Windowsill herb row | Sunny sills | Terracotta |
| 4. Honed dark stone counters | Busy cooks | Matte stone |
| 5. Butcher-block work zone | Daily prep | Bamboo block |
| 6. Wall rail of copper pots | Short walls | Copper, black iron |
| 7. Tumbled stone backsplash | Plain ranges | Travertine |
| 8. Open pantry wall | Jar storage | Pine, seagrass |
| 9. Under-cabinet herb garden | Low-light kitchens | Steel pots, light bar |
| 10. Two-tone wood cabinets | Mixed old and new | Walnut, painted pine |
| 11. Banquette eat-in corner | Family meals | Oak, linen |
| 12. Live-edge sink shelf | Window sinks | Live-edge oak |
| 13. Blackened-iron hardware | Plain cabinets | Iron, aged brass |
| 14. Seagrass storage baskets | Open shelves | Seagrass, rattan |
| 15. Ceiling herb-drying rack | Surplus herbs | Pine, twine |
| 16. Fluted wood island panel | Plain islands | Stained oak slats |
| 17. Terracotta crocks | Counter corners | Terracotta, stoneware |
| 18. Round-table breakfast nook | Tight corners | Oak, jute |
| 19. Island-end herb planter | Dead island space | Cedar trough |
| 20. Reclaimed-pine corner tower | Awkward corners | Reclaimed pine |
1. Walnut-Stained Shaker Cabinets With the Grain Left Visible
Choose shaker doors in a medium walnut stain, finished matte so the grain reads like bark rather than polished furniture. Keep the run simple: flat drawer fronts under the counter, no glass inserts, and slim aged-brass pulls, 5 inches long, centred on each door. Set the stain one shade lighter than the floor — walnut over warm oak planks — so the room layers instead of matching. Trade-off: dark stain shows every dusting of flour and needs a weekly wipe to stay rich rather than chalky.
The formula: walnut-stained shaker cabinets + honed pale stone counter + one row of living herbs on the sill.
2. Open Oak Shelves Where Uppers Used to Be
Swap two upper cabinets for open shelves in white oak, 2 inches thick and 10 inches deep, on matte-black iron brackets. Stack everyday stoneware in warm cream and clay, tallest pieces at the back, and leave a hand’s width of empty space on every shelf so the wood stays the headline. The calm comes from nature-inspired home decor: few materials, repeated often. Trade-off: open shelves collect cooking grease, so everything on them should be used — and washed — weekly.
Get the look:
- Main piece: two 4-foot white-oak shelves
- Supporting piece: matte-black iron brackets, three per shelf
- Texture or material: visible oak grain, matte oil finish
- Finishing touch: one small potted thyme at the end
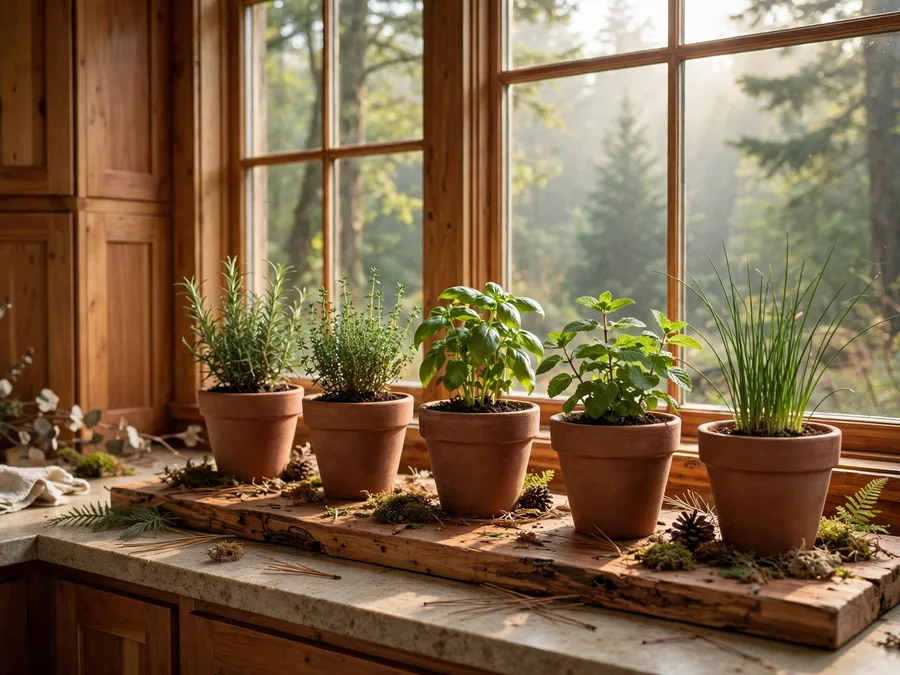
3. A Windowsill Herb Row in Terracotta
Line the kitchen window with five unglazed terracotta pots, 4 inches across, on a narrow cedar tray that catches the drips. Plant basil, flat-leaf parsley, chives, thyme and mint — mint always in its own pot, since it crowds out neighbours. Turn each pot a quarter turn every few days so the plants grow straight instead of leaning into the glass. If your sill catches morning sun, this is the cheapest herb garden seat in the house. Trade-off: terracotta dries out fast, so expect to water little and often.
Budget note: thrift-store terracotta costs almost nothing and mismatched pots look better here than a matched set; compost and five seed packets cost less than one shop-bought herb plant.
4. Honed Dark Stone Counters, Matte Like River Rock
Run the counters in a honed, charcoal-grey stone with soft white veining kept to a minimum, and stop the finish at matte — no polished shine anywhere. The flat surface swallows the reflection of overhead lights, so the walnut cabinets beside it look deeper and warmer by contrast. Keep the edge profile simple and square, and run the stone 4 inches up the wall as a ledge for oils and salt. Trade-off: dark matte stone shows pale crumbs and water rings clearly, so it asks for a nightly wipe-down habit.
Texture note: the pleasure here is in the hand — cool, slightly grainy stone against warm wood is the forest-floor contrast of rock and bark, repeated at counter height.
5. A Butcher-Block Work Zone That Earns Its Counter Space
Claim one 3-foot stretch of counter beside the stove as a prep zone, anchored by a thick bamboo butcher block that stays out full-time. The IKEA APTITLIG butcher block, at $29.99, measures 17¾ by 14¼ inches — big enough for a chicken or a pile of onions, heavy enough not to skate. Lean two smaller boards against the backsplash behind it, tallest at the back. Trade-off: a block left out full-time needs oiling every month or so, or the surface dries and starts to split.
Fit check: measure your counter depth first — a standard 25-inch counter leaves about 10 inches of room in front of this block: enough for a mixing bowl, not a sheet pan.
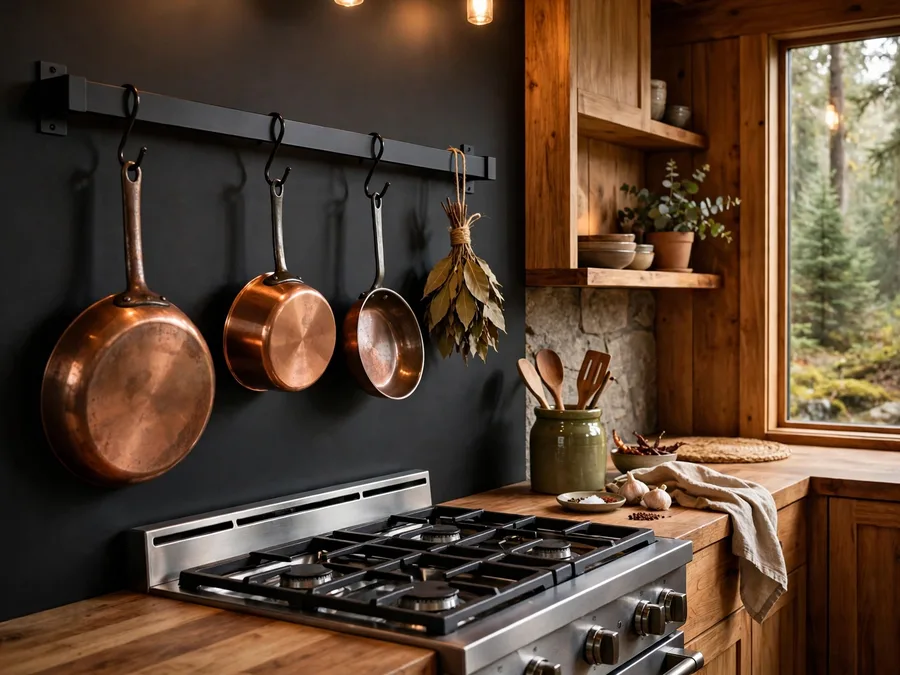
6. A Wall Rail of Copper Pots and Iron Hooks
Mount a 4-foot matte-black rail on the wall beside the range, 20 inches above the counter, and hang your three best copper or stainless pans from S-hooks alongside a small bundle of dried bay leaves. The metal picks up the warm tones in the wood and turns storage you use daily into the room’s decoration. Keep it to one wall only — a second rail tips the look toward cookware shop. If your pans live within arm’s reach of the stove, weeknight cooking gets noticeably calmer.
Why it works:
- It frees a whole base cabinet for bulky pots and lids.
- Warm metal against matte wood is the classic forest palette.
- Everything visible gets used; nothing hides and duplicates.
7. A Tumbled Stone Backsplash in Warm Greys
Behind the range, fit tumbled travertine in mixed warm greys and beige, in a brick pattern with sand-coloured grout. The tumbled edges catch light unevenly, so the wall reads like a dry-stone outcrop rather than a flat tiled surface. Stop the stone at the underside of the shelves or cabinets — a full-height wall of it overwhelms a small kitchen. Trade-off: porous stone behind a stove needs sealing once a year, and tomato splashes must be wiped the same day or they leave a shadow.
Color note: keep the stone in the warm family — greys with a beige lean, never blue-grey — so it sits comfortably against walnut, oak and terracotta instead of cooling the whole palette down.
8. An Open Pantry Wall of Baskets and Glass Jars
Give one short wall three pine shelves, each 12 inches deep, and organise dry goods the woodland way: flour, oats and pasta in clear glass jars with cork lids, onions and potatoes in woven seagrass baskets below, oils grouped on a small wooden tray. Label nothing — the shapes and colours of the food do the labelling. Trade-off: jars demand decanting discipline; a torn bag stuffed behind them ruins the effect in seconds, so keep a hidden drawer for the messy overflow.
Space note: twelve inches is the sweet spot — deep enough for a large flour jar, shallow enough that nothing gets lost behind anything else; go deeper and the back row becomes storage archaeology.
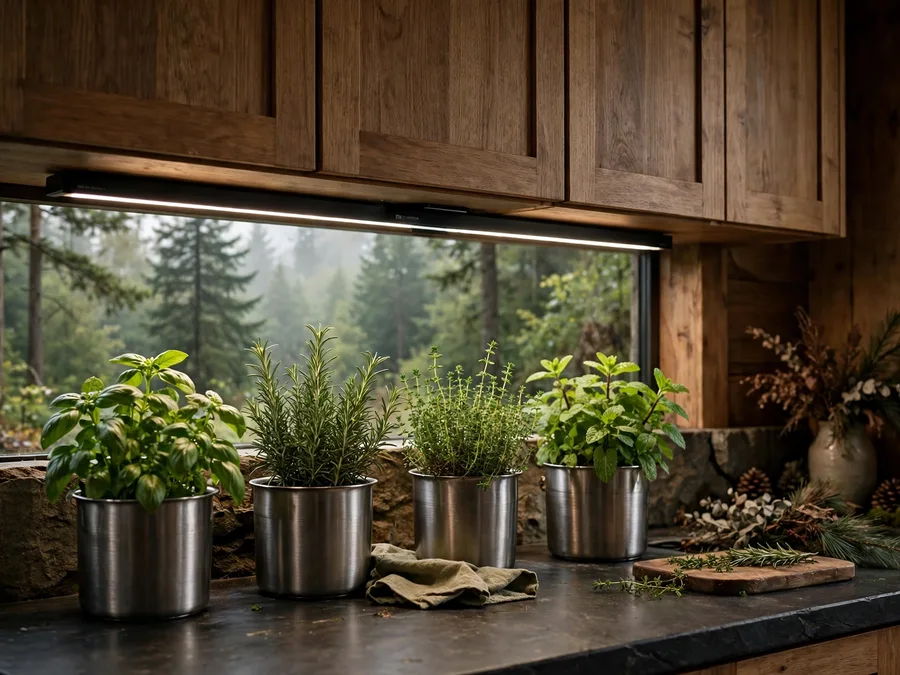
9. An Under-Cabinet Herb Garden With a Slim Light Bar
For a small or north-facing window, grow the herbs where light can be borrowed: a slim matte-black LED bar, 24 inches long, fixed under an upper cabinet, with four brushed-steel herb pots on the counter beneath it. Basil, cilantro and chives thrive under 12 to 14 hours of light a day on a cheap plug-in timer. Hide the cord in a painted cord cover so the setup reads as cabinetry. Trade-off: the counter under the cabinet gives up its role as a landing zone for post and paperwork.
Style note: choose pots in one metal only and keep the heights uneven — identical pots at identical heights read as a shop display; slight variation feels grown, not staged.
10. Two-Tone Cabinets: Stained Wood Below, Painted Wood Above
The oldest trick in a real forest is a dark floor and a lighter canopy, and it settles a kitchen the same way. Keep base cabinets in stained walnut or oak, then paint the uppers a warm, muddy off-white over real wood doors — the grain still ghosting through the paint. Dark bases ground the room and hide shoe scuffs; pale uppers bounce light back at eye level. Trade-off: painted wood chips at the corners over time, so keep a small jar of touch-up paint in a drawer.
Easy swap: repaint only the uppers — a soft clay one year, a pale stone the next — and the whole kitchen feels reworked while the expensive stained bases never change.
| Material | Finish | Best Spot | Honest Downside |
|---|---|---|---|
| Walnut | Medium stain, matte | Base cabinets | Shows flour and dust |
| White oak | Natural oil | Open shelves | Water rings if unsealed |
| Painted pine | Warm off-white, satin | Upper cabinets | Chips at corners |
| Dark stone | Honed, matte | Counters | Shows pale crumbs |
| Travertine | Tumbled | Backsplash | Needs yearly sealing |
| Reclaimed pine | Waxed | Shelves, racks | Soft — dents easily |
11. A Banquette Corner for Slow Kitchen Breakfasts
Build an L-shaped bench into the kitchen’s unused corner — a simple pine base with a hinged lid for linen storage — and cushion it in undyed natural linen with two back pillows in a deep moss-green wool. A round oak pedestal table, 36 inches across, keeps knees and chair legs out of the way. It is the same gathered, eat-where-you-cook feeling that runs through a whole forest home, scaled down to one corner. Trade-off: bench seating makes shuffling in and out a small group negotiation.
Best for: households that eat most meals in the kitchen and want the dining room back for other uses.
12. A Live-Edge Shelf Over the Sink
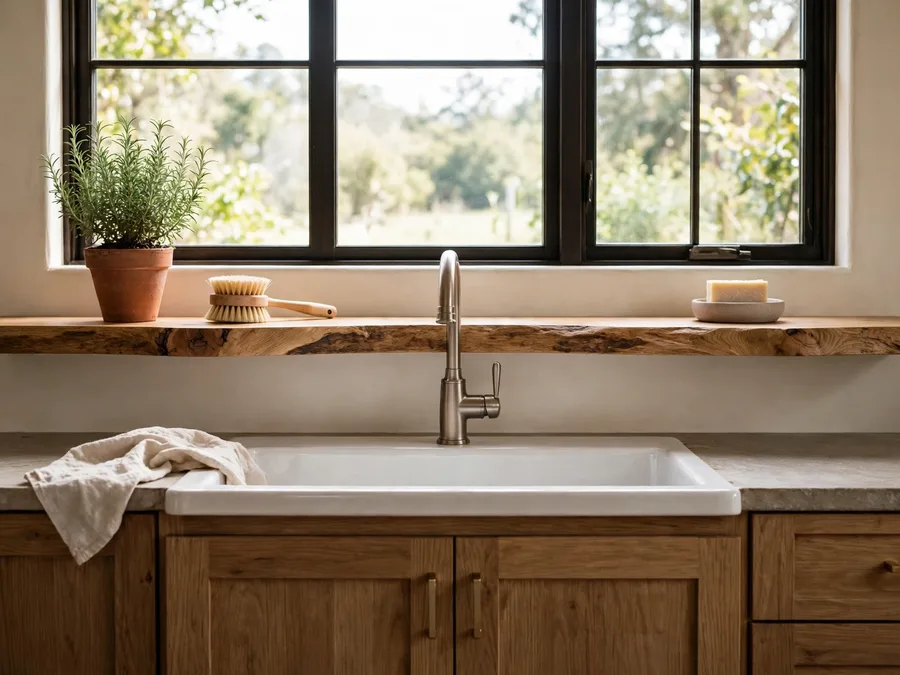
Span the window over the sink with a single live-edge oak board, its wavy bark-side edge facing into the room, resting on two small iron brackets. It holds exactly three things: a tiny pot of trailing rosemary, the washing-up brush, and a handmade soap dish — nothing more, or the edge disappears under clutter. Dishwater steam and splashes suit the herbs, and the board itself just needs a wipe. Trade-off: raw live edges shed the odd flake of bark early on, so brush it down weekly for the first month.
Seasonal swap: the pots rotate with the year — basil and parsley through summer, then rosemary and sage, which shrug off the cooler, darker months on the same shelf.
13. Blackened-Iron Hardware Against Warm Wood
Change nothing but the hardware and the kitchen shifts a decade older, in a good way. Swap shiny handles for blackened-iron cup pulls on drawers and simple iron knobs on doors, then match them with a matte-black bridge faucet at the sink. Against walnut or oak, the black reads like the ironwork on a forest gate — quiet, heavy, permanent. Trade-off: blackened finishes show water spots and fingerprints more than chrome, and cheap versions flake at the edges within a couple of years, so buy the heaviest you can afford.
The formula: blackened-iron pulls + matte-black faucet + one aged-brass accent kept from the old set, so the change looks collected rather than replaced all at once.
14. Seagrass Baskets Doing the Cabinet Work
Inside deep drawers and on low shelves, replace plastic tubs with woven seagrass and rattan baskets in three sizes — their tan, flecked weave does the decorative work. One holds potatoes in the dark of a base cabinet, one corrals tea towels beside the stove, one keeps the countertop fruit bowl overflow. For a household tired of plastic, this swap changes how the kitchen feels daily. Trade-off: woven baskets cannot be dishwashed and harbour crumbs, so shake them out over the bin weekly.
Get the look:
- Main piece: three lidded seagrass baskets, graduated sizes
- Supporting piece: one open rattan tray for fruit
- Texture or material: hand-woven grass, natural tan weave
- Finishing touch: wooden label tags on twine
15. A Ceiling Rack for Drying Herbs
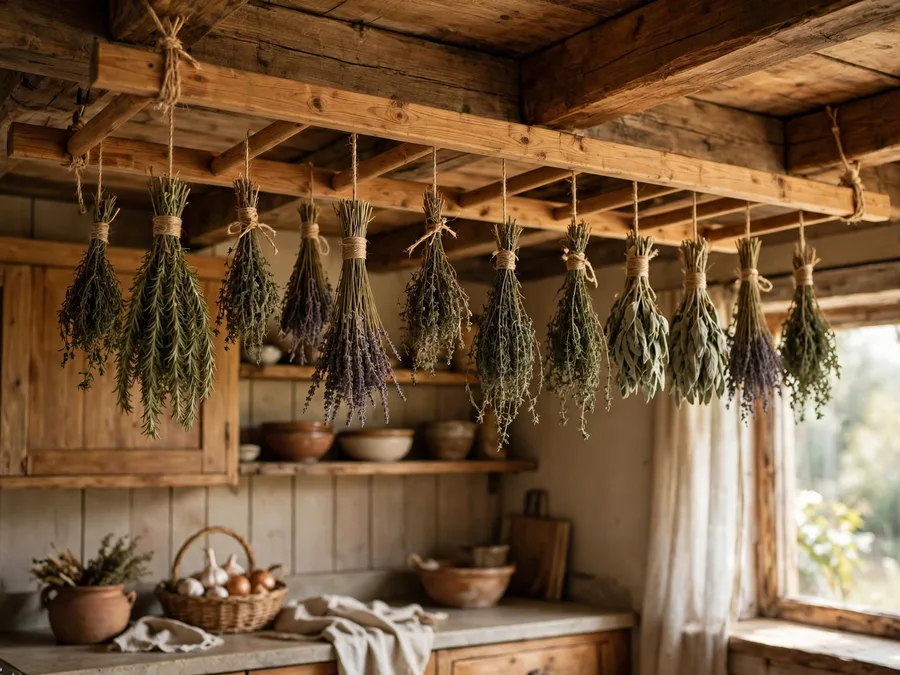
Screw a simple pine ladder rack — two rails and four rungs, about 3 feet long — to the ceiling over the island or a dry corner, and hang bundles of oregano, thyme and sage from it with garden twine, heads down. Bundles dry in a week or two in the warm rising air, then crumble straight into jars. Leave a third of the rungs empty so it reads as a working rack, not a decoration. Trade-off: drying herbs shed tiny leaves, so hang the rack anywhere except directly over the main chopping board.
Texture note: crisp, papery bundles against smooth pine give the ceiling a layered, canopy feel without a single themed ornament.
16. A Fluted Wood Panel on a Plain Island
If your island is a flat, characterless box, face its kitchen-side panel with vertical fluted oak slats, each about 1 inch wide with a half-inch shadow gap, stained to match the base cabinets. The ribs catch raking light through the day, so the island seems to change tone from breakfast to evening. Face only the room side; the working side keeps its smooth, wipeable surface. Trade-off: those shadow gaps collect dust and flour, and cleaning them is a brush-and-vacuum job, not a quick wipe.
Budget note: fluted MDF stained at home costs a fraction of solid oak and reads almost identically from three feet away; spend the savings on real oak for the end panel, where hands land.
17. Terracotta Crocks Clustered by the Stove
Gather wooden spoons, a steel whisk and the everyday spatula into two unglazed terracotta crocks, 6 and 8 inches tall, on a small round wooden board at the back of the counter beside the stove. The clay’s dusty orange-brown warms steel and stone like nothing else, and the board keeps the cluster movable for cleaning. Keep one crock a third empty — an overstuffed crock is a rummage, not a tool kit. Trade-off: unglazed terracotta stains where oil splashes land, darkening slowly into its own patina.
Fit check: keep crocks at least 4 inches from the stove edge, behind the front line of the burners — close enough to grab a spoon mid-sauce, far enough that handles avoid open heat.
| Herb | Light | Water | Season Note |
|---|---|---|---|
| Basil | Sunniest sill | Little and often | Summer star; sulks in cold drafts |
| Rosemary | Bright, airy spot | Sparingly | Hardy all year on a sill |
| Thyme | Bright sill | Sparingly | Tough through winter indoors |
| Mint | Bright, indirect | Keep moist | Always alone in its own pot |
| Parsley | Bright sill | Evenly moist | Slow to start; sow in spring |
| Chives | Sill or light bar | Evenly moist | Cut often; regrows for months |
18. A Round Pedestal Table in the Corner
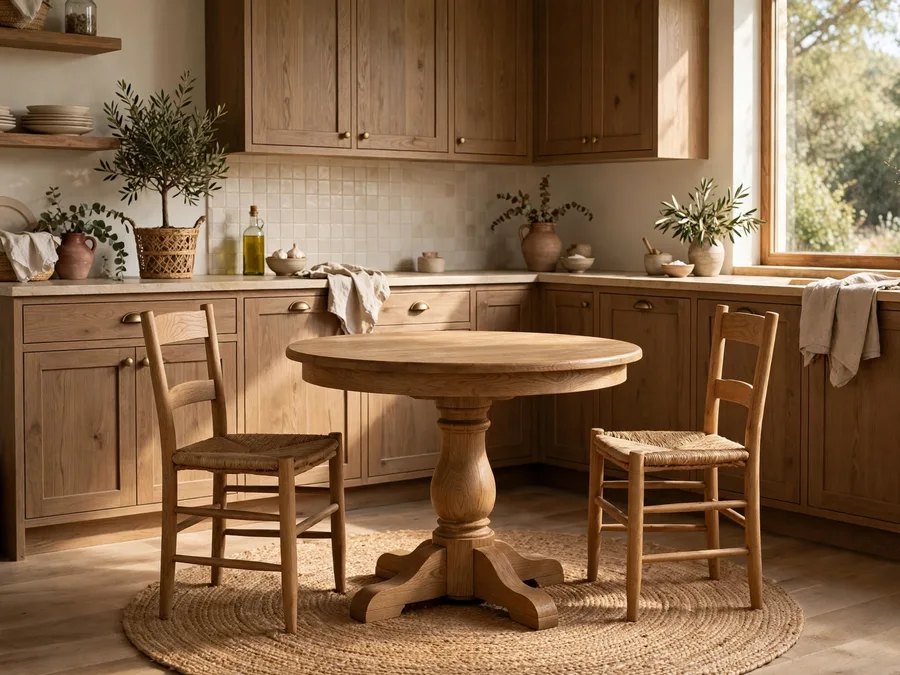
Where a banquette will not fit, a single round oak pedestal table, 32 to 36 inches across, turns a dead corner into the kitchen’s favourite seat. Add two wooden chairs with woven rush seats and ground the arrangement with round natural fiber rugs in undyed jute beneath. No corners means it squeezes into spaces a rectangular table wastes. Trade-off: a pedestal base seats four at a push, and a heavy lean on the edge will remind everyone it has one leg.
Why it works:
- A circle softens a room built from straight cabinet lines.
- One central leg leaves the floor — and the rug — fully visible.
- It doubles as extra prep space during big cooking days.
19. An Herb Planter Built Into the Island End
Most islands have a dead end panel facing the room — give it a job. Fix a cedar trough, 24 inches long and 6 inches deep, to that end at counter height, line it with a removable tray, and plant the herbs you reach for most: rosemary, thyme, trailing oregano. Snipping dinner’s herbs from the island itself, mid-recipe, is the moment the herb-garden promise of this kitchen stops being decor. Trade-off: the trough steals a step’s width of walkway, so skip it if your island clearance is already tight.
Color note: cedar weathers from red-brown toward silver-grey over a couple of years, and deep-green herbs look richer against it at every stage.
20. A Reclaimed-Pine Corner Shelf Tower
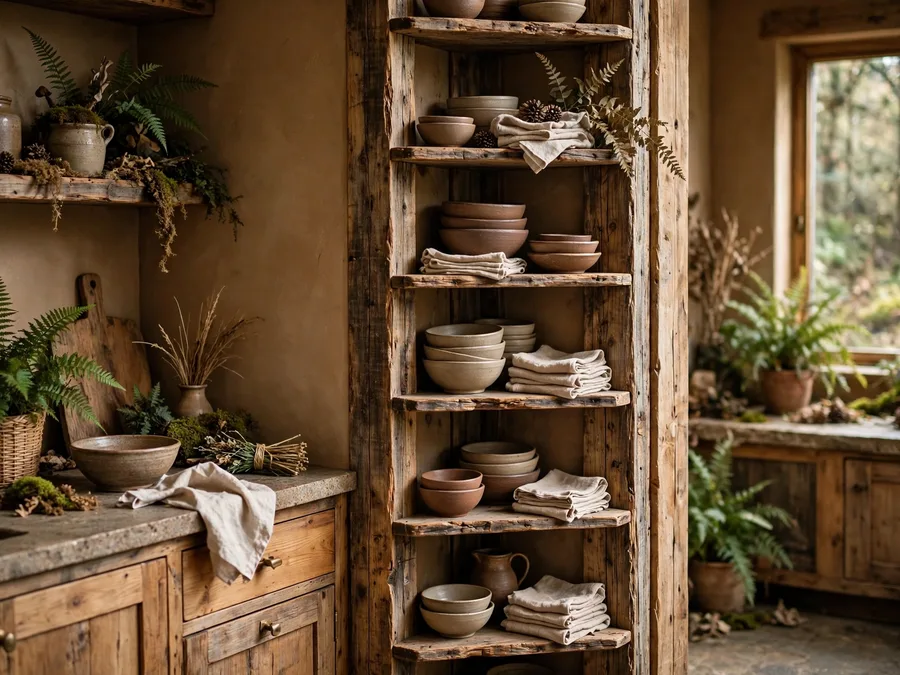
Finish the room in its most awkward corner: a narrow tower of reclaimed pine shelves, 14 inches wide and standing about 5 feet tall, its saw marks and old nail holes left honestly visible under a coat of clear wax. Stack it with quiet things — stoneware bowls, linen napkins, the good wooden salad servers. Narrow and tall, it stores without eating floor space. Trade-off: reclaimed timber varies wildly in tone, so buy every board from the same source or the tower looks patched rather than storied.
Style note: one storied piece per room is the rule — its dents and old paint ghosts stop the newer wood around it from feeling like a showroom set.
A Kitchen That Smells Like Herbs and Works Like a Kitchen
None of these ideas asks for a renovation on its own. The forest feeling arrives the way it does outdoors — layer by layer: honest wood first, matte stone and clay beside it, iron to anchor it, and something green and alive growing where you can reach it while the pasta boils. Start with whichever layer your kitchen is missing most, and let the rest follow over seasons rather than weekends.
Your one next step: stand in your kitchen tonight and pick the single surface you touch most — one counter run or one set of shelves — and restyle only that, using the formula above: wood visible, one material repeated, herbs within reach. Live with it for a week before touching anything else.