
A full Christmas tree needs a corner, a stand and a clear walking path — three things a small living room or a rented flat simply does not have. So the tree goes up on the wall instead, and that is where the second problem starts: most wall trees read as flat stickers, a green triangle with no depth, no shadow and none of the presence a real tree brings to a room.
The versions that work treat the wall as a shallow stage rather than a page. Something always stands off the surface — foliage fluffed outward, ornaments hung at different depths, one layer that catches light or throws a shadow. The best wall Christmas tree ideas all share that one habit: a flat outline, built up in layers.
Below are 10 wall Christmas tree ideas that take no floor space at all, each with its own depth trick built in. Most are made from basics you probably own already — a garland, string lights, branches, saved Christmas cards, tape and a handful of hooks — and every one comes down in January without a fight.
The Wall Christmas Tree Formula That Keeps a Flat Outline Looking Layered
- Anchor the triangle first: mark the top point and both base corners with painter’s tape before anything goes up, keeping the tree near 5 feet tall and 3 feet wide so the proportions match a real tree.
- Build with two materials, not one: pair something soft, like greenery or ribbon, with something hard, like wood, metal or glass, so the wall reads as texture instead of print.
- Respect the two-ounce rule: adhesive hooks and tape are your structure, so keep every ornament light, and put anything heavier low down, on a nail or on a slat, never on tape.
- Leave one layer removable: lights, cards or a topper that clips on and off lets the same outline change mood through December without a rebuild.
For example: a 5-foot zigzag of deep-green garland on clear hooks, copper-wire micro lights woven through the foliage, six matte gold baubles hung at staggered depths, and one wooden star on a short standoff hook at the top.
| # | Idea | The Depth Trick | Kindest Wall Fixing |
|---|---|---|---|
| 1 | Zigzag Garland With Lights Inside | Lit foliage fluffed outward | Clear adhesive hooks |
| 2 | Graduated Branch Ladder | Ornaments swinging at varied lengths | One picture hook |
| 3 | Wood Slat Tree on Spacer Blocks | Shadow gap behind every slat | Screws or anchors |
| 4 | Double-Layer Light Outline | Two depths of light | Clear adhesive hooks |
| 5 | Card Tree on Vertical Twines | Cards overlapping like shingles | Tape and pins |
| 6 | Ornaments at Staggered Depths | Baubles floating off the wall | Clear hooks or pins |
| 7 | Washi Outline With Raised Accents | Real pieces standing proud | Washi tape and putty |
| 8 | Corner Tree on Two Walls | A silhouette with two planes | Hooks on both walls |
| 9 | Outline Plus Sagging Swag Rows | Draped rows inside a taut frame | Heavy-duty hooks |
| 10 | Trim-Frame Tree With a Lit Centre | A frame’s shadow line | Removable strips |
1. Zigzag Garland With Lights Inside
Run one garland in a zigzag from a top hook down to two base corners 3 feet apart, on clear hooks every 12 inches. The depth is in the foliage: fluff every tip outward and let the lights sit inside the greenery, not on top. A ready-lit strand does both jobs at once — Pottery Barn’s Faux Lit Pinecone Garland ($99.50) threads warm white LEDs and pinecones through the needles, so glow and relief arrive together. Trade-off: lit garland is heavier, so let hooks cure an hour first.
Get the look:
- Main piece: 10-foot pre-lit pine garland
- Supporting piece: clear hooks every 12 inches
- Texture or material: fluffed pine, wired pinecones
- Finishing touch: wooden star, top hook

2. Graduated Branch Ladder
Tie seven branches or slim dowels — 36 inches at the bottom stepping down to 10 at the top — between two jute cords, and hang the ladder from one picture hook. Branches stand an inch off the wall on their own thickness, and ornaments on strings cut 2 to 6 inches float at staggered depths in front. Fresh branches smell wonderful but drop needles by week three; faux cedar skips the sweeping at higher cost. It borrows the layering behind Christmas tree themes, flattened to an inch.
Why it works:
- Real branch thickness holds the ladder off the wall
- Ornaments swing at different depths, like on a real tree
- It rolls into one bundle for January storage
3. Wood Slat Tree on Spacer Blocks
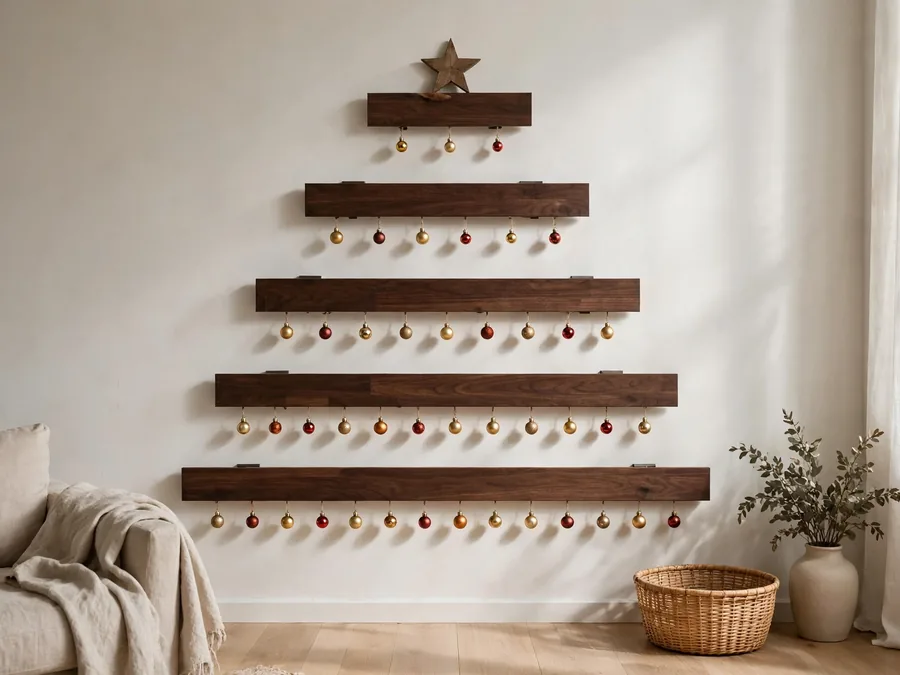
Cut five horizontal slats from 1×3 pine offcuts — 36, 29, 22, 15 and 8 inches — stain them dark walnut, and screw each through a 3/4-inch spacer block so every slat floats with a shadow line behind it. Hang small baubles and one tiny wreath along the front edges, and set a star on the top slat. The trade-off is commitment: this design wants screws or anchors, so it suits owners — renters can hang it from a picture rail instead.
Fit check: keep 3 inches between slats, and check the lowest clears the sofa back by 2 inches before drilling — the tree should read over furniture, not behind it.
4. Double-Layer Light Outline
Zigzag a warm-white micro LED string across clear hooks to draw a 5-foot outline, then drape a second, shorter string in loose scallops inside it, hanging an inch off the wall on the same hooks. Two planes of light do what one flat line cannot: the eye reads a front and a back to the tree. Finish with a small star on a standoff hook. The trade-off: by daylight this tree is nearly invisible, so it earns its wall in a room used mostly after dark.
Color note: warm white on both strings, never mixed — a warm outline against cool white makes the tree read as two displays competing, not one tree glowing.
5. Card Tree on Vertical Twines
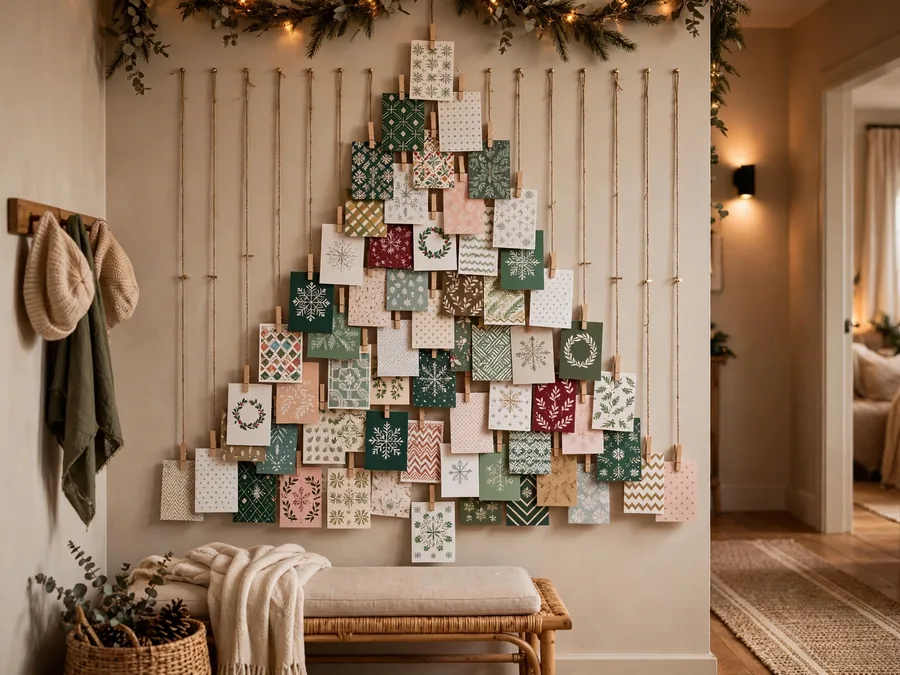
Tape a 5-foot triangle, then pin five vertical twine strands inside it — the centre one the full 5 feet, the outer ones stepping down to 2 feet. Clip Christmas cards along the strands with mini clothespins, each card overlapping the one below it like shingles on a roof. The cards sit at slight angles and catch the light as you pass, which is where the depth comes from. Early December is the honest weak point: the tree looks sparse until cards arrive, so seed it with last year’s saved cards and a few family photos.
Best for: hallways and stair walls you pass daily, and households that receive more cards than they have mantel space.
6. Ornaments at Staggered Depths
Skip the greenery. Inside a taped triangle, pin 25 hooks in loose rows and hang shatterproof baubles — matte red, gold and cream — on ribbon loops cut to different lengths: an inch near the edges, up to 5 inches near the centre, so the middle bellies gently toward the room. The trade-off is hardware: this is the most hook-hungry design here, and a swinging door will find the longest loops, so choose a quiet wall. It does a tree’s focal-point job in a cozy Christmas living room without taking a corner.
Space note: centre baubles stand 5 inches proud, so keep a 30-inch clear walkway — fine in a living room, too much for a narrow hall.
| Fixing | Wall Damage | Holds | Coming Off |
|---|---|---|---|
| Clear adhesive hooks | None | Garland, lights, light outlines | Peel off in January |
| Painter’s tape and washi | None | Tape trees, card twines | Lifts clean in one piece |
| Removable putty | None | Small raised accents | Rolls off with a thumb |
| Picture pins and small nails | Pin holes | Branches, ornament rows | A dab of filler |
| Screws and anchors | Small holes | Slat and trim trees | Filler and a paint touch-up |
7. Washi Outline With Raised Accents
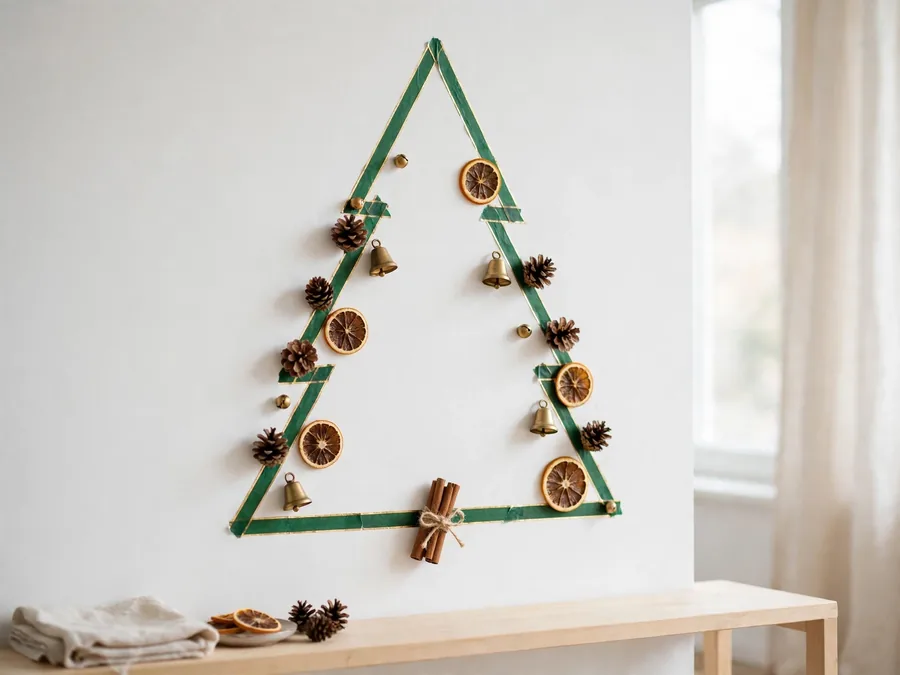
Draw the tree in two washi tones: deep green for the outline and branch strokes, thin gold run just inside it for a second edge. Then press accents onto the tape with removable putty — mini pinecones, brass bells, two dried orange slices, a cinnamon bundle. Each piece stands proud and throws a shadow — what saves the flattest material on this list. Trade-off: washi can lift fresh paint, so test a patch behind a door first, and press tape down rather than stretching it.
Budget note: two rolls of washi and a dab of putty cost a few dollars; the pinecones and orange slices are kitchen-and-garden finds — the whole tree costs less than one strand of lights.
8. Corner Tree on Two Walls
Build the zigzag — garland or lights — so the apex sits exactly in the corner and the rows wrap onto both walls, half the tree on each face. The silhouette gains a genuine second plane, the strongest anti-flat trick there is, and ornaments on both faces catch light from two directions. Measure each row down from the ceiling rather than up from the floor, or the two halves will not meet level at the corner. Trade-off: the measuring is fiddly, and it only works where a corner is truly empty.
Style note: corner placement lets you go narrower — a 4-foot tree reads full-size, because the fold supplies depth a 6-foot flat tree has to fake.
| Wall Space | Tree Height | Base Width | Garland or Lights Needed |
|---|---|---|---|
| Narrow hall, about 30 inches clear | 4 feet | 24 inches | About 6 feet |
| Standard living room wall | 5 feet | 36 inches | About 10 feet |
| Wide wall or stairwell | 6 feet | 48 inches | About 14 feet |
9. Outline Plus Sagging Swag Rows
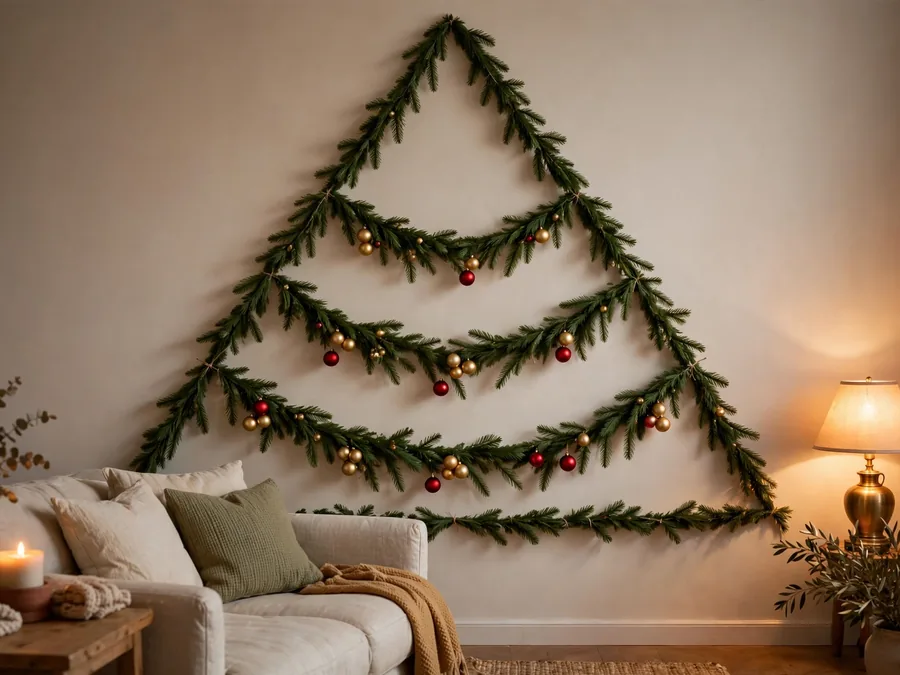
Hook one garland taut as a crisp triangle frame, then drape three shorter lengths horizontally inside it, pinned only at the ends so each sags 3 to 4 inches in the middle, like real boughs. Hang ornaments only on the sagging rows. The taut frame and soft scallops shadow each other, and the tree suddenly has an inside and an outside. Trade-off: it eats about 18 feet of garland, and the draped rows are the heaviest load here — heavy-duty hooks, cured overnight.
Texture note: use needle pine for the taut outline and softer cedar for the draped rows — the contrast between the two greens keeps the inside from reading as one flat mass.
10. Trim-Frame Tree With a Lit Centre
Cut thin wood trim — half-inch half-round beading — into two long sides and a base, paint it deep green or gold, and fix it with removable strips so the frame stands a half-inch proud of the wall. Inside, drape micro lights loosely and pin three flat ornaments; the frame’s shadow gap outlines the tree like a picture. It suits the same thinking as budget Christmas decor: offcut trim, one string of lights, nothing bought twice. Trade-off: the corners — mitres take patience; painted butt joints are the forgiving option.
Seasonal swap: after Christmas, leave the frame up and refill it — paper hearts in February, then a strand of faux ivy and fairy lights through spring.
Start With One Wall and One Evening
Every tree here is the same triangle wearing different materials, so the only real decision is how much depth your wall, your lease and your patience allow. Tape and lights forgive everything; slats and trim ask a little more and give a little more back. Pick the version you will still enjoy looking at in the third week of December, not just the first.
Your one next step: choose the wall tonight and tape a 5-foot triangle on it, then live with the outline until tomorrow. If the proportions still please you in daylight, hang the first strand; if they do not, the tape moves in seconds and no harm is done.