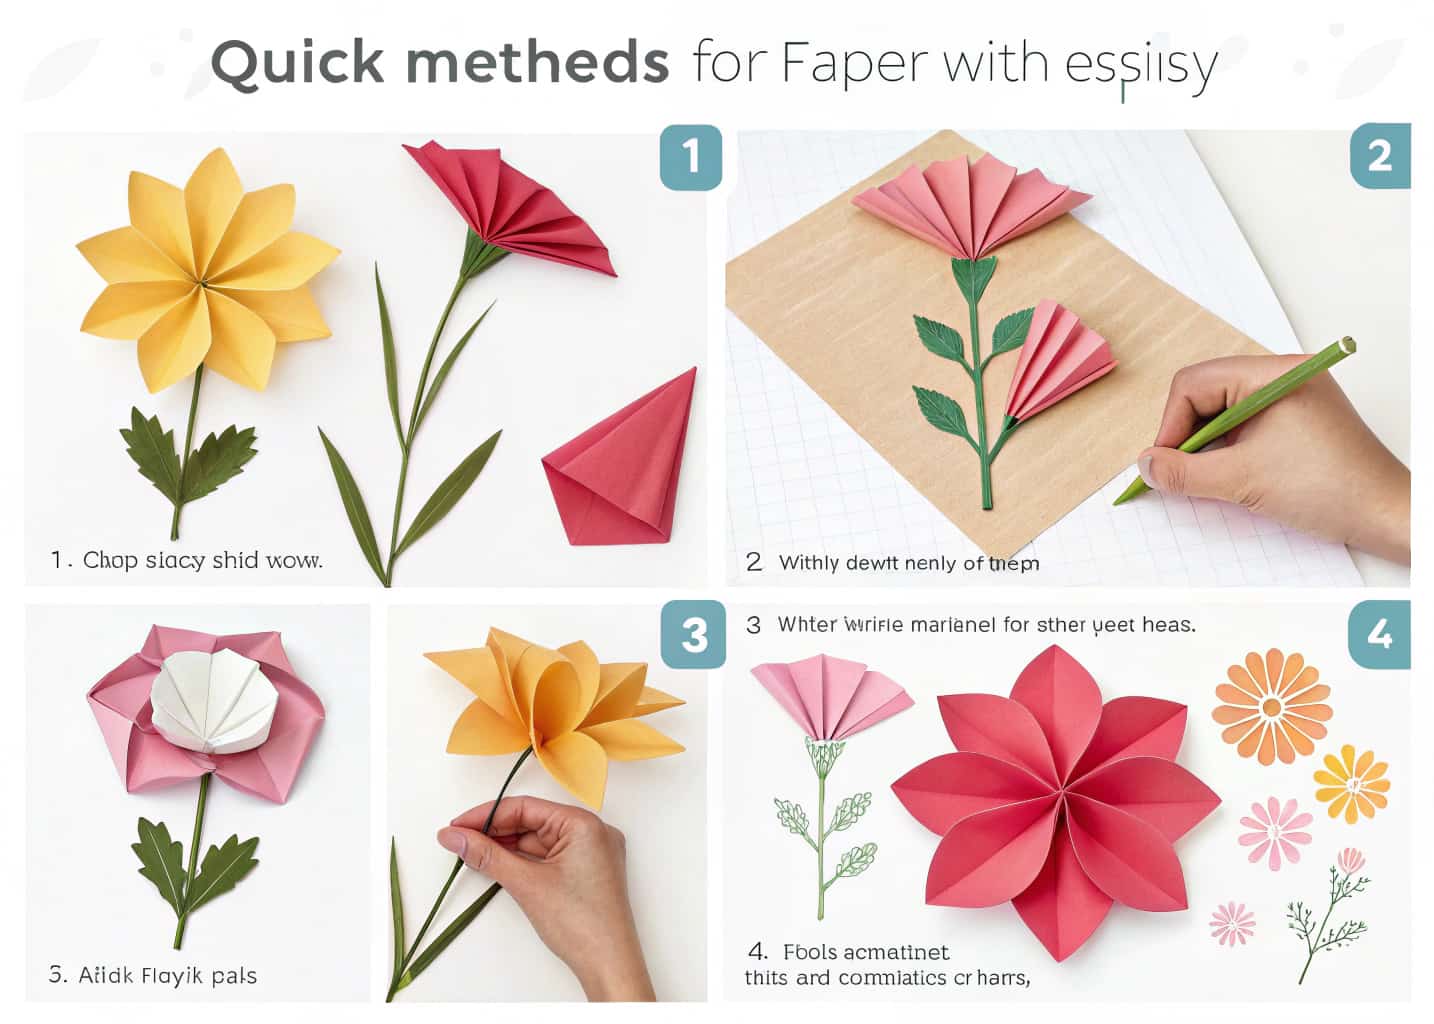
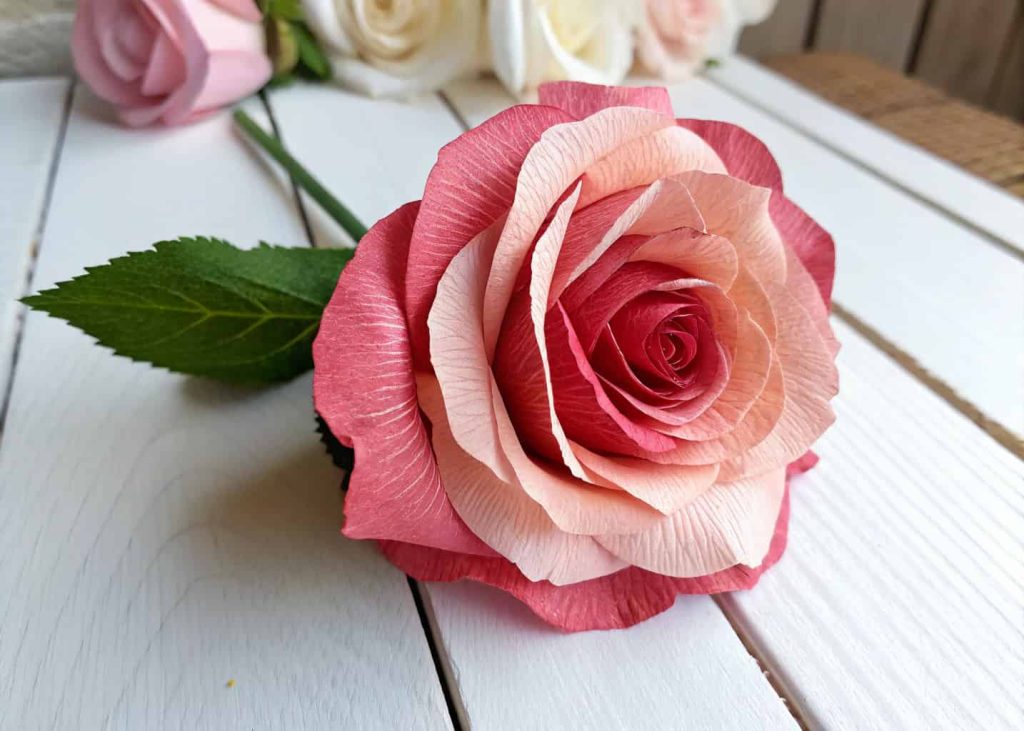
1. Classic Rose from Crepe Paper
Crepe Flowers with Paper roses are one of the most loved paper crafts in the world, and for a very good reason — they look stunningly real and they are not hard to make once you get the hang of it. Start by cutting a long strip of crepe paper and gently stretching the middle to give the petals a natural curve. Then roll one end tightly to form the center bud, and loosely wrap the rest around it, fanning out as you go. Secure the base with floral wire or tape, and your rose is ready. With a little practice, you can make a full bouquet in under an hour that will last forever.
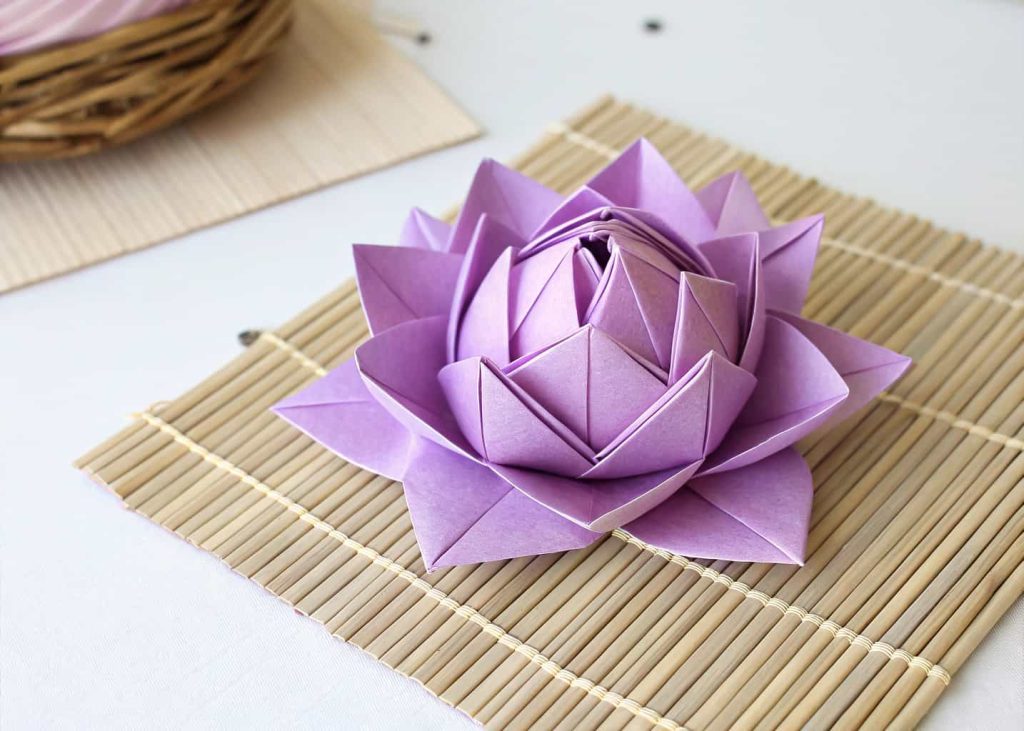
2. Simple Origami Lotus
The origami lotus is a timeless paper flower that looks elegant and meditative. You only need one square sheet of paper, and no glue or scissors are required, which makes it a perfect beginner project. Start by folding all four corners to the center, then repeat this step two more times. Flip the paper over and fold the corners to the center one last time. Now, carefully pull the flaps from underneath outward and upward to reveal the lotus petals. The result is a beautiful, multi-layered flower that sits flat and can be used as a decorative piece, gift topper, or table centerpiece at any event or gathering.
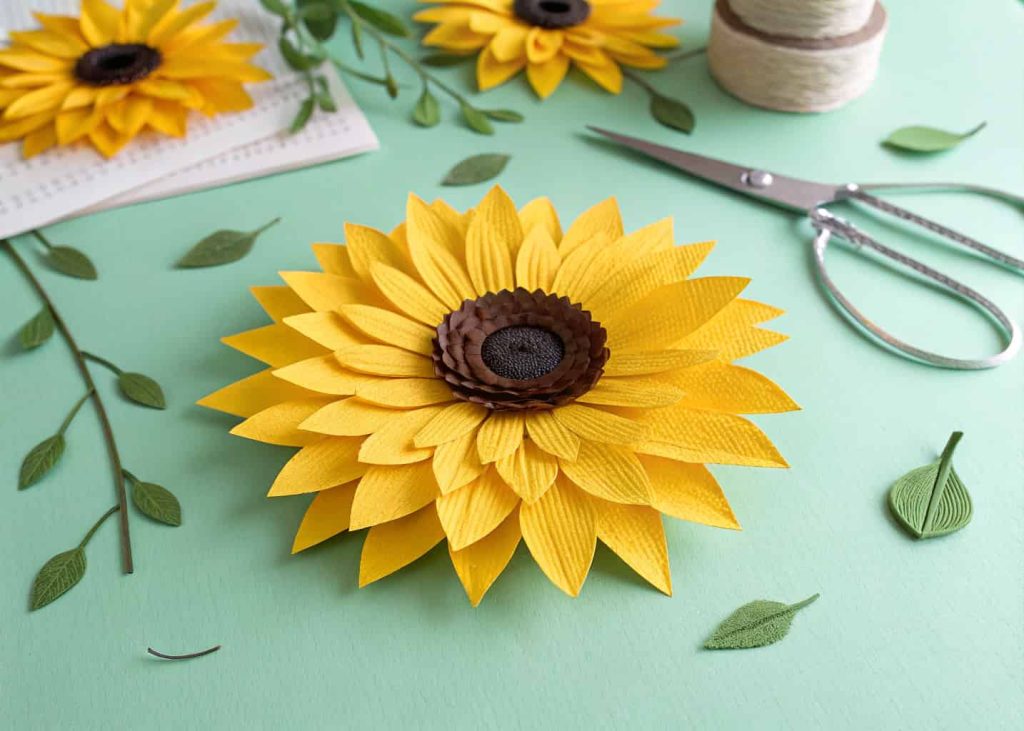
3. Paper Sunflower with Tissue Paper
Tissue paper sunflowers are bright, cheerful, and incredibly easy to make — even young children can do it with a little help. Cut out long petal shapes from yellow tissue paper and arrange them in two layers around a circular center piece made from brown or black cardstock. You can crumple the tissue petals slightly to give them more texture and dimension. Glue everything onto a green cardstock stem and add two leaf shapes on the sides. The lightweight nature of tissue paper makes these flowers especially great for hanging decorations, party garlands, or classroom craft projects. They add instant sunshine to any room.
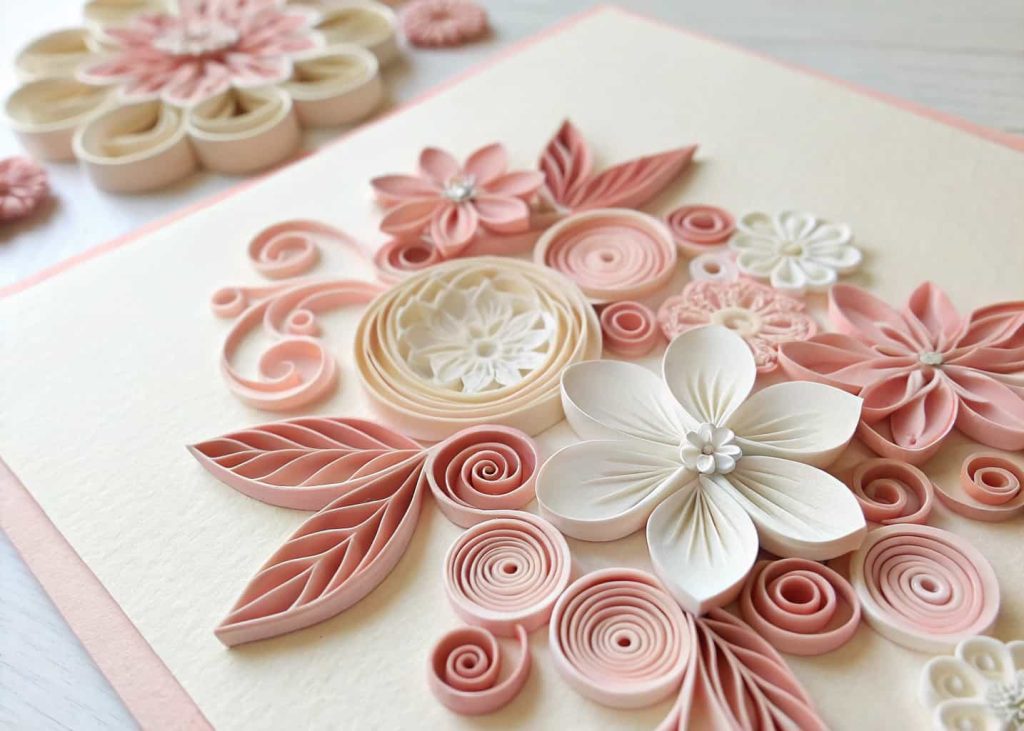
4. Rolled Paper Flowers (Quilling Style)
Quilling-style rolled flowers are small, detailed, and absolutely gorgeous when displayed in a frame or used in card making. You need narrow strips of paper — about 3mm to 5mm wide — which you roll tightly around a toothpick or quilling tool, then release to let them loosen slightly before gluing the end. Different coiling and shaping techniques produce different flower types: tight coils become the center, teardrop shapes become petals, and marquise shapes make leaves. Arrange them together on a backing card or canvas and you have fine art made from paper. This method requires patience but the results are worth every minute spent on this delicate and rewarding craft.
5. Coffee Filter Flowers
Coffee filters are an unexpected but brilliant material for paper flowers — they are soft, absorbent, and take color beautifully when dyed. Flatten a coffee filter and cut petal shapes around the edges, or simply layer three to four whole filters together and pinch them in the center. Tie the pinched center with a twist tie or wire, then gently separate and fluff out each layer to form the bloom. Before or after shaping, you can color them with watercolor markers or food coloring diluted in water for a gorgeous watercolor effect. These flowers are cheap to make in large quantities and look stunning bunched together in a vase or strung along a garland for parties.
6. Accordion Fold Paper Flowers
Accordion folding is a classic technique that creates impressive paper flowers with almost zero cutting required. Take a rectangular sheet of paper and fold it back and forth in equal pleats — like you are making a paper fan. Once fully folded, pinch the center tightly and secure it with a staple or piece of wire. Then fan out both sides and connect the two ends together with glue or tape to form a full circular flower. Using two sheets of different colored paper together creates a two-toned effect that looks very professional. These flowers can be made in any size — tiny ones for gift tags, medium ones for cards, and giant ones for wall decorations or party photo backdrops.
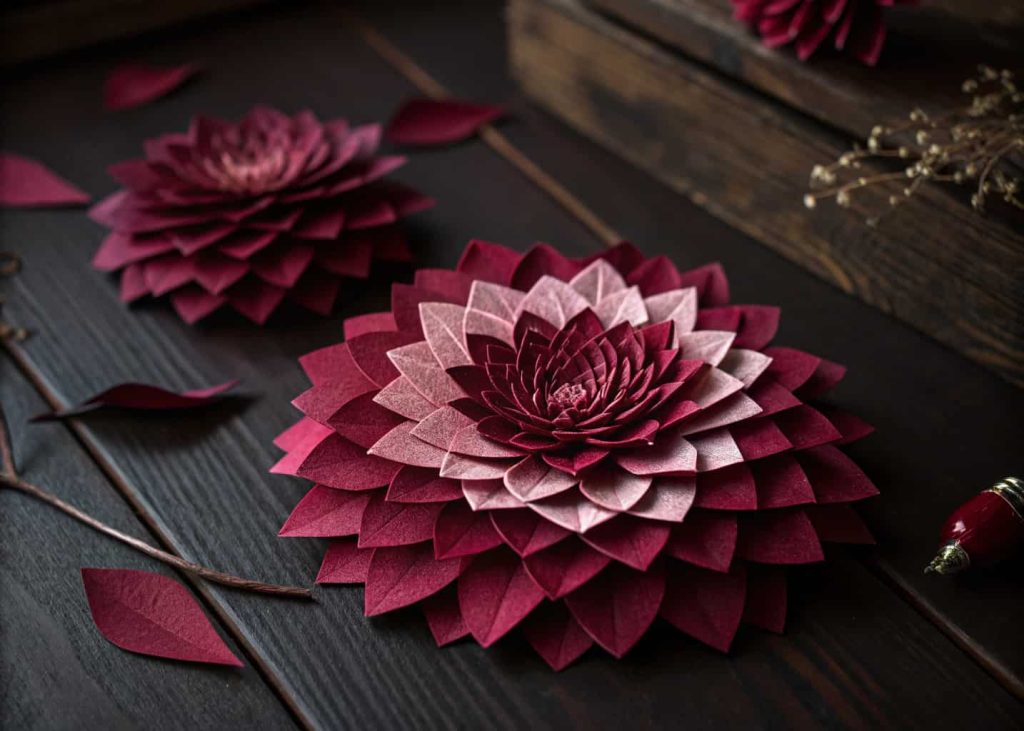
7. Dahlia from Square Paper Pieces
Paper dahlias look incredibly complex but they are made from a surprisingly simple process using multiple small squares of paper folded into cone shapes. Cut many small squares — about 2 inches each — and fold each one diagonally twice, then curl the open edges back with a pencil to form a rounded petal cone. Glue these cones in circular layers onto a base circle, starting from the outside edge and working your way inward. Each new row should be slightly smaller and angled inward more steeply. The final result is a stunning layered dahlia bloom that looks like it came from a florist shop. This is a satisfying project because the repetitive folding becomes meditative and the payoff is extraordinary.
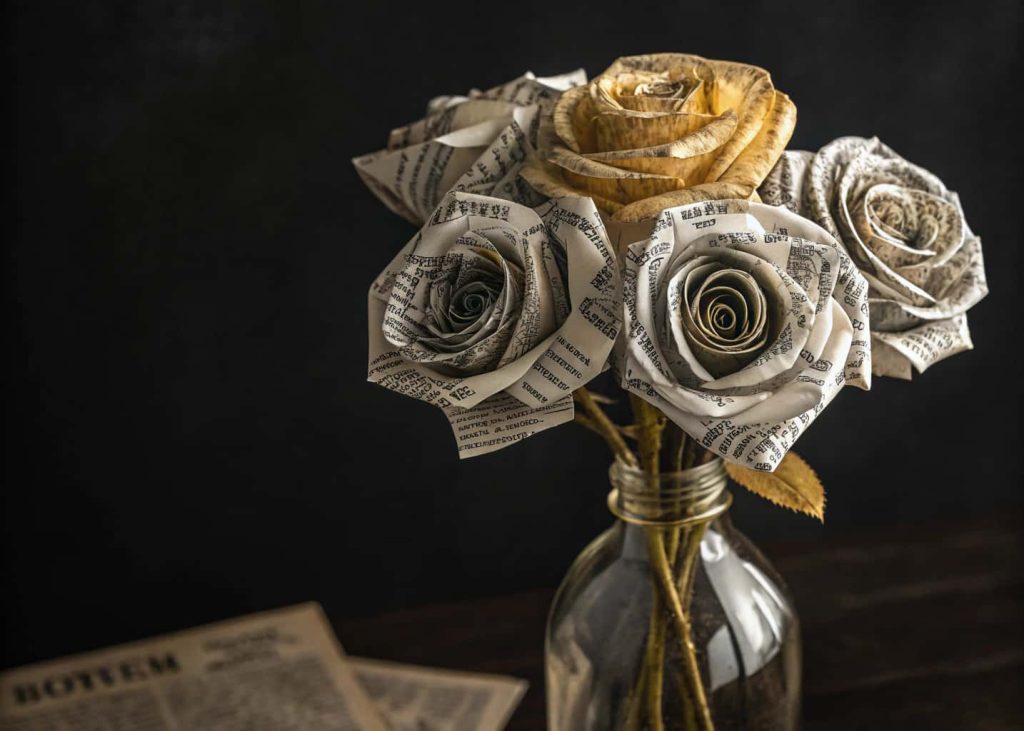
8. Newspaper Roses
Newspaper roses are not just a craft — they are a statement about creativity and recycling. Tear or cut strips of newspaper, then loosely roll and twist them to form petal shapes. Layer four to six petals around a central tight roll for each rose. Wrap the base with green floral tape or a strip of green paper twisted into a stem. You can leave the roses in their natural newsprint gray for a vintage editorial look, or paint them with acrylic paint in any color you like. Black and white newspaper roses painted with gold spray look absolutely stunning as a centerpiece. This project is also a wonderful way to repurpose old magazines or newspapers that would otherwise be thrown away.
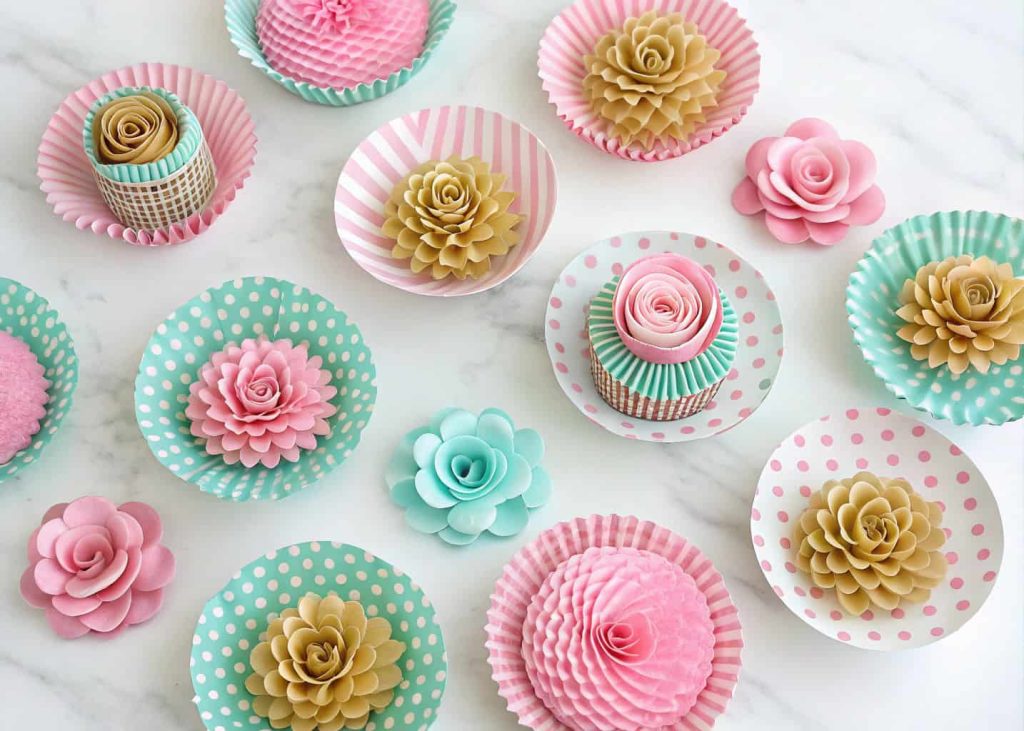
9. Cupcake Liner Flowers
Cupcake liners — those colorful fluted paper cups used for baking — make surprisingly delightful flowers with very little effort. Stack three to four liners of the same or different colors on top of each other and press them flat. Draw a spiral from the outside edge toward the center and cut along it. Then roll the spiral up from the outer end toward the center, and when you release it gently, it springs into a rose-like bloom shape. Glue the flat center to a cardstock circle to hold its shape. These flowers are perfect for cards, gift wrapping, and scrapbooking. Because cupcake liners come in hundreds of patterns and colors, you can create very diverse and unique flower collections very easily.
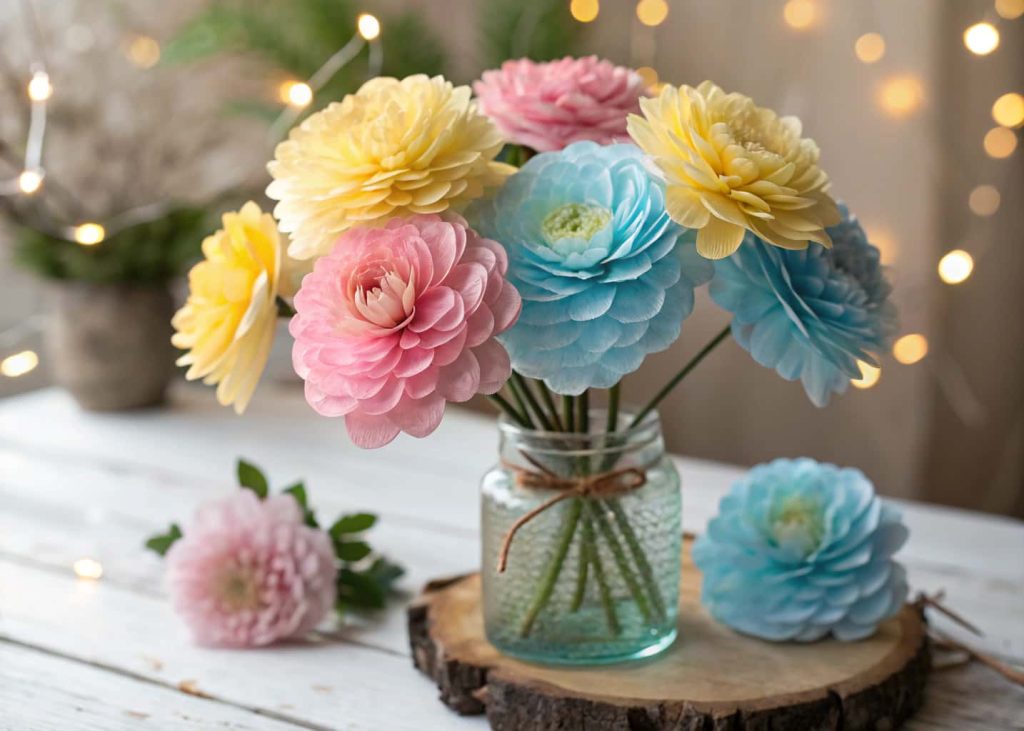
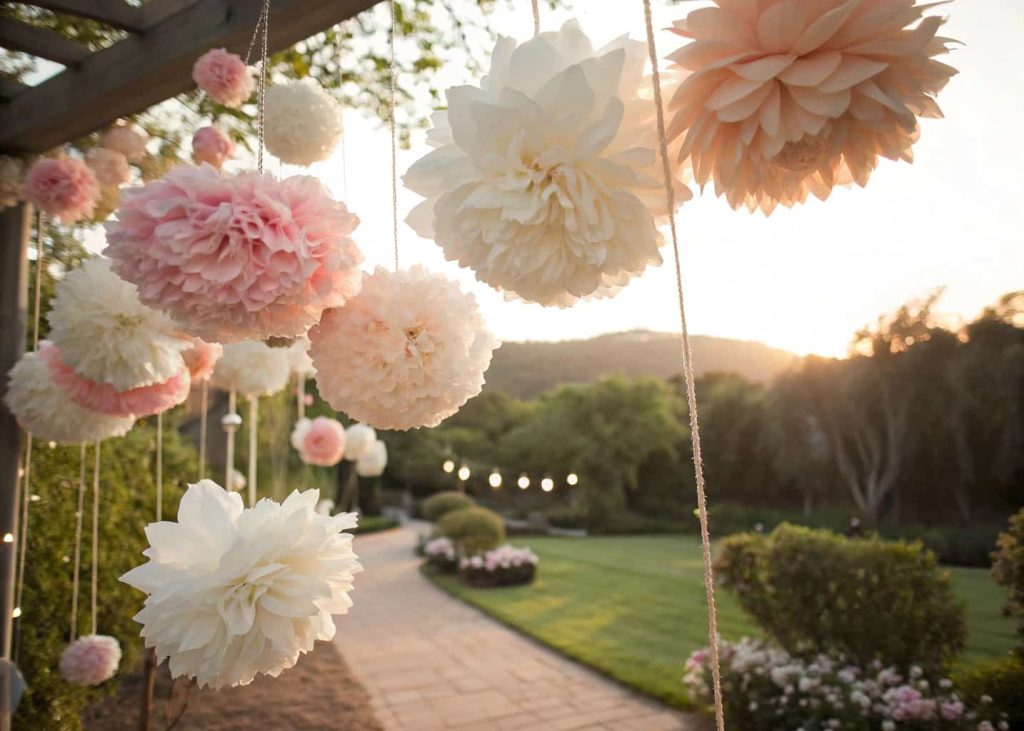
10. Peony from Tissue Paper Layers
Tissue paper peonies are fluffy, full, and breathtakingly beautiful — and they are shockingly simple to make with just a few sheets of tissue paper and some wire. Stack six to eight sheets of tissue paper and fold them accordion style into a fan. Fold the fan in half and twist a piece of floral wire around the center fold tightly. Trim the outer edges into a rounded or pointed shape depending on the petal style you prefer. Then slowly and carefully separate each tissue layer, pulling it upward and toward the center to fluff it into a full round bloom. These peonies are very popular for wedding decorations, baby showers, and photo booth backgrounds because of their full and romantic look.
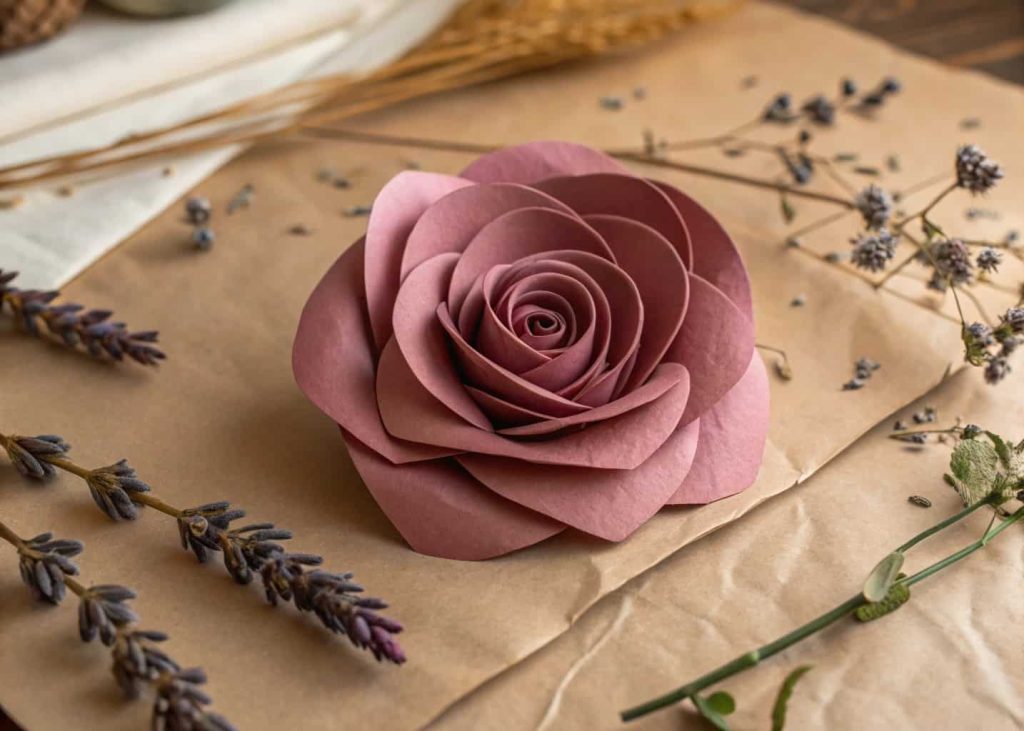
11. Spiral Rose from Card Stock
The spiral rose is a clever single-cut method that turns a circle of cardstock into a perfectly shaped rose. Draw a spiral on a circle of cardstock — it does not need to be perfectly even, organic imperfection actually makes it look more natural and beautiful. Cut along the spiral line from the outer edge all the way to the center. Then starting from the outer end, roll the spiral inward tightly. When you reach the center circle, use it as a flat base and let the rolled petals sit on top of it — they naturally unfurl into a gorgeous rose shape. Secure with a dab of glue on the base. These roses are perfect for card toppers, corsages, and wreath making.
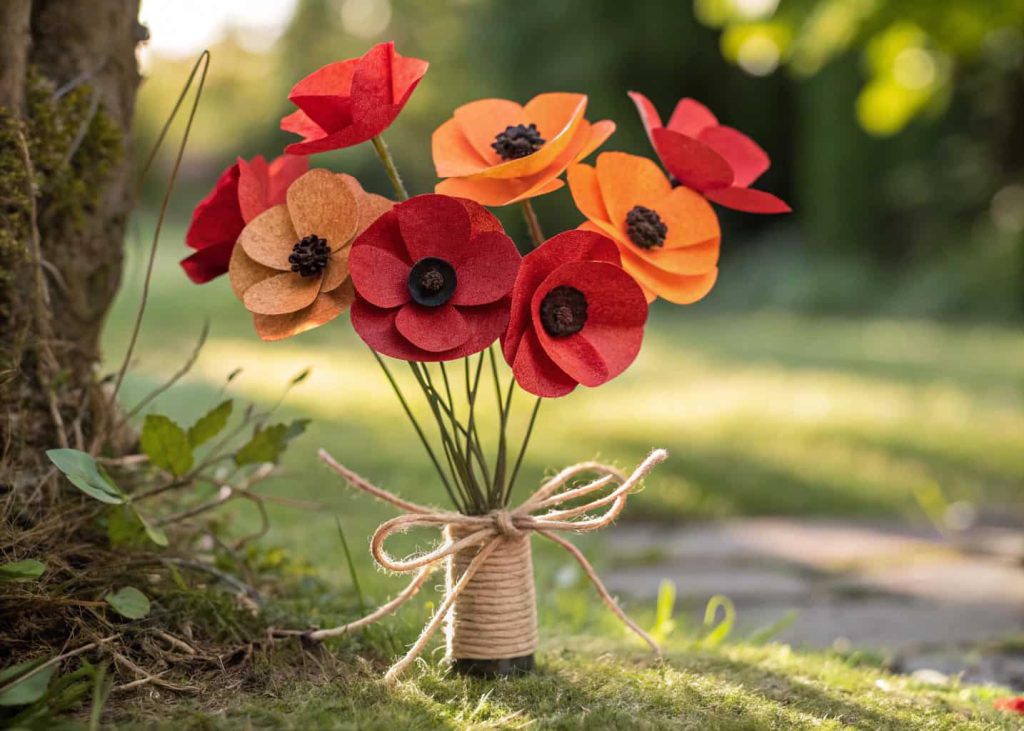
12. Poppy from Tissue and Pipe Cleaners
Paper poppies have a delicate, translucent quality when made with tissue paper that no other flower can quite replicate. Cut out four to six petal shapes from red or orange tissue paper — simple rounded teardrop shapes work perfectly. Crinkle each petal slightly in your hands to give it texture, then layer them together and pinch at the base. Secure the base with a black pipe cleaner twisted around it, which also forms the stem. Scrunch a small ball of black tissue paper and glue it in the center for the stamen. Group several poppies together in different heights for a wildflower arrangement that looks like it was picked straight from a summer field. These are great for nature-themed crafts and art projects.
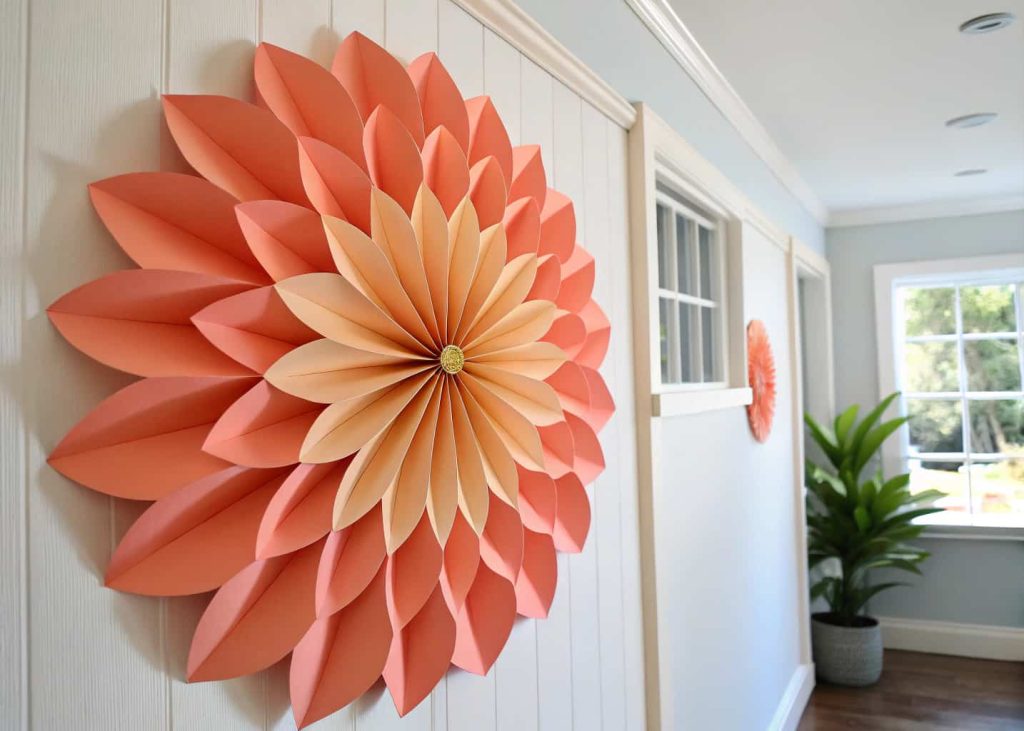
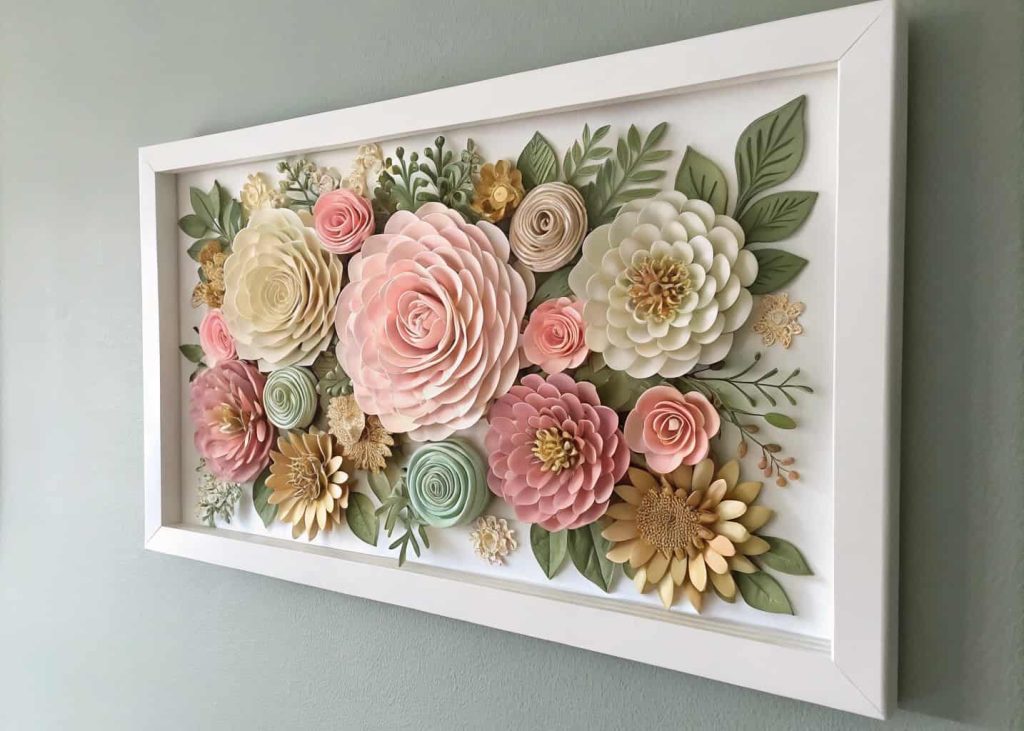
13. 3D Paper Flower Wall Art
Creating a 3D paper flower wall panel is the ultimate paper flower project — it combines multiple techniques and results in a jaw-dropping piece of home decor. Start by making a variety of different flowers in complementary colors using any of the methods mentioned above: rolled flowers, origami blooms, spiral roses, and tissue paper peonies all work beautifully together. Arrange them on a large canvas, wooden board, or thick cardboard backing and glue them down in an overlapping pattern. Vary the sizes and heights by gluing some flowers directly flat and others raised up on small folded paper platforms. Frame it and hang it on a wall for a stunning and completely personalized piece of art that costs far less than anything you would find in a shop.
Conclusion
Paper flower making is one of those crafts that rewards you far beyond the time and money you put into it. Whether you are a complete beginner trying your very first origami lotus, or an experienced crafter attempting a full 3D wall art display, there is always something new to discover and enjoy in this world of paper blooms. The 13 methods shared in this guide cover a wide range of styles, difficulties, and materials — so there is truly something here for everyone. The most important thing is to start, not to aim for perfection. Every petal you fold or roll teaches you something, and every flower you finish is something to feel genuinely proud of. So pick up some paper, choose your favorite method, and let your creativity bloom.