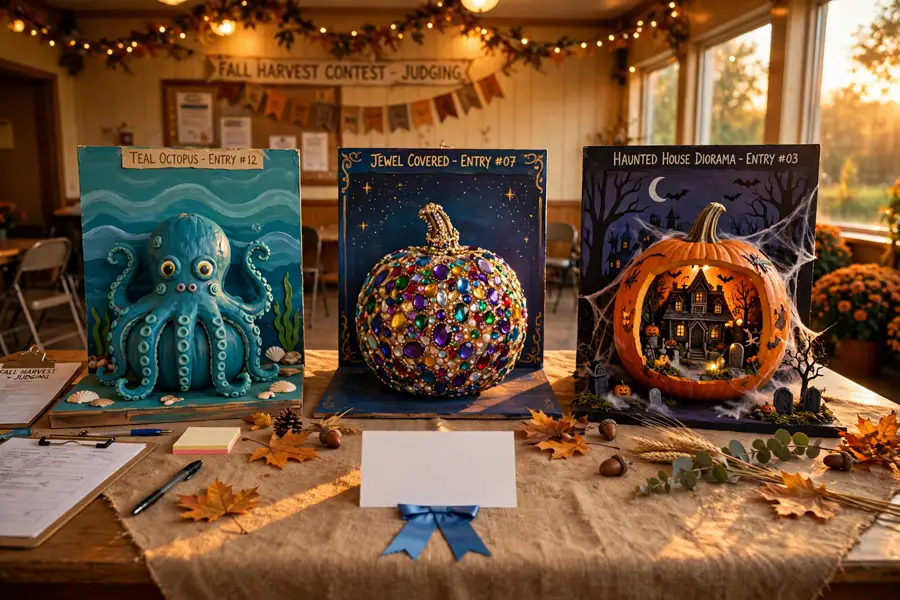
The night before judging is where most pumpkin contests are lost. Entries start to look alike — a triangle-eyed face, a quick coat of paint — and the rushed builds are worse: glued pieces slide off in the car, paint is still tacky at check-in, and a wobbly stack collapses on the judging table in front of everyone.
The entries that win are not painted pumpkins at all. They are little built scenes and characters: one strong concept, assembled in layers that dry in stages, and mounted so the whole thing travels like a single object. Browsing widely for pumpkin decorating ideas for contest season is a good way to gather sparks, but the difference between a spark and a ribbon is structure underneath it.
Below are 17 complete contest entries — scene dioramas, character builds, food look-alikes, animal builds, texture-covered builds, and one group series — each planned to stand out across a room and survive the trip to the judging table. Most are built from a pumpkin or two, acrylic paint, a glue gun, cardboard, and craft scraps you probably already own.
The Pumpkin Contest Formula That Keeps Showpiece Entries Looking Sturdy
- Build on a base board: glue or pin the pumpkin to a painted board, tray, or cake stand first, so every added piece joins one solid unit instead of balancing on a round, rolling fruit.
- Lock a three-color palette: pick two main colors plus one metallic or neon accent before you start, because a limited palette reads as designed from across the room while rainbow clutter reads as rushed.
- Build for the car ride: work in stages across two evenings so paint and glue fully cure, and test-carry the finished entry across the room before judging day.
- Keep one hero piece removable: attach the tallest or most fragile element — a hat, a flag, a chimney — with a pin or a blob of museum putty so it travels flat in a box and pops on at the table.
Put together, that looks like this: a caramel-apple pumpkin glued to a matte black board, coated in glossy chestnut-brown paint with rainbow sprinkles pressed into the top, a wooden dowel for the apple stick, and a small paper name flag that pins in only after the entry is set down.
| When | Do this | Why it matters |
|---|---|---|
| Two evenings before | Wash and dry the pumpkin, paint all base coats, cut cardboard pieces | Base paint needs a full cure or glued pieces peel it off |
| One evening before | Assemble the build on its base board and let glue set overnight | Overnight curing is what survives the car ride |
| Judging morning | Add removable pieces, touch up edges, photograph the entry | Fresh details stay crisp, and the photo is your backup record |
1. Dinosaur Breaking Out of the Egg
Paint a large oval pumpkin in matte cream with pale green speckles so it reads as a giant egg, then glue a jagged ring of white craft-foam shell shards around a black oval painted near the top. A toy dinosaur head and two small arms poke through the opening — pin them from inside with floral wire pushed through the shell so nothing depends on glue alone. Set the egg in a nest of shredded kraft paper on a 16-inch board painted moss green, with three small foam eggs beside it. The trade-off is honesty-worthy: a good toy dinosaur costs more than the pumpkin, so borrow one rather than buying.
Get the look:
- Main piece: oval pumpkin painted as a speckled egg
- Supporting piece: toy dinosaur head and arms wired through the shell
- Texture or material: craft-foam shell shards and shredded kraft paper nest
- Finishing touch: three mini foam eggs on a moss-green board
2. Barnyard Hen Sitting on Her Nest
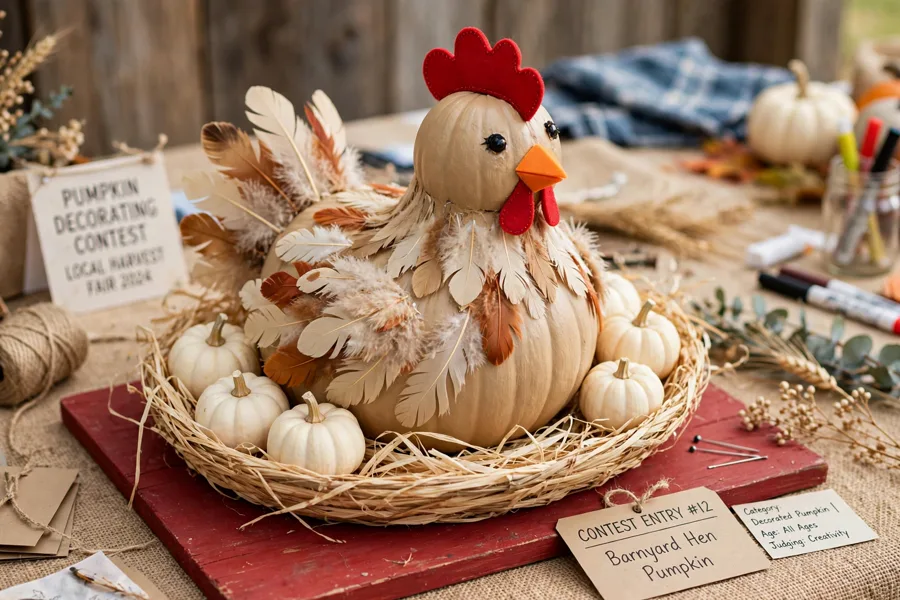
Build the hen from two pumpkins: a round 10-inch pumpkin as the body, painted warm buff, and a 5-inch pumpkin as the head, fixed at a tilt with a skewer-and-glue joint. Glue on overlapping rows of cream and rust craft feathers across the back, a red felt comb on top, and an orange foam triangle beak. She sits in a shallow basket lined with raffia, surrounded by four mini white pumpkins as eggs, all screwed to a barn-red board. Feathers shed a little no matter what glue you use, so pack a few spares in your repair kit. For more at-home builds in this spirit, these easy spooky Halloween crafts are a good warm-up.
Color note: Buff, cream, and rust keep the hen soft and readable, while the single red comb and barn-red board give judges one bright point to land on from across the hall.
3. Double Cheeseburger Pumpkin Stack
Stack two squat pumpkins as the bun, painted golden tan with tiny cream sesame-seed ovals dotted over the top one. Between them, layer the fillings as flat, painted shapes glued around the middle: a ruffled ring of lime-green felt for lettuce, a flat scarlet disc for tomato, and a square of orange craft foam, corners drooping, for cheese. Using the FolkArt Multi-Surface Satin Acrylic Paint set at $15.59 covers every layer color in two coats, which matters because thin paint over pumpkin skin streaks under contest lighting. The honest downside: a stacked entry is top-heavy, so run a bamboo skewer through both pumpkins and into the board. On a diner-style checked paper liner, it reads as lunch from ten feet away.
Why it works:
- Flat painted layers keep the silhouette clean instead of lumpy
- Every “ingredient” is a different material, so it photographs with depth
- The skewer-and-board build travels as one solid piece
4. Deep-Sea Octopus With Curly Legs
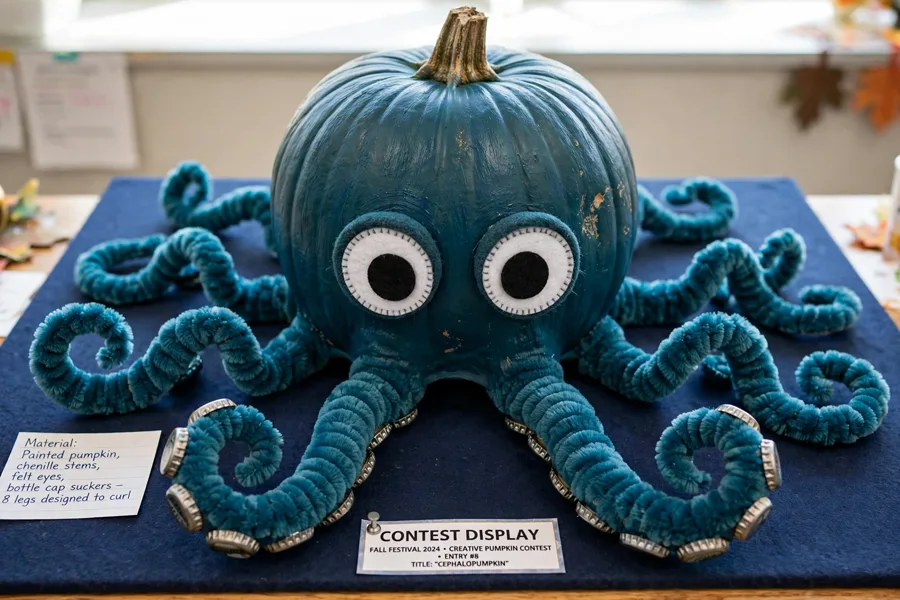
Paint a wide, low pumpkin in deep teal and let it dry overnight. For legs, bend eight 18-inch lengths of thick chenille stems into curls, wrap each around a pencil to set the spiral, and hot-glue the ends under the pumpkin’s base so the curls spill across a navy board like water. Add two large white-and-black felt eyes low on the front and a ring of pale bottle-cap suckers along two front legs. The curl in the legs flattens if the pumpkin rests directly on them, so raise the body on a hidden 2-inch foam block. If your contest table sits near a window, this is the entry that stops kids mid-stride.
Texture note: The whole entry is a texture contrast — smooth satin paint against fuzzy chenille curls and hard metal caps — and that contrast is what makes a single-color build look rich instead of flat.
5. Haunted House on Pumpkin Hill
Choose the widest, flattest pumpkin you can find and paint it deep plum-black as the “hill.” On top, glue a small haunted house folded from black cardstock — crooked roof, a leaning chimney kept removable for travel — with tiny orange tissue-paper windows lit from behind by a battery tea light set into a hole in the roof. A winding path of small gray pebbles curves down the pumpkin’s side to a crooked picket fence of craft sticks at the base, all on a black board dusted with fake cobweb. Cardstock wilts in damp evening air, so build the house double-walled; it adds ten minutes and saves the silhouette. This is the entry for anyone whose strength is patience rather than painting.
Best for: Evening judging under low light, where the lit windows do the showing off for you.
6. Gumball Machine With a Bowl of Minis
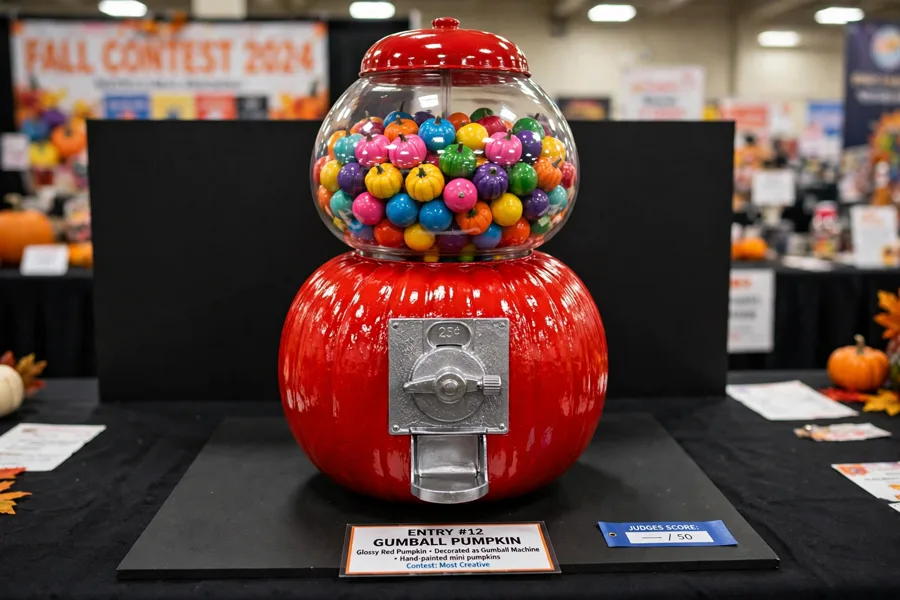
Paint a perfectly round pumpkin glossy red and let it cure a full day. Near the base, glue on a silver-painted rectangle as the coin plate, with a smaller black square and a tiny lever cut from craft foam. Turn a clear acrylic bowl upside down on top, fill it with mini pumpkins painted in gumball colors — cherry, lemon, turquoise, grape — and cap it with a red foam disc lid and a knob. The trade-off is weight: a bowl of real minis is heavy, so for transport, carry the bowl separately and set it on at the table. It sits on a black board, and under hall lights the clear bowl gleams like real glass.
Budget note: The bowl and foam are the only real costs here; mini pumpkins are the cheapest pumpkins at any patch, and a dented clear bowl from a thrift shelf works as well as a new one.
7. Witch’s Cauldron Bubble-Over
Paint a round pumpkin matte black and perch it on three short wooden-ball feet glued to a round slate board. Across the top, build the brew: overlapping blobs of neon-green foam clay pushed over the rim so they drip down the sides, with white cotton batting teased around the edges as steam. Lean a small twig broom against the side and scatter three plastic spiders on the slate. Foam clay stays slightly soft for hours, so this top must be finished the evening before, not the morning of, or the drips slump flat. Styled alongside the kind of scenes in these Halloween decor ideas, it holds its own as pure tabletop theatre.
Style note: Matte black against slime green is the whole trick — the flat, chalky cauldron makes the glossy green brew look wet and freshly stirred.
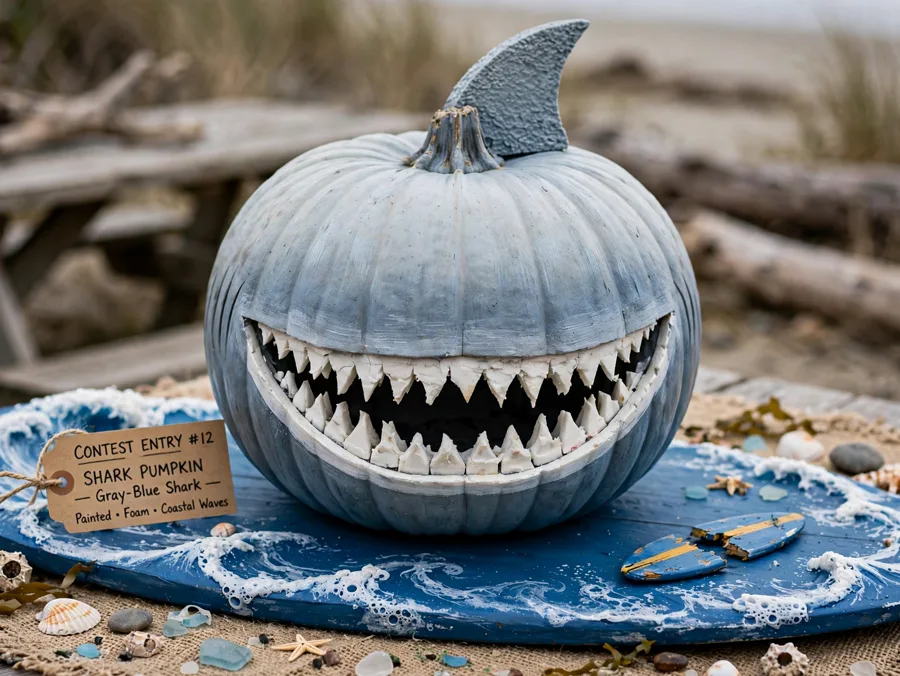
8. Shark Attack on a Blue Board
Paint a tall pumpkin in gradient gray-blue, darker on top and pale at the belly. Around the front, glue a wide open mouth: an oval of deep red craft foam ringed with two rows of white foam teeth, top row pointing down, bottom row up. Add a foam-board dorsal fin on top, fixed with two skewers, and black bead eyes on either side. The board underneath is painted ocean blue with white foam wave crests, and a small toy swimmer’s surfboard — snapped in half — floats beside the shark. Foam teeth are the first thing to knock loose, so use the fit check below and pack spare teeth. In a school contest, this one collects a crowd before judging even starts.
Fit check: Before gluing the fin, hold the finished pumpkin upright and measure the total height — many contest tables sit under banners or shelves, and the entry must clear 24 inches of vertical space without the fin bending.
| If the judges love… | Enter this build | Why it lands |
|---|---|---|
| Humor | Cheeseburger stack or shark attack | One clear joke, readable from across the room |
| Craft skill | Haunted house hill or jewel-covered build | Many small, neat parts reward a close look |
| Cuteness | Barnyard hen or caterpillar series | Soft shapes and faces win family-judged contests |
| Drama | Volcano island or witch’s cauldron | Height, glow, and one bold color contrast |
9. Potted Cactus That Never Needs Water
Set a squat pumpkin into a real terracotta pot one size larger than the pumpkin, wedged steady with crumpled paper under a layer of gravel. Paint the pumpkin cactus green and stipple it with short white paint-pen dashes in vertical rows for spines — paint, not pins, because real pins and toothpicks get entries disqualified at some family contests and are a hazard around small hands. Crown it with one large pink tissue-paper flower wired to the stem. The pot makes this the most stable entry on the list, though also the heaviest to carry any distance. On the judging table it reads instantly, even in a bad photograph.
Easy swap: Trade the pink flower for a tiny knitted hat and scarf, and the cactus becomes a winter porch entry for a December contest instead.
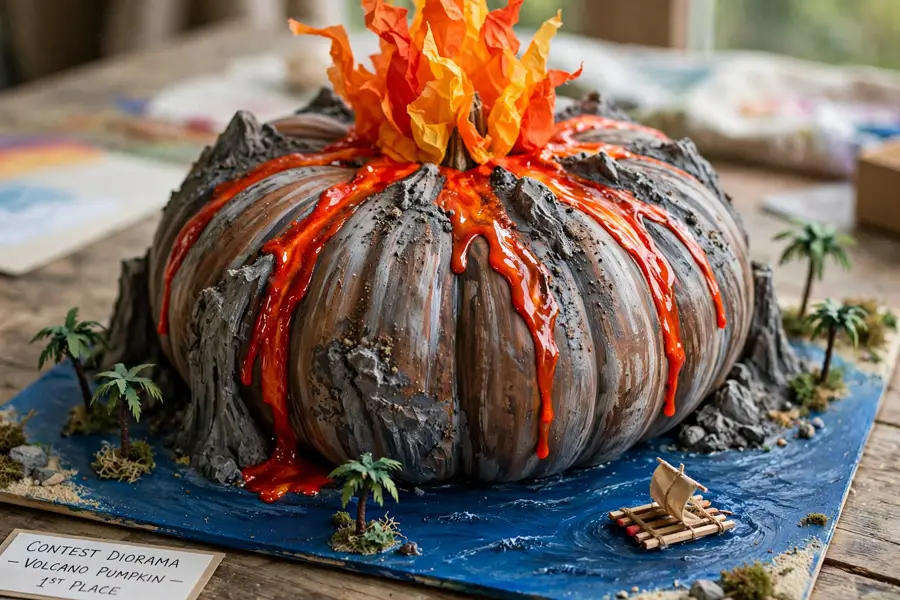
10. Volcano Island Erupting at the Stem
Paint a wide pumpkin in streaked browns and grays as a volcanic island, then build the eruption at the stem: thick drips of scarlet and orange paint running down one side, finished with a flame-shaped tuft of orange and yellow tissue paper pinned at the top. Around the base, on a board painted deep sea blue, stand three miniature palm trees — green paper fronds on twig trunks — and a tiny cardboard raft. Gloss medium over the lava drips makes them look molten under lights, but gloss also shows every fingerprint, so handle the finished pumpkin by the board only. This build suits anyone who paints better than they construct.
Space note: The island needs a board at least 20 inches wide; on a smaller base the palms crowd the pumpkin and the scene collapses into clutter, so check your board size before choosing this entry.
11. The Very Long Caterpillar (Group Series)
Line up five mini pumpkins as body segments, painted in alternating leaf and lime greens, each joined loosely with a short skewer so the row can curve slightly on its leaf-shaped green board. The head is a 6-inch pumpkin painted warm red with two black pipe-cleaner antennae and simple painted eyes. Scatter painted paper leaves along the board, plus one with a crescent bite cut out. As a series, it is forgiving: one imperfect segment hides among five, which is exactly why it suits a family entering together, each person painting a segment. The one real risk is segments rolling apart in transit — the skewers and a shallow lip of glued moss along the board’s edge fix that. More group-friendly material hunting can start with these dollar store Halloween crafts.
The formula: red head pumpkin + five green mini segments + leaf board with a bitten paper leaf
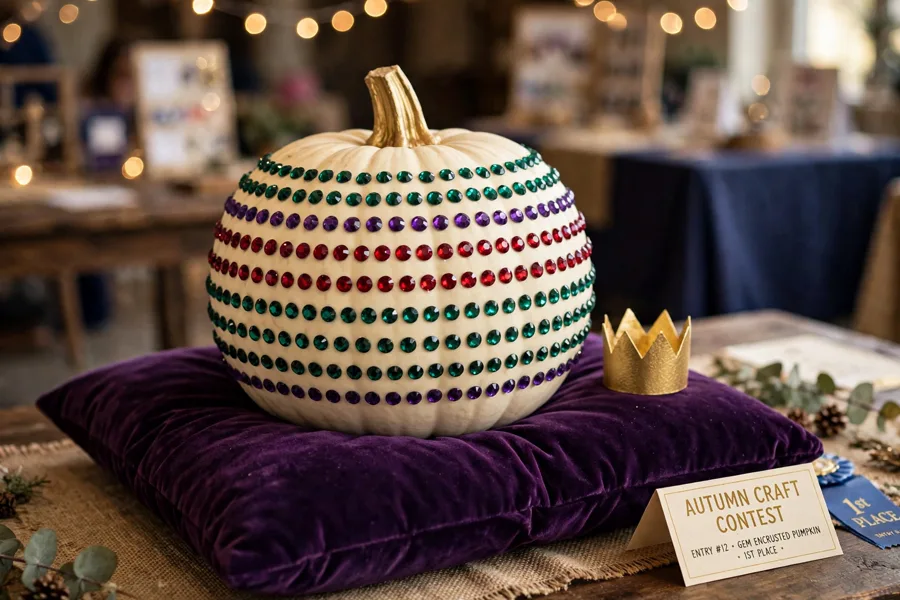
12. Jewel-Covered Royal Pumpkin
Cover a smooth, pale pumpkin in dense rows of plastic gems — amethyst, ruby, and emerald — set in rings that follow the pumpkin’s ribs. Leave the stem bare and paint it gold, then present the pumpkin on a deep purple velvet cushion with a small gold cardstock crown leaning against its side. Work in one rib-section at a time and let each cure before turning the pumpkin, or the gems slide into each other; the full cover honestly takes two evenings. The result is the most light-catching entry on any table. It is also the one kids at a neighborhood contest will ask to touch, so a small “please look, don’t touch” tent card is worth adding.
Seasonal swap: Switch the gems to pearl, silver, and ice blue and set the pumpkin on white velvet, and the same build becomes a winter-ball entry for a holiday decorating contest.
13. Beehive With a Swarm of Mini Bees
Wrap a tall pumpkin in horizontal rings of thick jute rope, gluing as you go, over a base coat of warm honey gold, so the whole fruit reads as a coiled hive. Near the bottom, paint a small black arch as the hive entrance. The swarm makes the entry: six foam balls painted yellow with black stripes, each on a curled wire, hovering at different heights from a hidden skewer cluster behind the hive, with translucent vellum wings glued on top. Rope wrapping takes longer than painting — budget a full evening — and the first ring must cure before the rest stack on it. From the doorway, the hovering bees give it motion no flat entry has.
Why it works:
- The rope texture is visible from far away, unlike paint alone
- Bees at different heights make the entry look alive in photos
- Everything is glued or wired to the board, so the swarm travels safely
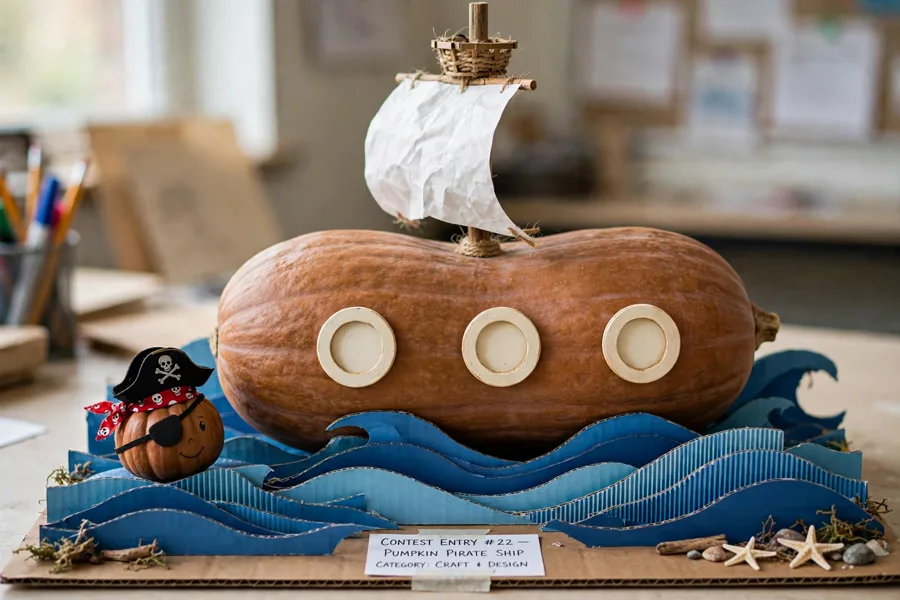
14. Pirate Ship Riding Cardboard Waves
Lay an oblong pumpkin on its side as the hull, painted walnut brown with three cream portholes down the flank, and glue it to a board covered in layered arcs of blue-painted cardboard waves. A dowel mast rises from the top, pinned through the pumpkin, carrying a white paper sail with a simple black skull-and-crossbones, plus a tiny crow’s-nest cup under it. A red mini pumpkin wearing a foam eye patch captains the deck. Paper sails are the weak point — a bent sail looks tired instantly — so glue the sail to a thin card backing and keep the mast removable for the car. For a family that builds together, everyone can own one part: hull, sail, waves, captain.
Get the look:
- Main piece: oblong pumpkin hull in walnut brown
- Supporting piece: dowel mast with a card-backed paper sail
- Texture or material: layered cardboard waves and jute rigging lines
- Finishing touch: mini pumpkin captain with a foam eye patch
15. Fox Curled in Autumn Leaves
Paint a round pumpkin burnt orange, then add a cream oval muzzle patch low on the front and a matching cream chest patch beneath it. Two stiff felt triangles in orange with cream tips stand as ears, and the tail is the showpiece: a curved length of orange faux-fur trim or a feather boa, pinned along one side and fanned across a board scattered with real or fabric autumn leaves. Painted black nose, closed curved eyes, done. Faux fur sheds at the cut ends, so seal them with a line of glue before the contest, not after the first photograph. On a leaf-strewn board this is the entry judges describe as “the pretty one.”
Color note: Burnt orange, cream, and one deep brown board keep the fox warm and woodland-toned; resist adding bright colors, because the soft autumn palette is exactly what separates it from cartoon entries.
16. Ice Cream Sundae in a Silver Bowl
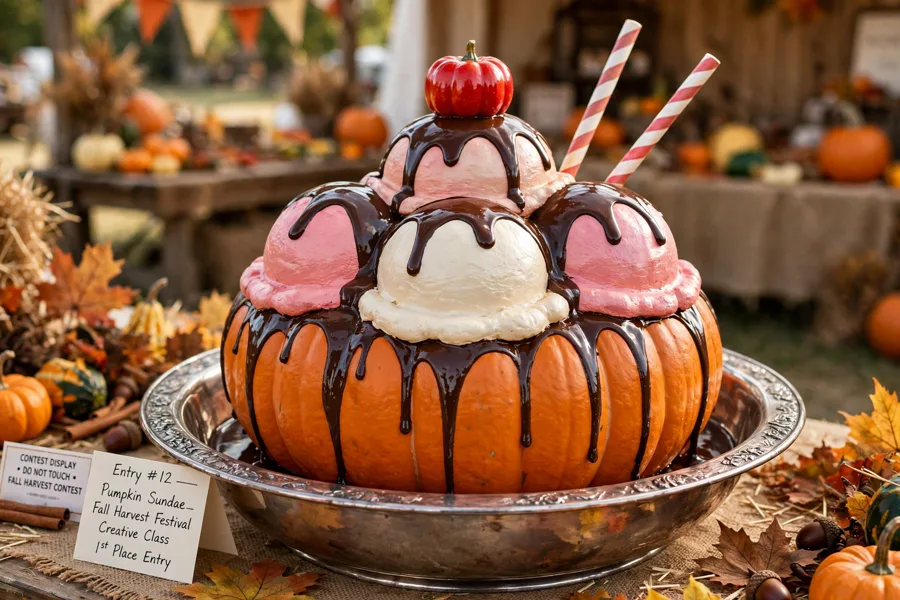
Set a wide, squat pumpkin into a large silver serving bowl or cake stand as the sundae glass. Paint the pumpkin’s top two-thirds as scoops: one band of pale strawberry pink, one of cream, with thick chocolate-brown drips running down from the crown. A mini pumpkin painted glossy cherry red, stem and all, sits at the very top, and two striped paper straws angle out behind it. Sauce drips painted freehand wobble easily, so draw them in chalk first and fill them in one slow pass. The bowl hides the pumpkin’s base completely, which makes this the most forgiving entry here for an oddly shaped pumpkin from the discount crate.
Texture note: Gloss paint on the scoops and cherry against the brushed metal bowl gives the whole entry a just-served shine, while the matte straws keep it from tipping into plastic-looking.
17. Friendly Robot With Bottle-Cap Eyes
Choose the squarest pumpkin you can find and paint it brushed silver-gray. Glue on two bottle-cap eyes with black bead pupils, a rectangle of black craft foam as a smiling speaker-grille mouth, and a chest panel of colored foam squares and one red bottle-cap “button” on the board in front of it. Antennae are chenille stems tipped with foam balls, and the arms are short lengths of flexible silver dryer-vent-style tubing pinned at the sides — or, cheaper, cardboard tubes wrapped in foil. Metallic paint shows brush strokes badly, so use a sponge for the final coat. This is the strongest entry for a school contest with a technology or STEM theme running through it.
Best for: School contests with a STEM or book-week theme, where the robot reads as both character and invention.
| Transport check | How | Disaster it prevents |
|---|---|---|
| Wiggle test | Lift the entry by its board and tilt it 20 degrees each way | Loose pieces sliding off at the first speed bump |
| Box fit | Carry the entry in a box only slightly larger than its board | Rolling, tipping, and crushed tall pieces |
| Repair kit | Pack glue dots, spare teeth/feathers/gems, and a paint pen | A small knock becoming a ruined entry |
| Photo check | Photograph the finished entry from the front before leaving | Forgetting how removable pieces were arranged |
Arrive Like You Meant to Win
None of these builds needs rare supplies or a free weekend — they need a decision made early, paint that is allowed to dry, and a base board that turns a round fruit into a stable little stage. Pick the entry that fits the judges in front of you, build it in two calm stages, and let the other contestants do the last-minute gluing.
Your one next step: tonight, choose your entry from the seventeen above and buy or borrow the pumpkin in the shape it needs — the right shape, bought early while the patch is full, is the single decision every winning build on this list depends on.