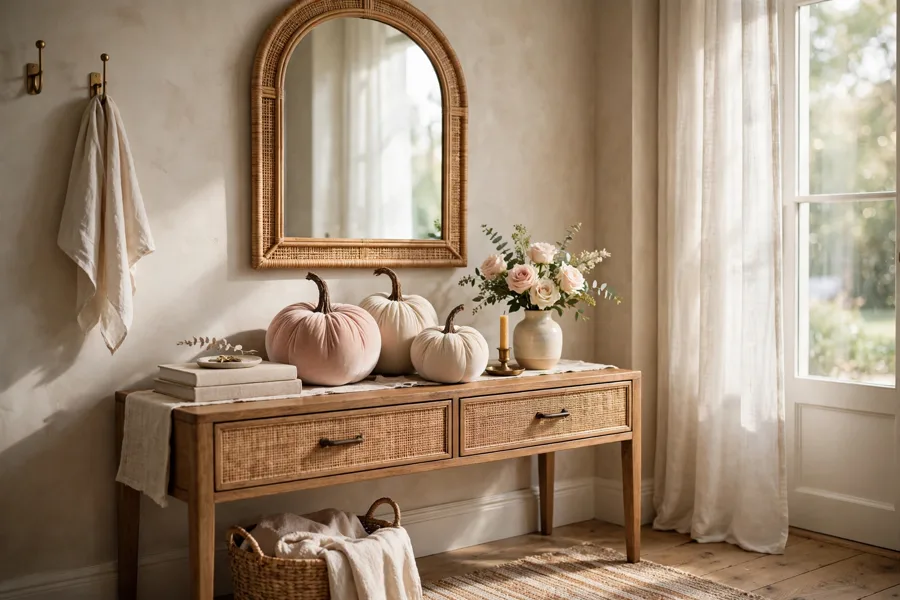
You buy a pumpkin with every intention of making it pretty, and somehow it still ends up looking like a party-store prop — a wobbly painted face, a streak of neon glitter, plastic shine in every photo. “Cute” is the hardest fall look to land, because the line between sweet and tacky is mostly about restraint, and most decorating advice pushes you to add more.
The pumpkins that stay on the pretty side follow one rule: one soft idea per pumpkin, done properly. A single velvet texture, one oversized bow, one cluster of pearls — then they stop. Soft colors do the rest, because blush, cream and sage read as decor, while bright orange with black reads as costume.
These 13 cute pumpkin ideas are all about that restraint: dressed-up pumpkins for porches, mantels and tables, in fabric, ribbon and flowers, and nearly every one starts with a plain pumpkin and things already in a craft drawer or linen closet.
The Cute Pumpkin Formula That Keeps Fall Decor Looking Sweet Without Turning Tacky
- Start with a soft base: choose white, cream or pale blush pumpkins — real Cinderella varieties or smooth foam ones — because a gentle base color is what keeps every later detail on the pretty side of the line.
- Pick one dressing, not three: each pumpkin gets a single treatment — velvet, a bow, pearls, flowers — because one clear idea reads as styled, while three together read as a craft stall.
- Mind the scale: minis (3–4 inches) belong in bowls, garlands and place settings, while one larger pumpkin (10–14 inches) anchors a porch or mantel — mixing the wrong size into the wrong spot is what looks cluttered.
- Keep one element removable: bows, bands and toppers should lift off or untie, so the same pumpkins can be re-dressed from early fall into Halloween week and back again.
Put together, that looks like a cream 12-inch pumpkin on the porch step wearing nothing but a wide blush velvet bow, with two bare white minis beside it and a sprig of dried flowers tucked behind the stem.
| Palette | Colors | Looks Best In |
|---|---|---|
| Blush and Cream | Blush pink, ivory, warm white, natural wood stems | Living rooms, bedrooms, dining tables |
| Sage and White | Soft sage green, white, eucalyptus grey-green | Kitchens, entryways, farmhouse spaces |
| Dusty Blue Toile | Dusty blue, porcelain white, a touch of navy | Porches, hallways, traditional rooms |
| Rose Gold Glow | Rose gold, cream, champagne | Coffee tables, mantels, evening light |
If your rooms are compact, this small space Halloween decor uses the same soft approach at apartment scale.
1. Blush Velvet Pumpkin Trio
Take three foam or fabric pumpkins in graduated sizes — roughly 8, 6 and 4 inches — in blush pink velvet with natural twisted stems. Set the largest on a small stack of two linen-covered books on the coffee table, the medium beside it at table level, and the smallest on the books in front, so the trio forms a soft triangle. Velvet does all the work here; add nothing else to the pumpkins themselves. The honest catch: cheap velvet can look shiny under lamps, so turn each one in the shop light before buying — matte pile only.
Get the look:
- Main piece: blush velvet pumpkins in 8, 6 and 4 inches
- Supporting piece: two linen-covered books as a low riser
- Texture or material: matte cotton velvet with real-look twisted stems
- Finishing touch: one sprig of dried gypsophila tucked behind the largest stem
2. Oversized Bow-Topped White Pumpkin
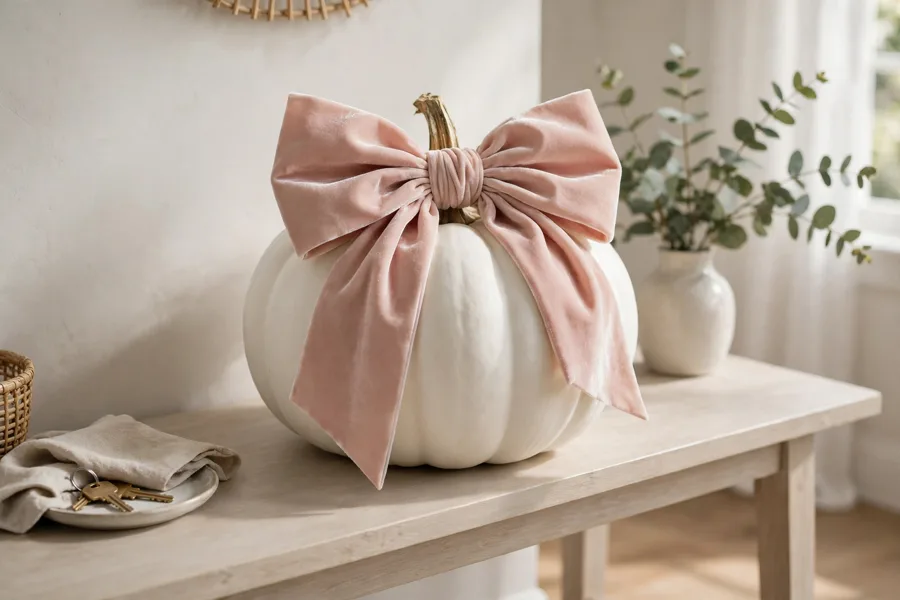
Start with one smooth white pumpkin, real or foam, about 10 inches across. Tie a single oversized bow from 2.5-inch-wide blush velvet ribbon — loops about 5 inches wide, tails cut at an angle and left long enough to drape 4 inches down the pumpkin’s side. Fix the bow at the stem with a discreet pin or a dot of hot glue, and let it sit slightly off-center, which looks softer than dead center. Nothing else goes on this pumpkin; the bow is the whole idea, and that restraint is exactly why it photographs so well on an entry table.
Color note: blush on white is the sweetest pairing, but swap the ribbon to sage and the same pumpkin turns farmhouse — the white base works with every soft palette in the first table.
3. Floral-Topped Pumpkin Arrangement
Cut a shallow 3-inch circle in the top of a foam pumpkin (or use a real one and set a small jar inside) and fill it with a compact arrangement: three blush garden roses, two cream ranunculus, a few stems of white waxflower and one trailing piece of ivy, all trimmed short so the flowers sit like a crown rather than a bouquet. The pumpkin becomes the vase, and the arrangement should be wider than the opening by about 2 inches on each side. Real flowers last 4–5 days here; silk versions carry the whole season.
Why it works:
- The pumpkin reads as a container, not a costume, so it suits a dining table.
- Short stems keep the arrangement low enough to see over at dinner.
- Blush and cream flowers repeat the palette instead of fighting it.
4. Gingham Fabric-Wrapped Pumpkin
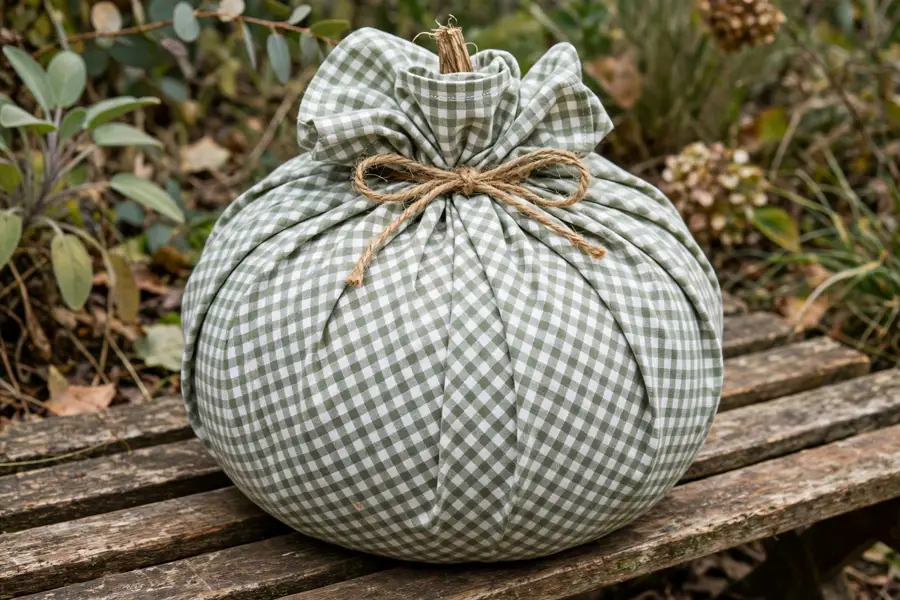
Cut a square of red-and-white or sage-and-white gingham cotton, about 24 inches for a medium pumpkin. Set the pumpkin in the center, gather the fabric up around the stem in soft pleats, and tie it tightly with twine so the gathers fan out like a fabric collar. Tuck a short real twig beside the stem to finish it. The checked fabric gives farmhouse pattern without a drop of paint, and the whole wrap takes under ten minutes. Wrinkles are the enemy — iron the square first, because gingham shows every crease once it is stretched.
Texture note: woven cotton gingham against the pumpkin’s smooth skin gives that quilted, gathered look; printed polyester gingham stays shiny and slips, so check the fabric content before you cut.
5. Pearl-Cluster Stem Pumpkin
Take a smooth cream pumpkin and leave its sides completely bare. Around the base of the stem, glue a dense cluster of flat-backed pearl beads in mixed sizes — 4, 6 and 8 mm — packed tight like a little crown, roughly 2 inches across. A few pearls can trail down one rib, no more than five, and then stop. Against the plain cream surface the cluster reads as jewelry rather than decoration, which is what keeps it elegant. Use a glue gun on low heat for foam pumpkins; on real pumpkins, tacky glue holds better on the waxy skin.
Style note: mixed pearl sizes are the detail that matters — one uniform size looks like a sticker sheet, while the mix reads as a handmade cluster.
6. Blue Toile Decoupage Pumpkin
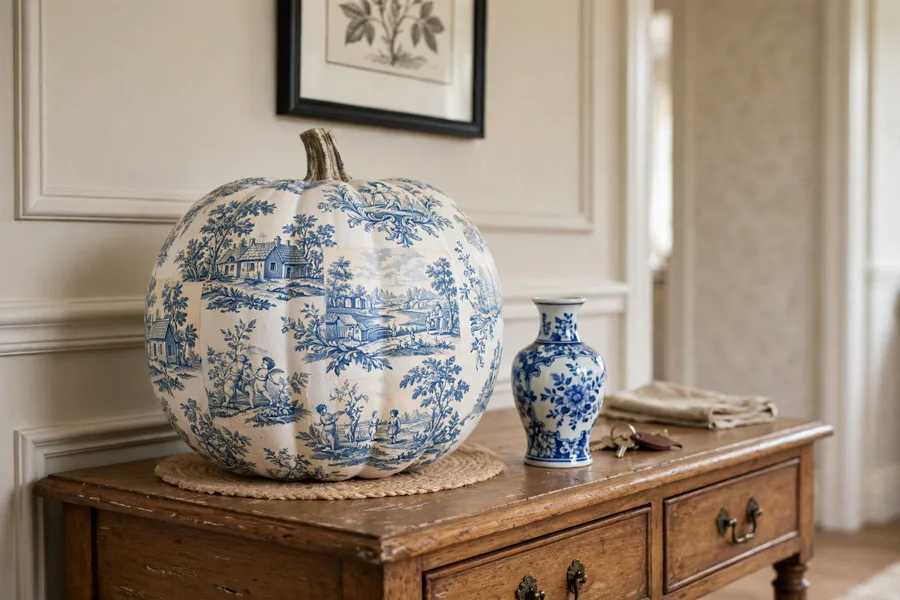
Cut the scenic panels from two blue-and-white toile paper napkins, peel away the backing layers so only the printed ply remains, and smooth the pieces onto a white foam pumpkin with decoupage glue, working from the stem downward and letting the pattern wrap the ribs. Overlap edges slightly and align one main scene — a cottage, a bridge — at the front. Seal with a second thin coat once dry. The result looks like porcelain, which makes it a beautiful hallway piece. It is the fiddliest idea here: budget 40 minutes and expect the first panel to wrinkle before you get the rhythm.
Fit check: before gluing, hold the napkin panel against the pumpkin’s widest point — if the scene is wider than about 5 inches it will distort around the ribs, so choose the smaller motifs for narrow pumpkins.
| Pumpkin Type | Looks Best For | Watch Out For |
|---|---|---|
| Real (white/Cinderella) | Porch stacks, floral toppers, place settings | 2–4 weeks of life; keep off damp floors |
| Foam | Decoupage, pearl work, wreaths, garlands | Plastic shine — choose matte finishes or paint first |
| Fabric / velvet | Trios, bowls, shelves, coffee tables | Dust shows fast; needs a lint roller weekly |
7. White Mini Pumpkin Garland
Thread nine to eleven white mini pumpkins, 3 inches each, onto a length of jute twine, passing the needle through the stems (foam minis) or tying a small loop around each stem (real minis). Between every pumpkin, add a knot and one small wooden bead so the spacing stays even. Drape the garland across the mantel in two soft swags, letting each swag dip about 8 inches at its lowest point, and anchor the ends behind something heavy. Real minis make this heavy — more than about eleven and the swag pulls its anchors forward.
Space note: measure the mantel first and cut the twine 1.5 times that length; a garland cut to the exact width hangs flat and loses the swag entirely.
For more ways to carry this gentle look through the whole room, here is how to build a Halloween living room aesthetic without it tipping into spooky.
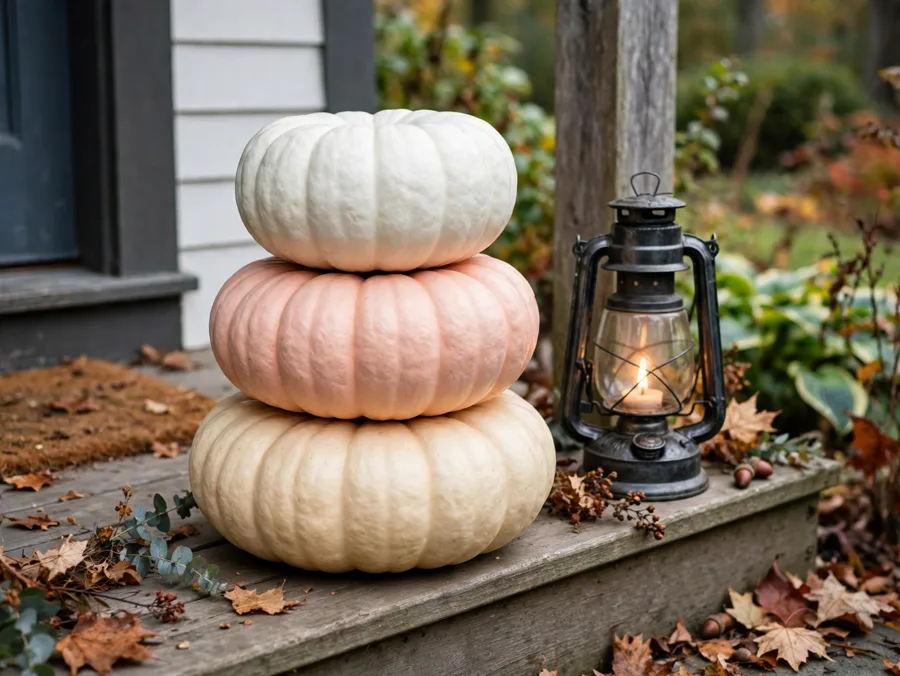
8. Blush and Cream Porch Stack
Stack three flat Cinderella-style pumpkins beside the front door: a 14-inch cream at the bottom, a 12-inch blush in the middle, and a small 8-inch white on top, turned so each stem sits slightly off the one below for a relaxed, settled look. Wedge a little moss or a folded burlap scrap between layers if they rock. Add one lantern at the base and nothing else — the stack is the statement. Real pumpkins stacked like this last well, but check the bottom one weekly; the first soft spot always starts underneath.
The formula: wide cream base pumpkin + blush middle layer + small white topper beside one simple lantern.
9. Lace-Banded Table Pumpkin
Take one medium white or pale-orange pumpkin and wrap a single band of ivory lace trim, about 2 inches wide, around its middle, fixing the overlap at the back with two pins or a dot of glue. The band should sit at the pumpkin’s widest point so it reads like a belt. Set it on a small wooden stand or a stack of plates at the center of the table, with plain greenery around the base. That single band is all it needs — a bow as well would tip it over into fussy, so resist.
Easy swap: trade the lace for a strip of burlap and the same pumpkin turns rustic enough for a farmhouse table — the method does not change at all.
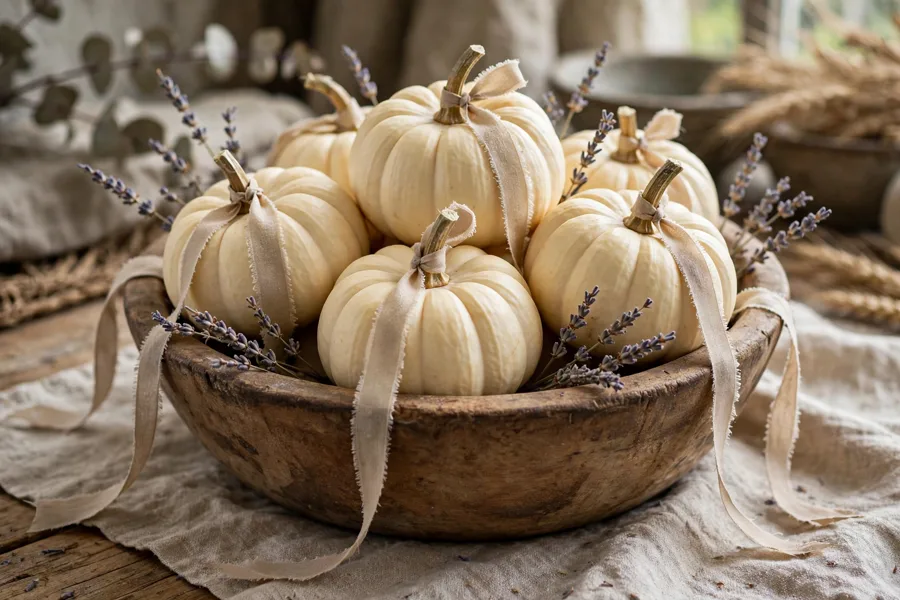
10. Ribbon-Tailed Minis in a Dough Bowl
Fill a wooden dough bowl, about 14 inches long, with seven mini pumpkins in cream and the palest orange. Tie a 6-inch length of narrow ribbon — blush velvet, sage grosgrain, cream satin — around each stem and let the tails drape over the pumpkins’ sides like streamers. Tuck two or three sprigs of dried lavender between them. The ribbon tails are what lift this from “bowl of pumpkins” to styled centerpiece. If you are buying minis, the Pottery Barn faux mini pumpkin vase filler ($34.50) is the set to measure others against for shape and matte finish. Real minis are cheaper, though, and soften the look.
Budget note: real minis at a market stall cost a fraction of faux sets and only need to last the season — spend the savings on one good ribbon spool you will reuse at Christmas.
11. Pastel Pumpkin Tiered Tray
Style a two-tiered tray — wood or white metal — on the kitchen counter or dining table. On the top tier, cluster three faux mini pumpkins in blush, cream and soft sage with a short faux eucalyptus sprig tucked between them. On the bottom tier, set two more minis beside a small blush candle and a tiny stack of dessert plates, so the tray still works at dinner. Faux pumpkins matter here: real minis sweat and stain the tray as they age. The honest downside is upkeep — a tiered tray gathers stray keys and mail fast, and it only reads as styled while the pumpkin cluster stays the tallest thing on it.
Seasonal swap: after Halloween, swap the candle for two small pinecones and tie a cream bow on the handle — the tray reads as late-autumn and lasts to Thanksgiving.
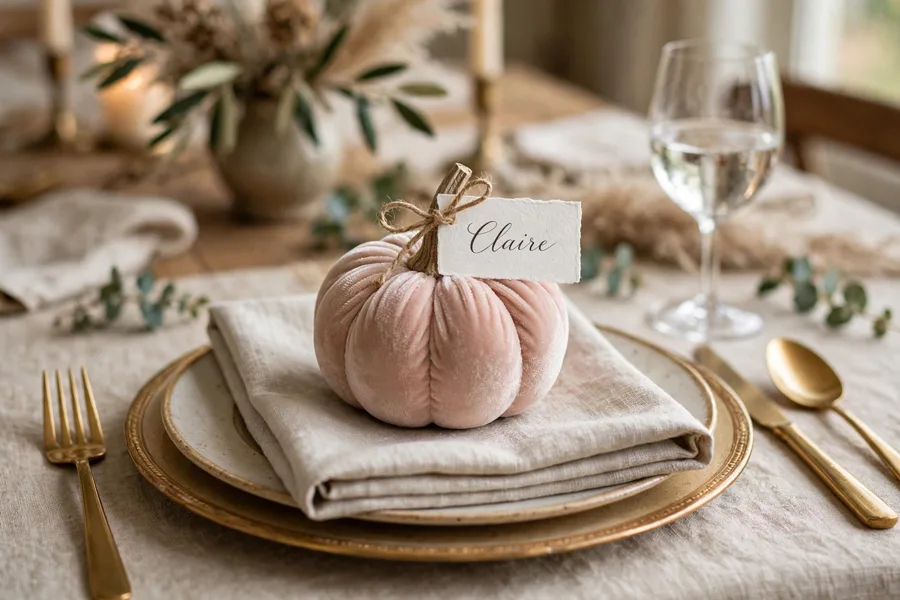
12. Velvet Pumpkin Place Settings
Set one mini velvet pumpkin, about 3 inches, in blush or cream on each dinner plate, resting on the folded napkin rather than the china. Tie each guest’s name card to the stem with a short length of twine or narrow ribbon. Six to eight of these down a table gives you a full centerpiece and place markers in one move, and guests can take theirs home. The trade-off is storage: velvet minis crush in a packed box, so keep them in a single layer with tissue between them when the season ends.
Best for: a fall dinner party or Thanksgiving table where the centerpiece needs to stay low and the guests are the decoration.
13. Rose Gold and Cream Coffee-Table Cluster
Group five pumpkins on a round tray: two cream in different sizes, two painted in a soft metallic rose gold, and one small real white in front. Paint only goes on foam or ceramic here — rose gold spray over a white base, two thin coats, fully dry before handling. Add a short cream candle and a small stack of coasters to the tray so the cluster feels lived-in rather than staged. In evening light the metallic pair glows gently instead of glittering, which is the whole point. Keep the tray under 16 inches so it does not swallow the table.
Why it works:
- Two metallics among three mattes give shimmer without sparkle overload.
- The tray edge contains the group, so it never looks scattered.
- Cream repeats in every piece, which ties the mixed finishes together.
| Spot | Idea to Use | Size to Buy |
|---|---|---|
| Mantel | Mini Pumpkin Garland (7) | 3-inch minis, 9–11 of them |
| Front porch | Porch Stack (8) | 14, 12 and 8 inches |
| Dining table | Place Settings (12) or Lace Band (9) | 3-inch minis, one per guest |
| Kitchen counter | Pastel Tiered Tray (11) | Two-tier tray, faux minis |
| Coffee table | Velvet Trio (1) or Rose Gold Cluster (13) | Mixed 4–8 inches |
Sweet, Styled and Ready for the Season
Pretty pumpkins are not about finding cuter supplies — they come from a soft base, one clear dressing per pumpkin, and the discipline to stop. Pick the two or three ideas here that match your rooms and repeat their colors everywhere else, and the whole house starts to feel coordinated. If you want the gentlest possible Halloween layer on top, these Halloween decor ideas sit happily alongside every pumpkin in this list. Your one next step: choose your palette from the first table tonight, then buy or gather just the pumpkins for one idea — the bow-topped white pumpkin is the fastest — and dress that single pumpkin before you touch anything else.