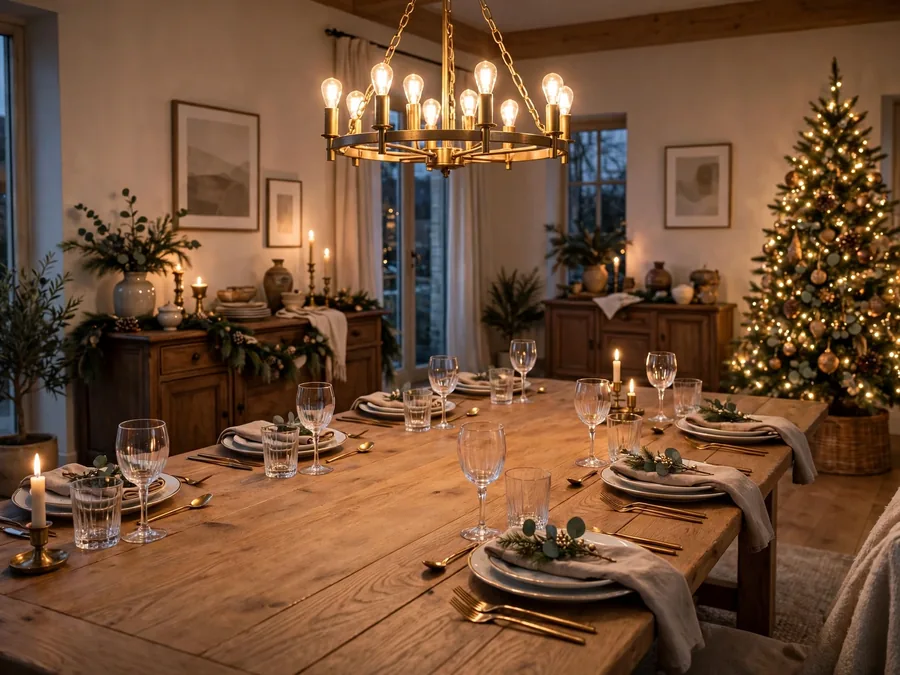
The Christmas dining room usually fails in one predictable way: everything festive migrates to the middle of the table, and by the time the serving dishes, glasses, and elbows arrive, there is nowhere left for dinner itself. The room looks decorated in photos and feels cramped in real life.
The rooms that work flip that habit. They push the Christmas layer out to the edges — the sideboard, the hutch, the walls, the windows, the chairs — and let the table’s centre stay empty until the food lands. If you want more proof that the edges carry a room, browse these Christmas dining room decor ideas and notice how little of the magic actually sits on the table.
Below are 25 ways to dress the whole dining room — sideboard, hutch, chandelier, chairs, windows, and floor — while the middle of the table stays clear. Most use basics you already own: a garland, spare china, cushions, candles, and one good wreath.
The Christmas Dining Room Formula That Keeps the Table Looking Clear and the Room Looking Magical
- Decorate the perimeter, not the centre: put every festive layer on the sideboard, hutch, walls, windows, and chairs, and leave the table’s middle bare until serving dishes arrive.
- Pick two colours and one metal: choose a pair such as deep red and cream with brass, then repeat that same trio in every zone so the room reads as one idea.
- Keep serving surfaces half empty: any surface that will hold food, drinks, or elbows stays at least half clear, no matter how pretty the styling looks.
- Make every layer lift away: use hooks, ties, and liners instead of glue or nails, so the whole room can reset to an ordinary Tuesday dinner in minutes.
One combination that follows all four rules: a cedar garland swagged along the sideboard front, red glassware glowing inside the hutch, cream slipcovers on the two host chairs, and a plaid flatweave under the table — with nothing at all in the table’s centre.
| # | Idea | Zone | Time |
|---|---|---|---|
| 1 | Cedar Garland Swagged Along the Sideboard Front | Sideboard | 15 min |
| 2 | A Drinks Station That Lives on One Tray | Sideboard | 10 min |
| 3 | Santa-Boot Candlesticks at the Serving End | Sideboard | 5 min |
| 4 | A Leaning Print and a Stack of Platters | Sideboard | 10 min |
| 5 | Slim Pencil Trees Flanking the Sideboard | Floor | 20 min |
| 6 | Christmas China on the Open Shelf | Sideboard | 15 min |
| 7 | Plaid Paper Behind the Hutch Glass | Hutch | 30 min |
| 8 | Red Glassware in Even Rows | Hutch | 10 min |
| 9 | Pitchers of Greenery Along the Hutch Top | Hutch | 15 min |
| 10 | One Big Wreath Centred Over the Sideboard | Wall | 10 min |
| 11 | A Wall of Christmas Plates | Wall | 40 min |
| 12 | Winter Prints Swapped Into Everyday Frames | Wall | 20 min |
| 13 | Red Shades on the Wall Sconces | Wall | 5 min |
| 14 | A Wreath Inside Every Window | Windows | 15 min |
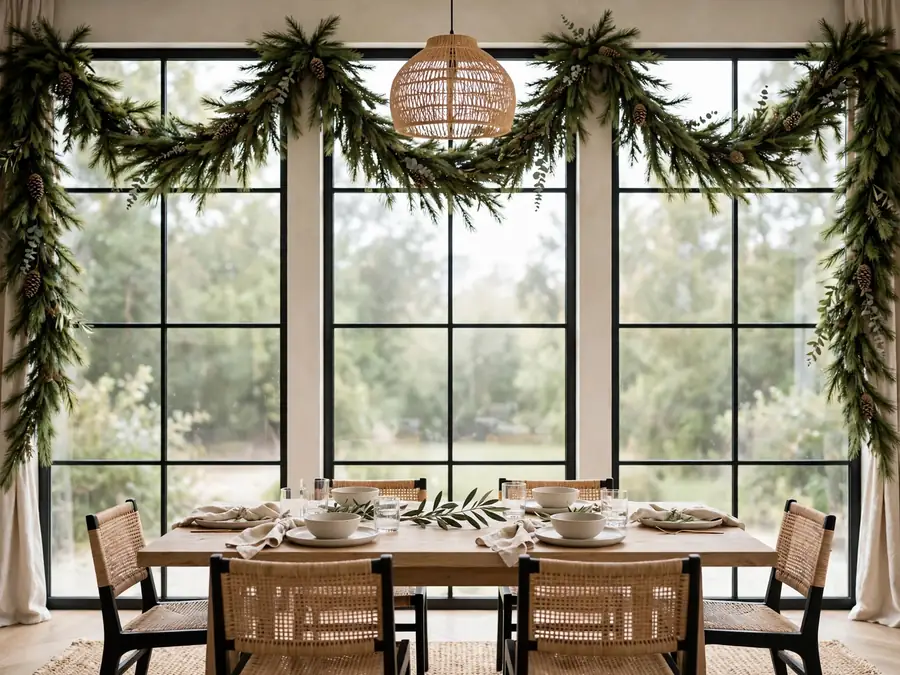
| 15 | Garland Swagged Across the Window Tops | Windows | 20 min |
| 16 | A Battery Candle on Every Sill | Windows | 5 min |
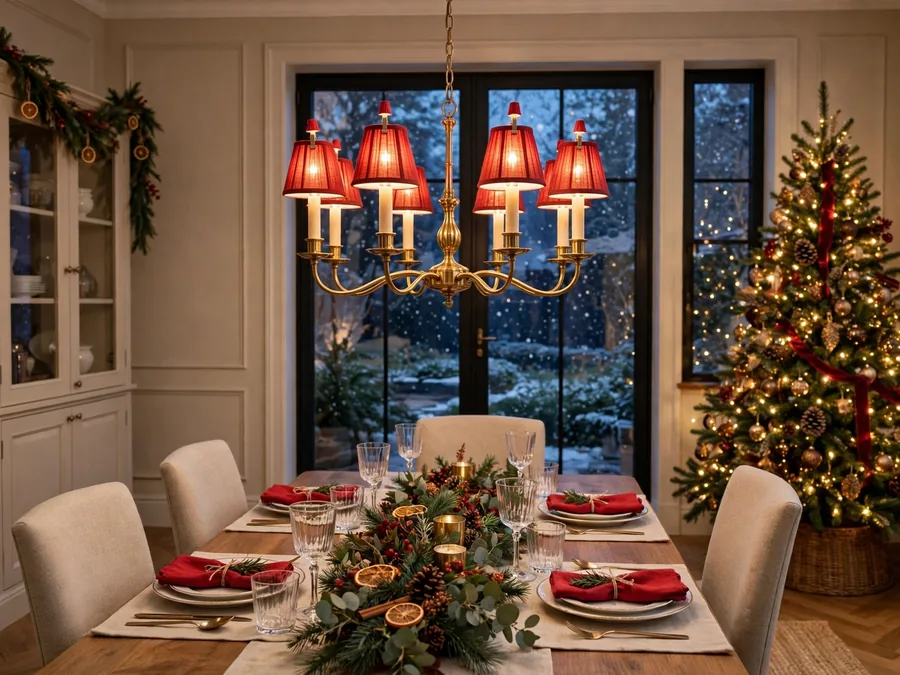
| 17 | Mini Red Shades on the Chandelier | Chandelier | 10 min |
| 18 | Red Sleeves on the Chandelier’s Candles | Chandelier | 15 min |
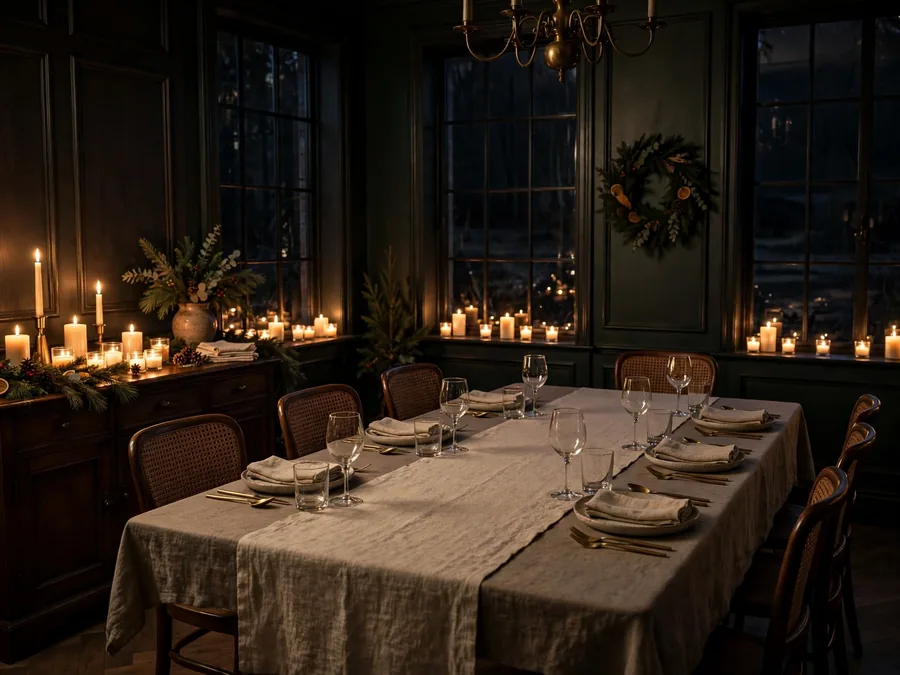
| 19 | Dim the Overheads and Let Candles Lead | Lighting | 5 min |
| 20 | Cream Slipcovers on the Host Chairs Only | Chairs | 15 min |
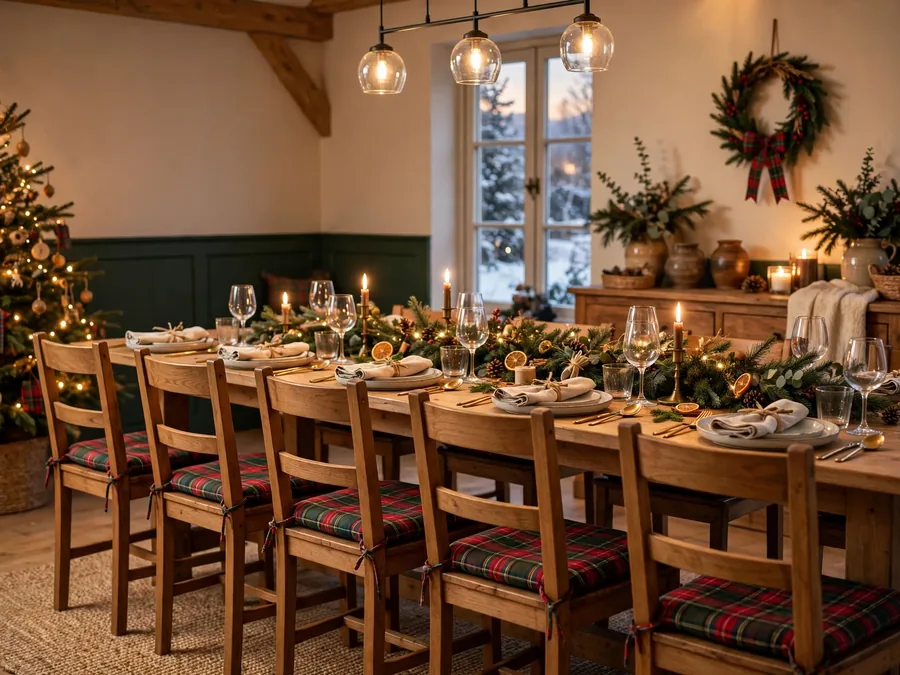
| 21 | Plaid Seat Pads on Every Chair | Chairs | 15 min |
| 22 | A Bench Pulled Up on One Side | Seating | 10 min |
| 23 | A Plaid Flatweave Layered Under the Table | Floor | 15 min |
| 24 | The Bar Cart as a Cocoa and Cordial Station | Serving | 15 min |
| 25 | A Landing Table by the Kitchen Door | Serving | 10 min |
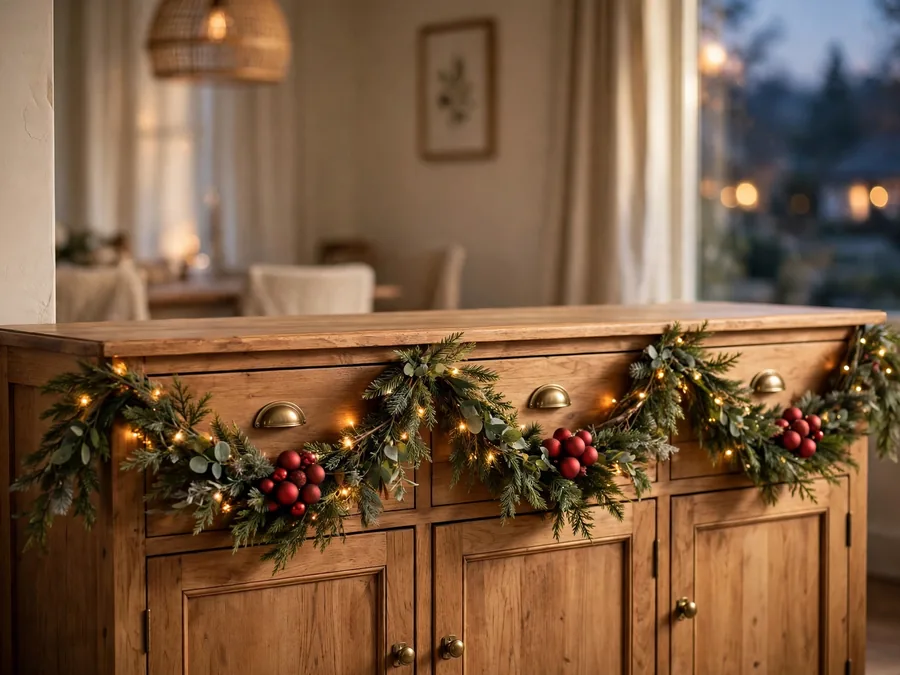
1. Cedar Garland Swagged Along the Sideboard Front
Drape a 6-foot faux cedar garland along the front edge of the sideboard in three shallow swags, fixed at the corners and centre with removable hooks, so the top stays free for serving dishes. Wire five matte red baubles at the dips and thread a battery micro-light string along the stems, its pack hidden behind a napkin stack. The honest trade-off: a front-edge garland brushes against you when you lean in to serve, so keep each swag shallow — no deeper than 4 inches at the dip.
Get the look:
- Main piece: 6-foot faux cedar garland
- Supporting piece: battery micro-light string
- Texture or material: matte baubles against glossy cedar
- Finishing touch: five red baubles wired at the swag dips
2. A Drinks Station That Lives on One Tray
Gather everything for drinks onto a single 20-inch brass or wooden tray at one end of the sideboard: a water pitcher, a decanter, six tumblers, and a small bowl of clementines with two cedar sprigs tucked behind the glasses. Because the station lifts away as one piece, the sideboard returns to pure serving space in seconds when the main course arrives. The trade-off is discipline — the moment a bottle or glass lands outside the tray, the station starts sprawling again.
Budget note: Skip the brass tray and use the largest wooden cutting board or baking sheet you own, covered edge to edge with a folded red linen napkin; it reads as an intentional station and costs nothing.
3. Santa-Boot Candlesticks at the Serving End
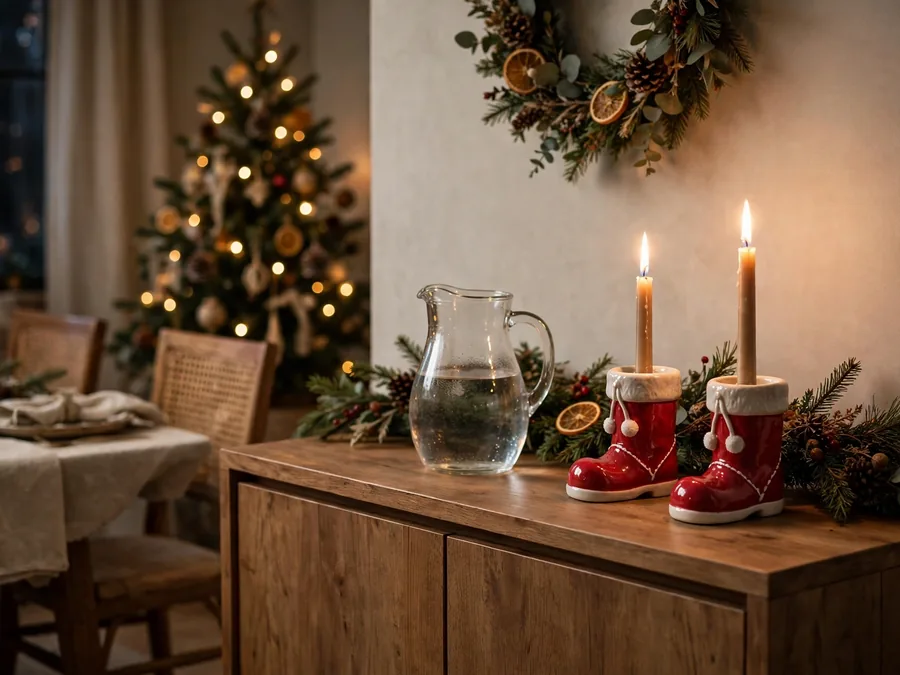
Stand a pair of small ceramic Santa-boot candlesticks — the red-and-white glazed VINTERFINT pair from IKEA, $5.99 each — at the serving end of the sideboard, flanking the water pitcher. Each boot is under 3 inches tall and takes a slim candle, so the flame sits low and well away from passing plates and sleeves. They bring one playful note to a room that is otherwise all cedar and brass. The trade-off is tone: boots are charming, not formal, so skip them for a black-tie dinner and keep them for family nights.
Style note: The lift comes from restraint — one whimsical pair, everything else classic. Two novelties would tip the sideboard into theme-park territory; one reads as a wink.
4. A Leaning Print and a Stack of Platters
Lean one large framed Christmas print — a winter village or vintage-style Santa — against the wall at the back of the sideboard, and set a stack of serving platters in front of it, largest at the bottom. The platters you need for dinner become the decoration; the print does the festive talking behind them. It pairs naturally with the kind of cute Christmas table decor that keeps settings simple. Trade-off: a leaning frame needs 4 clear inches of depth, so measure a narrow sideboard first.
Color note: Choose a print whose reds match your napkins and whose background is cream rather than white; it sits calmly and ties the sideboard to the table without shouting.
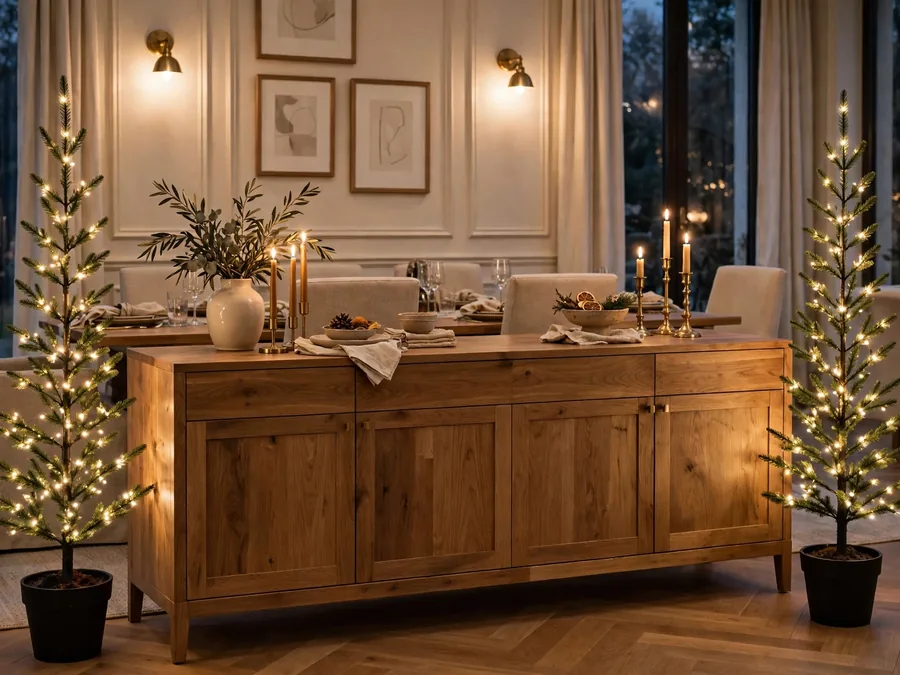
5. Slim Pencil Trees Flanking the Sideboard
Stand two slim pencil trees, each about 4 feet tall and under 10 inches wide, at either end of the sideboard, in plain black pots. Dress them with warm micro-lights only — no ornaments — so they read as two columns of glow framing the serving wall. As floor pieces, they add height without taking an inch of serving surface. The trade-off: pencil trees near a serving path get brushed by guests, so push them tight to the wall and choose sturdy, weighted pots.
Space note: A pencil tree needs a footprint of just 12 inches square. If one side lacks that room before a doorway, use one tree and balance it with Idea 10’s wreath.
6. Christmas China on the Open Shelf
If your sideboard has an open shelf or plate groove, stand your Christmas plates upright in a row along it — holly-rimmed, plaid, or plain red — with the largest dinner plates at the back and salad plates in front. Add nothing else; a single row of patterned china against the wood is decoration enough, and the plates are already stored where dinner needs them. The trade-off is dust: open-shelf china needs a rinse before it is used, so this suits plates you will actually serve on during the season rather than heirlooms on permanent display.
The formula: upright Christmas plates + the shelf’s natural wood as backing + one bare surface left empty on either side.
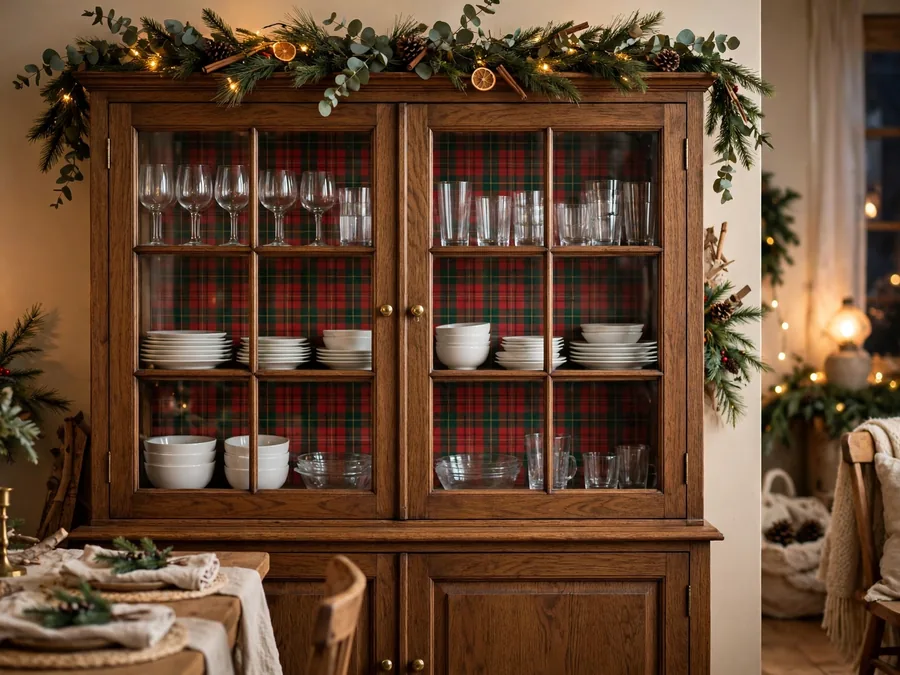
7. Plaid Paper Behind the Hutch Glass
Line the back panel inside a glass-front hutch with red-and-green plaid wrapping paper, cut to size and held with removable tape at the corners. Behind white dishes and clear glassware, the plaid turns the whole cabinet into a Christmas display without moving a plate. Cut the paper 1 inch oversize per panel and trim in place for a clean edge. The trade-off: paper inside a cabinet that holds damp glasses can wrinkle, so dry glasses fully before the doors close, and expect to re-paper next year.
Texture note: Matte paper is the right call — it absorbs cabinet light softly, where glossy paper throws reflections that fight the glass doors. Smooth white china pops hardest against the matte plaid.
8. Red Glassware in Even Rows
Move every piece of red glassware you own — goblets, tumblers, ruby dessert bowls — onto one visible hutch shelf, lined up in rows by height. Through glass doors or on an open shelf, a single colour massed together glows like a shop window and asks for no other decoration on that shelf. The trade-off is honesty about numbers: this needs at least eight matching-ish pieces to read as a collection; with only three glasses, scatter them through Idea 6’s china row instead.
Best for: a hutch or sideboard shelf at eye level in a dining room that gets any daylight — red glass does its best work backlit by a nearby window.
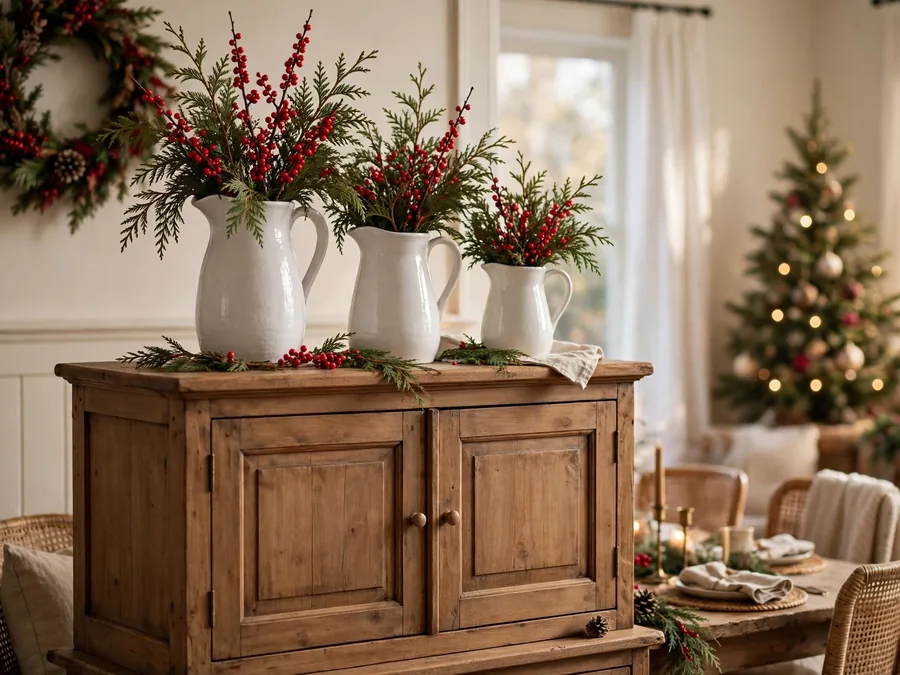
9. Pitchers of Greenery Along the Hutch Top
Stand three white pitchers along the hutch top, tallest in the middle, and fill each with faux cedar and a red winterberry branch or two. A hutch top is dead space most of the year; a green-and-white row there draws the eye up and dresses the whole wall. Use faux stems, not fresh — nobody can reach to change the water. The trade-off: hutch-top pitchers collect unseen dust, so wipe them when the decorations come down.
Why it works:
- White pitchers echo everyday china, so the row feels collected, not costumed
- All the colour sits in the greenery, keeping the look calm from the table
- The pitchers go straight back to serving duty the day the season ends
| Zone | Lead Colour | Supporting Material | Keep Clear |
|---|---|---|---|
| Sideboard | Cedar green | Brass, matte red | Half the top, always |
| Hutch | Plaid red | White china, red glass | Door swing and handles |
| Walls & windows | Deep red | Cream ribbon, evergreen | Window latches and vents |
| Chandelier | Warm ivory light | Red fabric, candle sleeves | Anything hanging into sight-lines |
| Chairs & floor | Plaid and cream | Wool, velvet, flatweave cotton | Chair pull-out space, 24 inches |
10. One Big Wreath Centred Over the Sideboard
Hang a single generous wreath — 24 to 30 inches across, plain cedar or cedar with pinecones — centred on the wall above the sideboard, with one wide cream ribbon looped over the top as the only trim. One large wreath does the work of a whole gallery wall and leaves the rest of the wall calm. Keep it bow-less and bare: the sideboard below is busy enough with serving pieces. The trade-off is storage: a 30-inch wreath needs a big box or garage hook for eleven months, so buy the size you can store.
Fit check: Pick a wreath two-thirds the sideboard’s width, its centre about 57 inches from the floor; higher, and it floats away from the furniture.
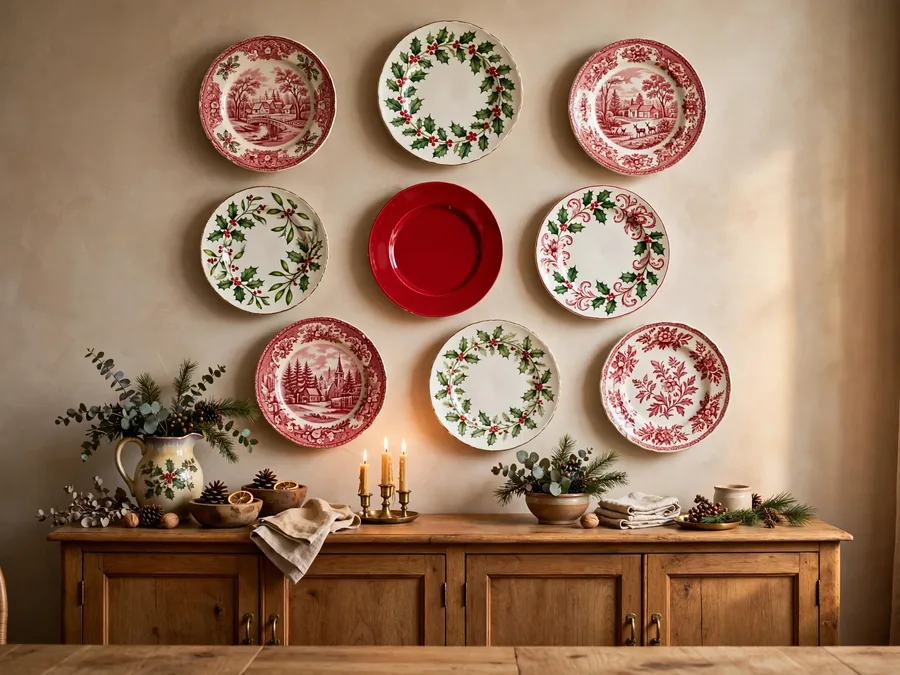
11. A Wall of Christmas Plates
On the dining room’s one blank wall, hang a loose grid of six to nine Christmas plates — holly patterns, red transferware, plain cream — on plate hangers, spaced 2 inches apart. Lay the arrangement out on the floor first, then hang from the centre plate at eye level. It costs almost nothing if the plates already live in your hutch. Trade-off: hangers show as tiny clips at the rim, and plates risk a knock near doorways, so choose a low-traffic wall.
Get the look:
- Main piece: one large patterned plate at the centre
- Supporting piece: six to eight smaller plates around it
- Texture or material: glossy transferware against matte paint
- Finishing touch: one plain red plate as the anchor
12. Winter Prints Swapped Into Everyday Frames
Take down the dining room’s everyday art and slip Christmas prints into the same frames — a snowy lane, a vintage Santa portrait, sheet music for one carol, a child’s drawing from last December. Frames, nails, and spacing stay as they are, so the swap takes minutes. Store the original art flat inside the frame behind the new print, and January’s swap-back takes minutes too. The trade-off: prints behind glass glare under a chandelier, so choose matte prints and skip anything with large white areas.
Easy swap: If buying prints feels like a step too far, wrap the existing frames in wide red ribbon like parcels, one band each way — the art stays, the wall still changes.
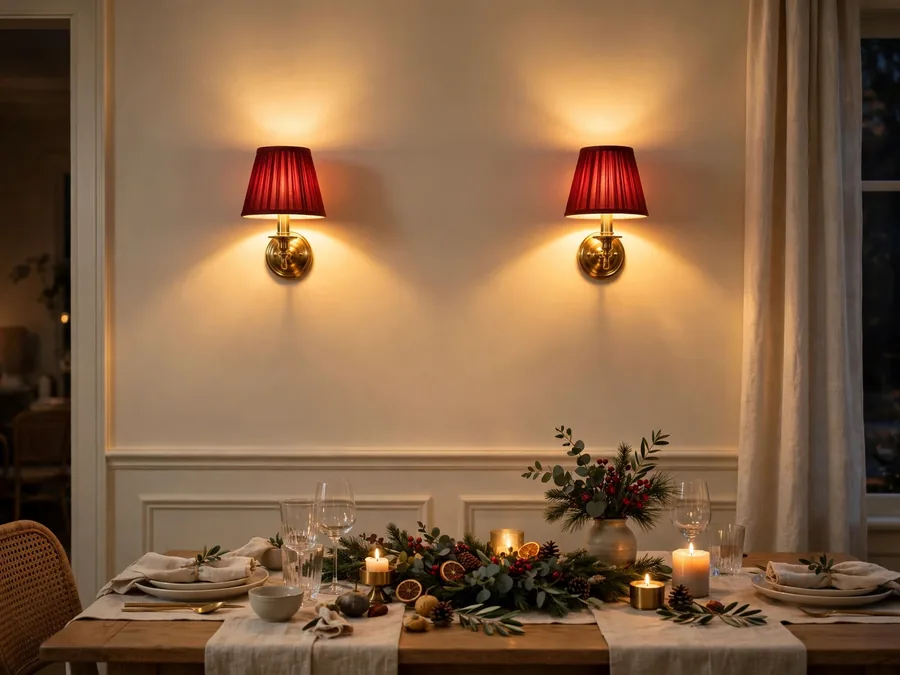
13. Red Shades on the Wall Sconces
Swap your wall sconces’ shades for deep red clip-on fabric ones in burgundy or cranberry for the season. The light drops to a warm, low glow that flatters faces across the table and makes cream walls look candlelit before a single candle is lit. It sits well alongside velvet Christmas decor if your chairs or cushions already lean that way. The trade-off: red shades dim the room noticeably, so keep the overhead light available on a dimmer for serving and clearing.
Budget note: New shades for two sconces can cost less than a single wreath, or wrap existing white shades in red fabric offcuts, pinned at the back seam where no one sees.
14. A Wreath Inside Every Window
Hang a small wreath, 12 to 14 inches across, inside each dining room window, suspended from the top of the frame on a length of wide cream ribbon so the wreath floats against the glass. From inside, a green ring frames the winter view; from outside, the house looks dressed. Keep the wreaths identical and undecorated — repetition is the whole effect. Trade-off: ribbon-hung wreaths swing when a window opens, so this suits windows that stay shut all winter, and the ribbon must clear the latch.
Color note: Cream ribbon, dark green cedar, grey winter sky: the classic trio. If your room runs red, swap to cranberry ribbon — but use it on every window, never a mix.
15. Garland Swagged Across the Window Tops
Run one long faux pine garland across the tops of the dining room windows, pinned at each corner and dipping in one soft swag over each window, like a valance made of greenery. It frames the glass without touching the view and carries the sideboard’s cedar story around the room. Secure it to the trim with removable hooks, and let the ends drop 12 inches down each side. The trade-off: garland above windows collects dust where it is hardest to reach, so shake it outside before it goes up, not after.
Seasonal swap: Come spring, the same hooks hold a swag of faux eucalyptus or a string of paper flowers; the hardware disappears into the trim between seasons.
16. A Battery Candle on Every Sill
Set one battery pillar candle, about 4 inches tall in ivory, on each dining room windowsill, all on timers set for the same hour. When they switch on together at dusk, the windows become the room’s soft back wall of light, and dinner feels held inside a ring of small flames — with no wax near curtains and no flames to mind while you are in the kitchen. Trade-off: nightly sills eat batteries by New Year, so rechargeables earn their keep.
Best for: dining rooms whose windows face the street or garden — the glow reads from outside too, and timers mean it works even on nights you eat in the kitchen instead.
17. Mini Red Shades on the Chandelier
Clip small red fabric shades, about 4 inches across the base, onto every bulb of the chandelier. The fixture that hangs over the table all year suddenly matches the room’s colour story, the light turns warm and downward, and faces around the table look softer. Because the shades sit above the sight-line, they dress the room without putting a single object between diners. The trade-off: fabric shades trap heat, so pair them with LED chandelier bulbs only, and check the shade’s clip sits clear of the bulb’s hottest point.
The formula: red clip-on shades on every arm + warm LED bulbs + the dimmer set low once plates are down.
18. Red Sleeves on the Chandelier’s Candles
If your chandelier has candle-style stems, slide deep red drip sleeves — the resin covers that sit over the white candle tubes — onto each stem. It is a ten-minute, reversible change that makes a plain fixture look made for Christmas, especially paired with plain brass or black metal. Buy sleeves 1 inch longer than the exposed tube so the line looks deliberate. The trade-off is fit: sleeve sizes vary by brand, so measure one tube’s diameter before ordering a set, or the idea stalls at the post.
Style note: Red sleeves work because everything else on the fixture stays plain. Resist adding bows or rings to the arms — the single block of colour is the elegance.
19. Dim the Overheads and Let Candles Lead
Make a rule for December dinners: the chandelier drops to its lowest warm setting, and the real light comes from candles placed around its edges — the boot candlesticks on the sideboard, the pillars on the sills, one pair of tapers at the serving end. Faces glow, the empty centre stays calm, and food looks richer in warm light. Trade-off: carving, pouring, and place cards get harder, so keep one brighter source — the kitchen doorway’s spill is often enough.
Texture note: Candlelight loves texture. It pools in the grain of a wooden sideboard, catches cut glassware edges, and flattens against matte plaid — another reason the edges should carry the materials, not the table.
| Serving-Night Check | The Test | If It Fails |
|---|---|---|
| Table centre | Can two serving dishes and a water jug sit down at once? | Move the decor, never the food |
| Sideboard top | Is at least half of it empty? | Lift the drinks tray off and re-stage it |
| Chair space | Does every chair pull out a full 24 inches? | Shift trees and baskets tight to the wall |
| Sight-lines | Can seated guests see each other over the table? | Nothing on the table may rise above the glasses |
| Serving path | Is the walk from kitchen door to table completely clear? | The landing table moves, the path does not |
20. Cream Slipcovers on the Host Chairs Only
Dress just the two end chairs — the host seats — in cream or ivory slipcovers, and leave the side chairs in their everyday wood. The pale pair bookends the table, reads as “the special seats,” and costs two covers instead of eight. Choose washable covers with a skirt that just clears the floor. The trade-off is laundry honesty: cream covers at a table serving cranberry sauce will need washing after the big dinner, so check the care label before the day, not after.
Easy swap: In January the same two covers in reverse — move them to whichever chairs sit by the window — and the room feels rearranged without a single new purchase.
21. Plaid Seat Pads on Every Chair
Lay a plaid seat pad — red-and-green tartan on one side, plain cream on the reverse — on every dining chair, each pad fastened underneath where its ties never show. Matching pads pull odd chairs into a set, add pattern at sitting height, and make long dinners kinder. At about 16 inches square, standard pads fit most dining seats. Trade-off: pads raise sitters an inch or so, which can angle shorter guests’ elbows oddly — keep one chair pad-free just in case.
Fit check: Measure your seat’s depth before buying; a pad that overhangs the front edge by more than an inch will slide and bunch. Pads should sit 1 inch inside the seat’s edge all round.
22. A Bench Pulled Up on One Side
Replace the chairs along one long side of the table with a simple wooden bench dressed with two plaid cushions and one folded cream throw at its end. A bench seats three where chairs seat two, tucks under the table after dinner, and suits long, loud family meals. Trade-off: benches have no backs, so older guests and coffee-lingerers should keep the chairs — put the bench on the side the younger half of the family claims.
Space note: A bench needs no pull-out room behind it — guests slide in from the ends — so it can rescue a dining room whose long wall sits too close to the table for chairs.
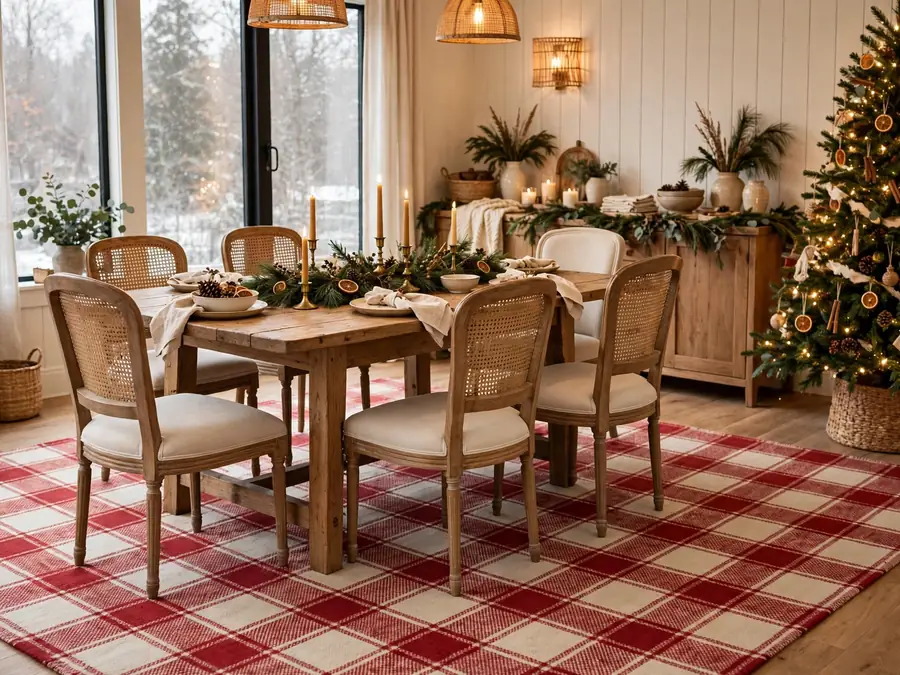
23. A Plaid Flatweave Layered Under the Table
Roll a red-and-cream plaid flatweave over your everyday rug — or straight onto the floor — extending 24 inches beyond the table on every side. The plaid field grounds the scheme, catches crumbs and drips on a washable layer, and shows in the sight-line under the table. Flatweave is the key word: chair legs slide on it instead of catching. Trade-off: if cushions and hutch lining are also plaid, keep this rug’s check large and muted so the room layers instead of clashing.
Why it works:
- The pattern sits below, colouring the room without crowding it
- A washable layer takes spills the good rug would have suffered
- Rolled away in January, it changes the room back in minutes
24. The Bar Cart as a Cocoa and Cordial Station
Wheel the bar cart into the dining room corner and restyle it for December: top shelf a cocoa pot, a row of mugs, and a jar of marshmallows; bottom shelf the after-dinner bottles and glasses. A cedar sprig and one red bow on the handle is dressing enough. Guests serve themselves, keeping the sideboard clear and the host seated. It fills the same self-serve role as the console table decor by the door. Trade-off: a loaded cart begs to be bumped, so park it in a corner, never in the serving path.
Seasonal swap: After Christmas the cart returns to drinks duty; in summer the shelves hold a lemonade jug, glasses, and a bowl of lemons.
25. A Landing Table by the Kitchen Door
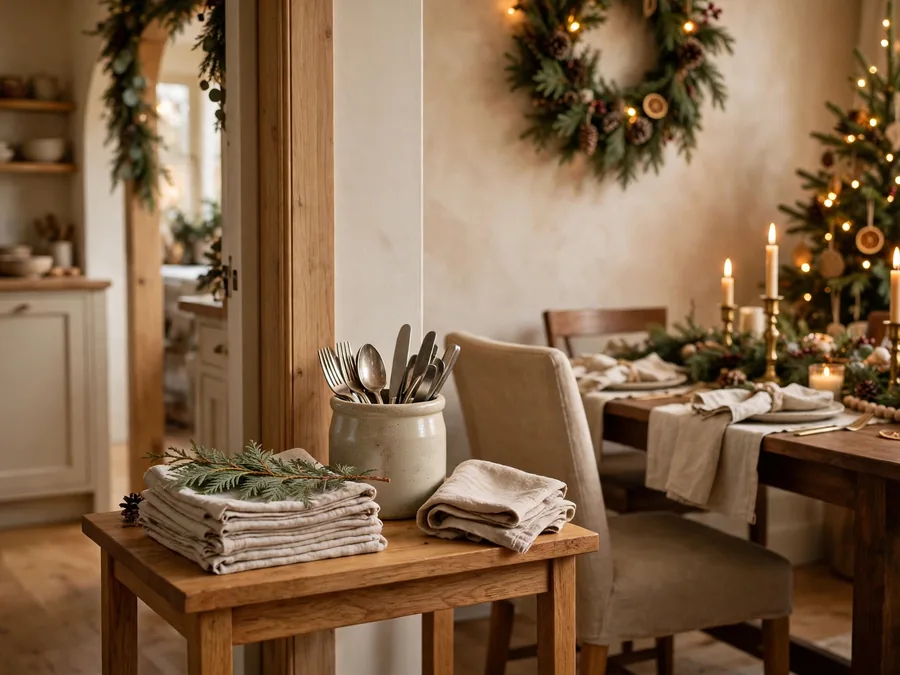
Set one table — a plant stand, narrow console, or sturdy stool — by the kitchen door, holding spare napkins, a cutlery crock, and a folded spare cloth. Every host knows the scramble for a dropped fork; a landing table ends it and keeps rescue items off the styled sideboard. Add one cedar sprig on the napkins so it belongs to the room. Trade-off: it invites style creep, so rule it functional-only — nothing decorative lives there but the sprig.
Get the look:
- Main piece: small table at the kitchen doorway
- Supporting piece: crock of cutlery, stack of napkins
- Texture or material: linen and steel against the table’s wood
- Finishing touch: one cedar sprig laid on the napkin stack
Start at the Sideboard and Keep the Middle Empty
A magical Christmas dining room is not the one with the most on the table — it is the one where the glow, the plaid, and the greenery ring the room while dinner itself gets all the room it needs. Dress the sideboard first, then the hutch and walls, then the chairs and floor, and let the table’s centre belong to the food and the people reaching across it.
Your one next step: stand in your dining room doorway tonight and pick the single emptiest edge — one sideboard top, one blank wall, one bare hutch shelf — then apply just one idea from this list to that edge before the weekend.