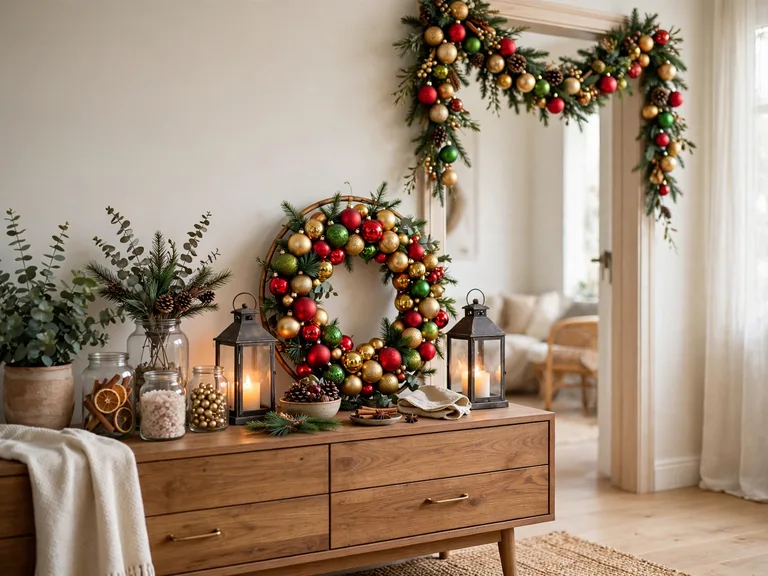
Your favourite ornaments spend eleven months in a box, then get one crowded month on a tree where half of them hide behind branches. They deserve better than that, especially the handmade ones, the travel finds, and the baubles your children made years ago. This year, let them take centre stage in every room instead.
An ornament display does not need a tree at all, only a container, a hook, or a flat surface and a clear colour story. Group your baubles by colour or finish, give each display one job, and leave breathing room around it so the ornaments read as a collection rather than clutter. The sixteen ideas below work in big houses and small flats alike, and most of them take less than half an hour to set up.
Start with the ornaments you already own before buying anything new, and pull out the pieces you love most rather than every bauble in the box. A small, thoughtful display always beats a large, random one, and it is far easier to pack away in January. These small-apartment Christmas ideas prove that a festive home needs clever placement, not more square footage, and the same thinking shapes every display in this list.
The Ornament Display Formula That Keeps Baubles Looking Collected
- One palette: Pick two main colours and one metallic, then repeat that trio in every display so the rooms feel connected.
- One hero per display: Give each vignette a single largest or most special bauble, and let the smaller ones support it.
- Mixed finishes: Combine shiny, matte, and textured ornaments in each group so the light catches something different at every angle.
- Breathing room: Leave empty space around each display so the eye can rest, because a crowded surface makes even beautiful ornaments look messy.
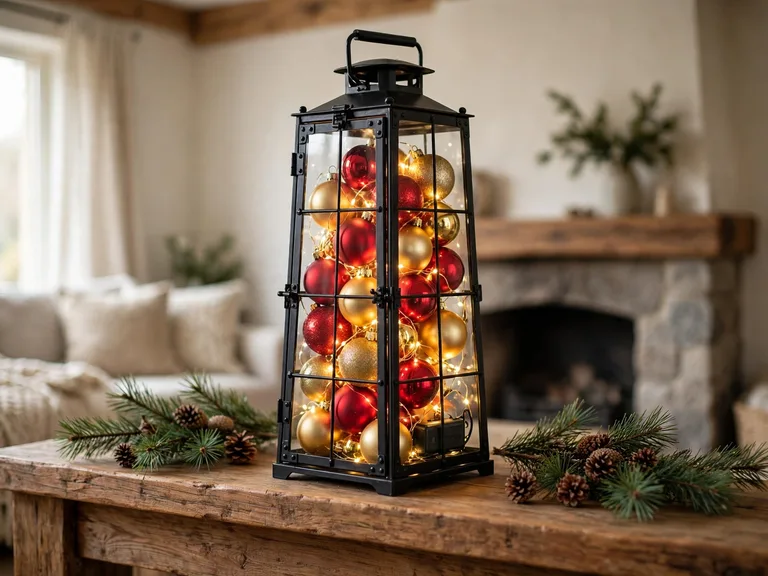
A red, gold, and cream palette with one large vintage bauble in a lantern, smaller matching baubles around it, and a clear table around the lantern looks finished in minutes.
1. Ornament-Filled Lanterns
A lantern turns a handful of baubles into a little glowing scene, and it works on a porch, a mantel, or a side table without any hanging or drilling. Choose a lantern with clear glass panels so the ornaments stay visible from every side, then fill the base with three to five baubles in mixed sizes. Tuck a short string of battery fairy lights between them for a soft glow after dark, and keep the largest bauble at the bottom so the stack looks steady.
Get the look:
- Lantern: tall, with clear glass panels.
- Baubles: three to five, in mixed sizes.
- Lights: one short battery fairy light string.
- Base: a pinch of faux snow underneath.
2. Ornament Hoop Display
An embroidery hoop makes a light, airy frame for hanging ornaments, and it costs almost nothing to put together. Wrap the wooden ring in ribbon or greenery, then hang five to seven baubles from it at different lengths with thin ribbon or clear thread. Hang the hoop from a ceiling hook or a picture rail where it can turn gently in the draught. Keep the baubles small and light so the hoop stays balanced, and match the ribbon to your room colours.
Why it works:
- The open ring keeps the display light and airy.
- Mixed lengths add gentle movement overhead.
- Ribbon ties the hoop to the room colours.
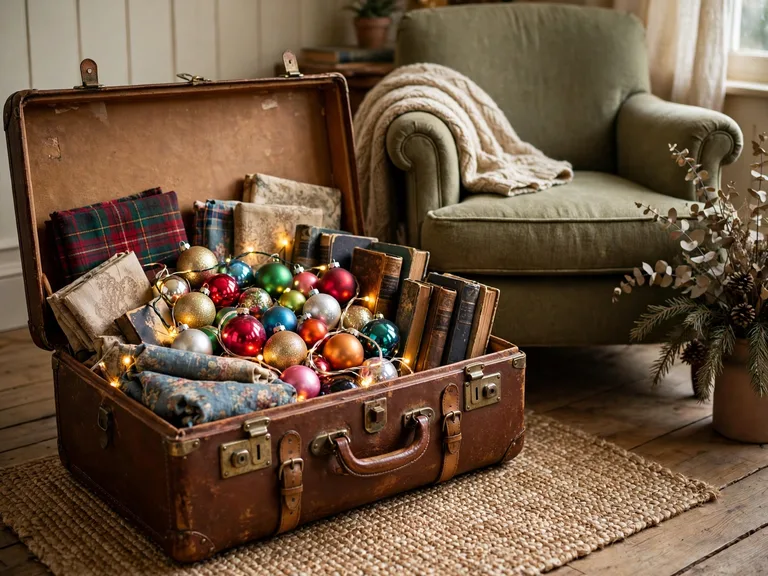
3. Ornament-Filled Vintage Suitcase Vignette
An old suitcase or trunk gives your ornaments a story before anyone looks closely at them. Open the lid and prop it against the wall, then nestle baubles inside among folded vintage fabric, old books, or a string of warm lights. Place the suitcase on the floor beside a chair or at the foot of the stairs, where it looks collected rather than stored. Reusing pieces you already own keeps the display personal, as these eco-friendly Christmas ideas show, and it costs nothing extra.
Color note: Keep the baubles to two colours inside the suitcase, so the vintage fabric and old books stay visible instead of disappearing under a rainbow.
4. Ornament-Filled Hurricane Glasses
Tall hurricane glasses turn loose baubles into a neat, glowing column, and they need no candles at all. Fill each glass two-thirds full with ornaments in one colour family, then add a short battery fairy light string curled through the middle. Set a pair on the mantel or a trio down the centre of a sideboard, mixing heights for a natural rhythm. Use shatterproof baubles at the bottom and save fragile glass ones for the top, where they catch the light best. They look far more expensive than they cost.
Texture note: Mix one matte bauble for every two shiny ones, so the column has depth instead of a flat, mirror-like glare.
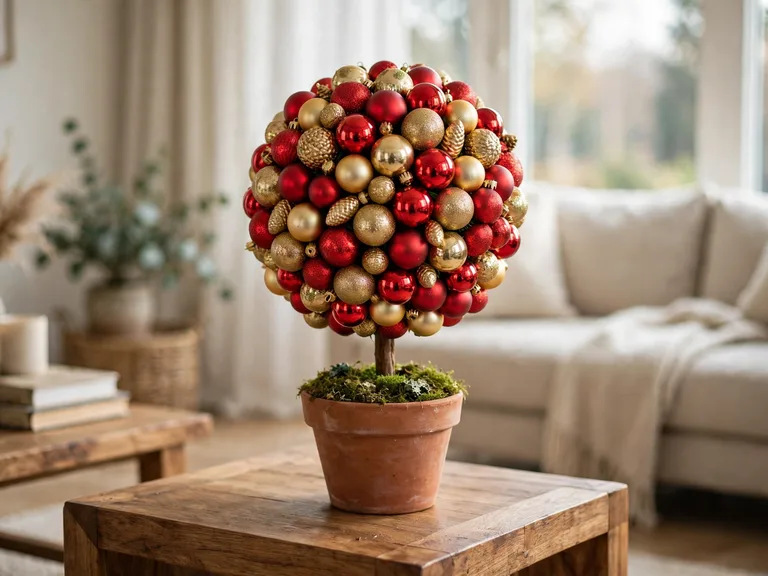
5. Ornament Topiary
A bauble topiary brings the shape of a little tree to a table without needing a real one. Push a foam ball onto a short dowel set in a terracotta pot, then pin or glue baubles tightly across the ball until no foam shows. Fill the pot with moss or faux snow to hide the base, and crown the top with one larger bauble or a small bow. Keep the baubles in one colour family with a single metallic accent, and set the finished topiary where guests can admire it up close.
Best for: A side table, a hallway console, or a dining table centrepiece where a full tree would never fit.
6. Ornament-Filled Glass Cylinders on a Sideboard
A row of tall glass cylinders turns a plain sideboard into a gallery of colour. Fill each cylinder with baubles in a single shade, then line them up from lightest to darkest for a gentle gradient across the room. Metallic baubles in gold, silver, or copper add sparkle between matte ones, and these silver Christmas ideas show how cool metallics can still feel warm. Leave a little space between cylinders so each colour reads clearly. The effect is calm, modern, and surprisingly easy.
Space note: Three cylinders suit a standard sideboard; add a fourth only if at least a handspan of empty surface remains at each end.
7. Ornament Display in a Glass-Front Cabinet
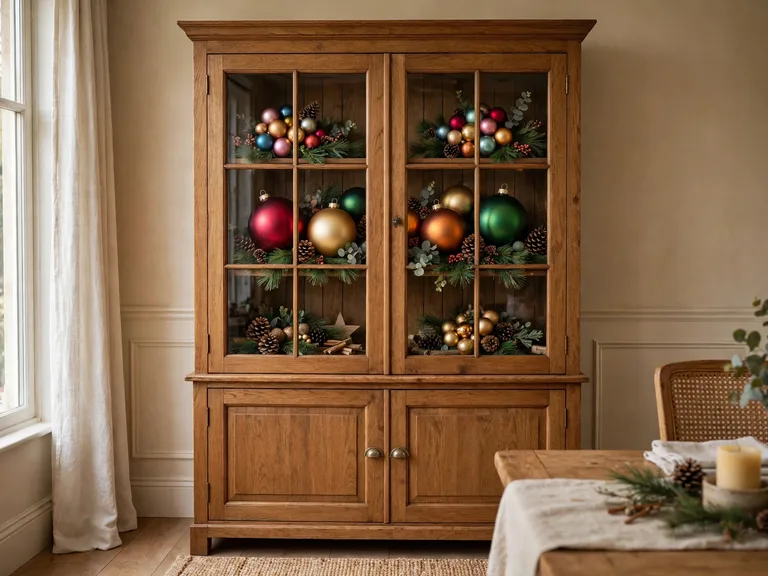
A glass-front cabinet or hutch is the safest home for your most precious ornaments, and it keeps them dust-free all season. Arrange baubles on the shelves in small groups of three or five, mixing sizes and finishes, and tuck sprigs of greenery or a few pinecones between them. Put the largest pieces at eye level and smaller ones above and below, so the cabinet reads like a little museum. Leave one shelf partly empty to avoid a crowded, shop-window feel.
Fit check: Measure the shelf height first; tall finial ornaments need at least two fingers of clearance above them or the door will not close.
8. Ornament Basket on the Hearth Floor
A basket of ornaments on the hearth floor feels relaxed and welcoming, like the room dressed itself. Choose a wide, sturdy basket and fill it with baubles in your main palette, then add a few pinecones and a folded plaid throw draped over one edge. Set it beside the fireplace, never in front of it, and keep it low so children and pets can admire it safely. Use shatterproof baubles here, since a basket on the floor is easy to nudge with a passing foot.
Style note: A woven seagrass or wicker basket suits a relaxed room, while a dark wood or metal basket fits a smarter, more formal fireplace.
9. Ornament Place Settings
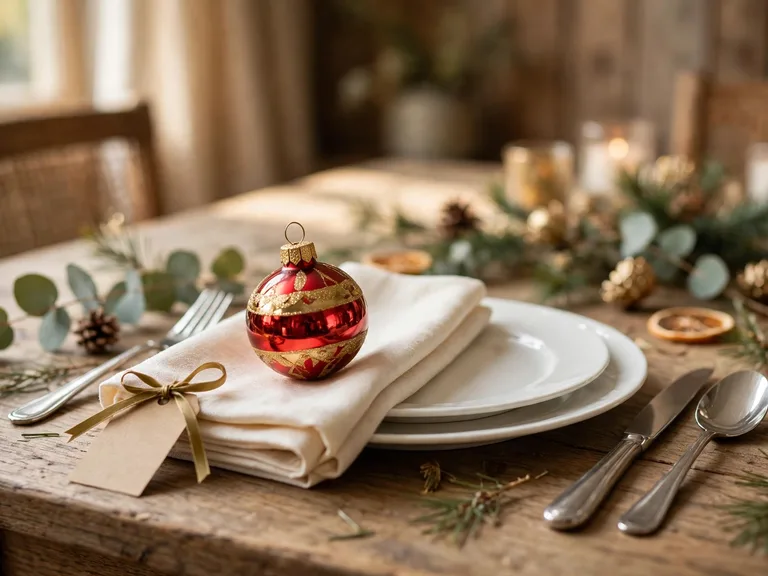
One ornament at each place setting turns the dinner table into a display and gives every guest a small gift to take home. Lay a single bauble on each napkin or tie it to the napkin ring with a short ribbon, choosing colours that match the plates. Add a tiny handwritten name tag tied to the ribbon so the ornament doubles as a place card. Keep the baubles small and flat-bottomed so they sit steady, and choose shatterproof ones for a table full of happy, clumsy hands.
Easy swap: Swap the ribbon colour next year and the same baubles will match a completely different tablecloth and plate set.
10. Hanging Ornament Mobile Over the Dining Table
A hanging mobile of ornaments over the dining table fills the empty air above the meal with colour. Suspend a branch, a hoop, or a simple wooden frame from the ceiling with clear fishing line, then hang baubles at staggered lengths so they catch the light from every seat. Keep the mobile high enough that no one bumps it while serving food, and balance the weight evenly so it hangs level. Use lightweight baubles here, since anything heavy will pull the frame out of line.
Seasonal swap: After Christmas, replace the baubles with paper stars or plain glass drops and the same frame works for a winter dinner party.
11. Ornament Swag on the Front Door
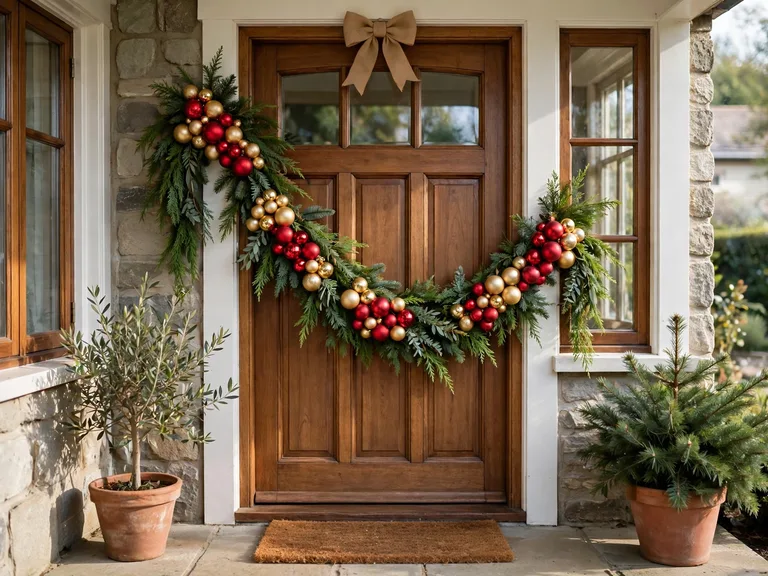
A swag of ornaments on the front door greets guests before they step inside, and it is not a wreath. Drape greenery in a loose curve across the door, then wire baubles along it in clusters of three, mixing sizes and finishes. Hang it from a sturdy over-door hook so it stays put in winter wind, and keep the heaviest baubles near the centre where the hook carries them. Finish with a simple bow, and choose weatherproof ornaments for a door that faces rain.
Budget note: A swag costs little if you reuse last year’s greenery and spare baubles. Buy only the over-door hook and one roll of florist wire.
12. Ornament Colour-Gradient Wall Row
A wall of ribbon-hung ornaments in a colour gradient turns a blank wall into a piece of art. Fix a row of small removable hooks across the wall, then hang one ornament from each hook on ribbons of the same length, arranging the colours from deep red through gold to pale cream. Keep the spacing even and the ribbon lengths identical so the gradient reads as one clean line. This works beautifully in a hallway or behind a sofa, where the wall would otherwise sit empty all December.
The formula: One ornament per hook, one colour step per ornament, and identical ribbon lengths are the three rules that keep the gradient looking intentional.
13. Ornament-Filled Mason Jars on the Kitchen Counter
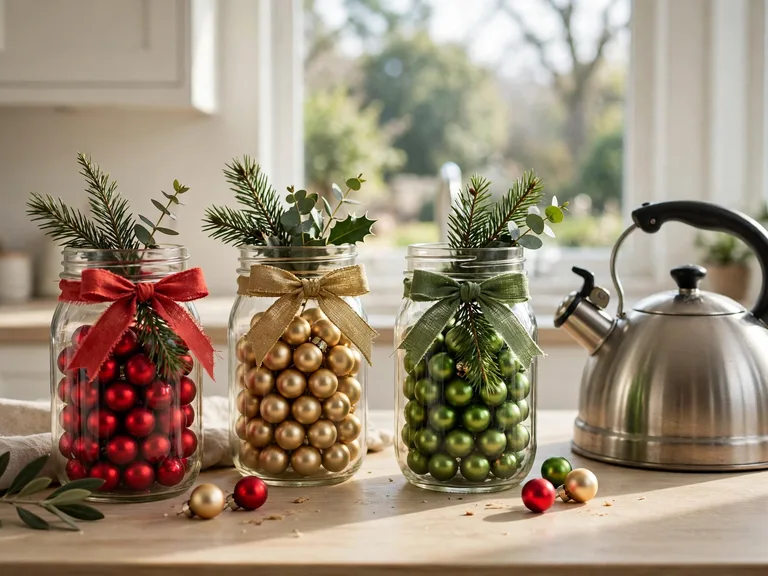
Mason jars full of baubles bring Christmas into the kitchen, where the family spends its time. Fill two or three jars with ornaments in your palette, then set them beside the kettle or along the windowsill where they catch the morning light. Tie a ribbon or greenery around each jar neck for a finished touch, and keep the jars away from the hob and the sink. Use small baubles so the jars look full without dozens of them.
Get the look:
- Jars: two or three mason jars, mixed heights.
- Baubles: small ones, in your kitchen palette.
- Ribbon: one sprig of greenery per jar.
- Spot: beside the kettle or on the windowsill.
14. Ornament Tree of Stacked Baubles
A tree made of stacked baubles gives you the silhouette of a Christmas tree on a sideboard, with no needles to sweep. Start with a wide, flat base, then stack baubles in shrinking rings from the bottom up, using museum putty between layers to keep them steady. Alternate shiny and matte finishes as you climb, and crown the top with a star or a single large bauble. Keep the palette to two colours and one metallic so the little tree reads as elegant, not busy.
Why it works:
- The shrinking rings read as a tree silhouette instantly.
- Museum putty keeps the stack steady all season.
- Two colours plus one metallic keep it elegant.
15. Ornament Garland Across a Doorway
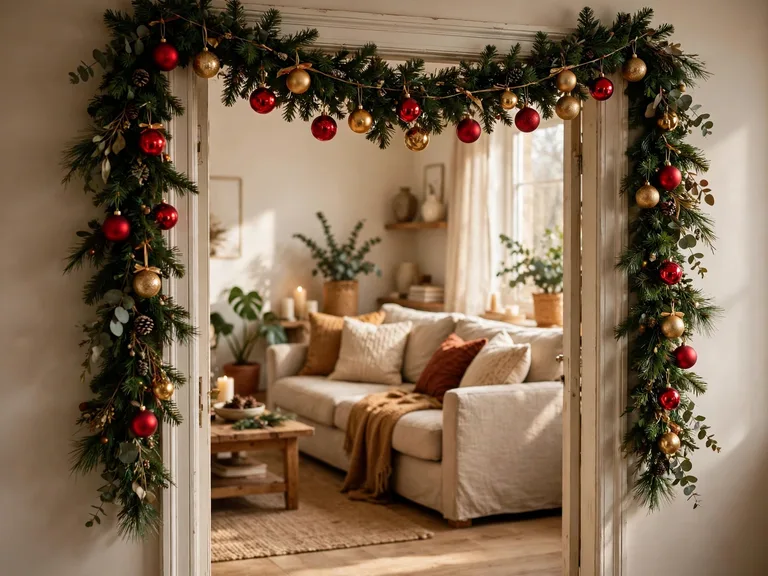
An ornament garland across a doorway frames every entrance with colour and movement. String baubles along a length of greenery or ribbon, spacing them evenly and alternating sizes so the garland feels full without sagging. Fix it to the door frame with removable hooks at both ends and one in the middle, so the weight spreads evenly. Hang it high enough that tall guests pass underneath without ducking, and keep the colours in your room palette so the doorway feels part of the room.
Color note: Match the garland baubles to the largest ornament display in the room, so the doorway echoes the room instead of starting a new colour story.
16. Ornament-Filled Apothecary Jars on the Console Table
Apothecary jars with lids turn a console table into a little ornament museum. Fill each jar with baubles in a single colour, then line up two or three jars of different heights along the table, leaving space for a small lamp or a stack of books between them. The lids keep dust out and make the display look deliberate, like a shop window. Mix one jar of metallic baubles among matte ones so the light catches the group from across the room.
Texture note: Pair frosted or velvet baubles with glossy ones inside each jar, so the group has a soft, layered glow rather than one flat shine.