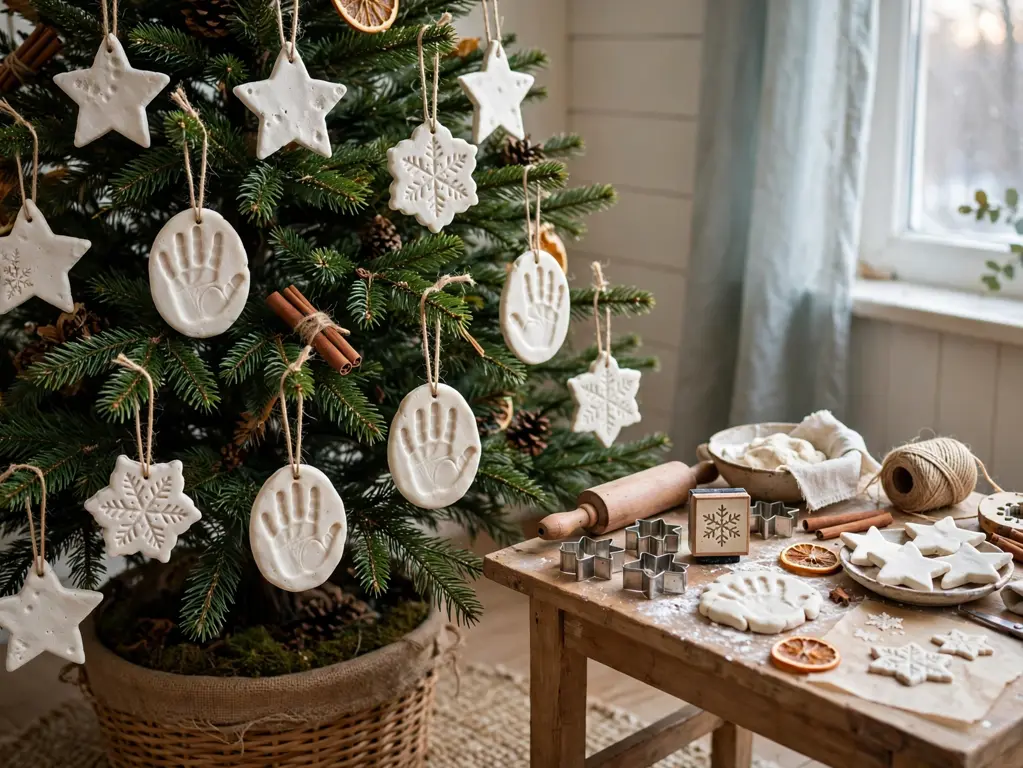
Every December the same thing happens: the handmade ornaments in magazines need specialty supplies, a glue gun and skills you do not have, so the tree fills up with bought plastic that looks fine and means nothing.
Salt dough changes that math completely. Three kitchen staples – flour, salt and water – roll out into a permanent, paintable ornament, and the whole craft rests on three habits: roll evenly, dry slowly, and seal the finish.
Below are 30 salt dough ornament ideas, from a baby’s first handprint to keepsake discs that mark a family’s years, and every one of them comes from the same basic batch of dough.
Why Dough Beats Store-Bought Plastic
An ornament’s value on a family tree was never its price tag – it is whose hands it remembers. Bought plastic ornaments are prettier in the shop and forgettable by January, which is why they drift to charity bags within a few years. Dough works the opposite way: it records a thumbprint, a child’s wobbly painting, a pet’s paw, in a material that costs pennies and keeps for decades once sealed. The making is also part of the gift – one slow afternoon of rolling and stamping gives a family a set no shop sells, sized exactly to their tree and their story.
Beginner Note: Make one practice ornament from the first roll and dry it alongside the rest – it tells you exactly how your oven behaves before the keepsakes go in.
The Salt Dough Formula That Keeps Ornaments Smooth, Strong and White
- Two-one-one dough: two parts plain flour, one part fine salt, one part warm water – fine salt is what keeps the surface smooth instead of grainy.
- Roll to one even thickness: a quarter-inch everywhere, guided by two sticks or books at the sides, so every ornament dries at the same speed and none crack.
- Dry low and slow: the lowest oven setting for two to three hours (or two days air-drying) – rushed heat puffs and browns the dough.
- Seal both sides: a coat of clear varnish or Mod Podge front and back keeps moisture out, which is what makes dough ornaments last for years.
Example: one batch rolled between two quarter-inch guides, cut into stars, dried low for three hours and sealed both sides, gives a full tree set that still looks new five Christmases later.
| # | Idea | Best For | Budget/Effort |
|---|---|---|---|
| 1 | Classic Cut-Out Star Ornaments | The whole tree | Free |
| 2 | Handprint Santa Ornaments | Family keepsakes | Free |
| 3 | Fingerprint Reindeer Ornaments | Kids’ crafting | Free |
| 4 | Stamped Snowflake Discs | Elegant tree sets | Free |
| 5 | Cinnamon Salt Dough Hearts | Scented displays | Free |
| 6 | Cookie-Cutter Tree Ornaments | Beginners | Free |
| 7 | Dough Garland Beads on Twine | Mantel garlands | Free |
| 8 | Initial Letter Ornaments | Gift toppers | Free |
| 9 | Dough Gift Tags with Names | Wrapped presents | Free |
| 10 | Mini Wreath Dough Ornaments | Wreath-style tree decor | Free |
| 11 | Angel Cut-Out Ornaments | Traditional trees | Free |
| 12 | Dough Snowman Faces | Kids’ rooms trees | Free |
| 13 | Leaf-Print Dough Ornaments | Nature themes | Free |
| 14 | Dough Candy Cane Twists | Kitchen trees | Free |
| 15 | Pressed Lace Dough Ornaments | Vintage looks | Free |
| 16 | Dough Reindeer Head Silhouettes | Rustic trees | Free |
| 17 | Glitter-Dusted Dough Icicles | Sparkly trees | Free |
| 18 | Dough House Ornaments | Village themes | Free |
| 19 | Paw Print Dough Ornaments | Pet lovers | Free |
| 20 | Dough Star Garland String | Mantel or window | Free |
| 21 | Marbled Dough Swirl Discs | Modern trees | Free |
| 22 | Dough Bell Ornaments with Ribbon | Door knobs too | Free |
| 23 | Tiny Dough Tree Place Cards | Christmas table | Free |
| 24 | Dough Snowflake Window Hangings | Windows | Free |
| 25 | Numbered Dough Advent Ornaments | Countdown trees | Free |
| 26 | Dough Mitten Pair Ornaments | Cosy themes | Free |
| 27 | Rustic Dough Heart Garland | Mantel or doorway | Free |
| 28 | Kids-Painted Dough Ornaments | Family activity | Free |
| 29 | Dough Keepsake Disc Ornaments | First Christmas gifts | Free |
| 30 | Two-Tone Dough Twist Ornaments | Red-and-white themes | Free |
1. Classic Cut-Out Star Ornaments
Stars are where every salt dough set begins, because a five-point cutter forgives wobbly hands and still reads as Christmas from across the room. Roll the dough to an even quarter-inch, press the cutter straight down, and lift each star onto the tray with a thin knife so the points stay sharp. Poke the hanging hole with a straw near the top point before drying. Once hard, the stars take any finish you like: plain white, brushed gold, or painted to match your tree’s colors. Hang the largest low and central, and let smaller stars scatter toward the branch tips.
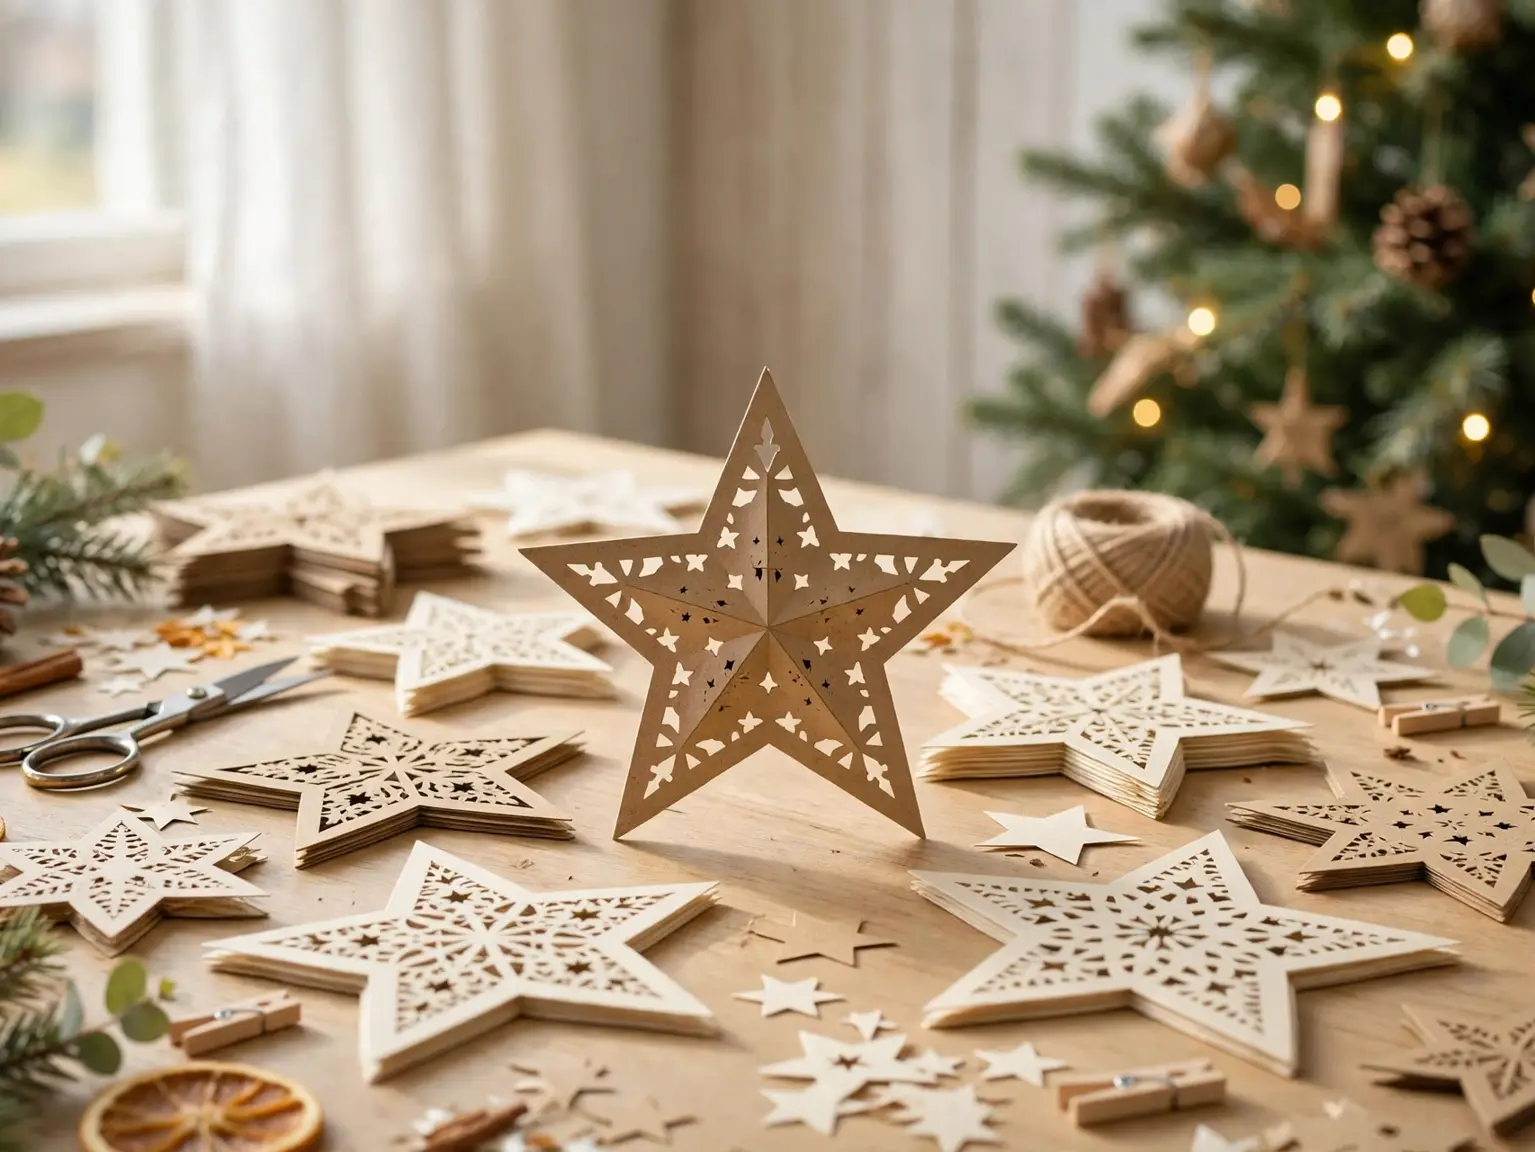
Style note: a single star shape in three sizes looks more designed than ten different shapes mixed together.
2. Handprint Santa Ornaments
Press a small hand into a round of dough, fingers pointing down, and dry the print exactly as it lands. Paint the fingers white as the beard, the palm skin-tone as the face, and add a red hat across the top where the heel of the hand sits. Two black dots for eyes and a pink nose finish him. Write the child’s name and the year on the back before sealing, because in ten years that detail is the part everyone turns the ornament over to find.
Easy swap: swap the Santa paint for simple white and gold if you prefer a keepsake that matches a neutral tree.
3. Fingerprint Reindeer Ornaments
A thumbprint pressed into a small dough disc becomes a reindeer the moment you paint it brown and add two tiny antlers. Press prints while the dough is fresh, one per child, and let each maker paint their own: brown oval body, black dot eyes, a red nose on at least one for the full Rudolph effect. A fine brush or a toothpick draws the antlers best. These are light enough for the thinnest branch tips, and a whole herd made across several years quietly records how fast small hands grow in your own kitchen.
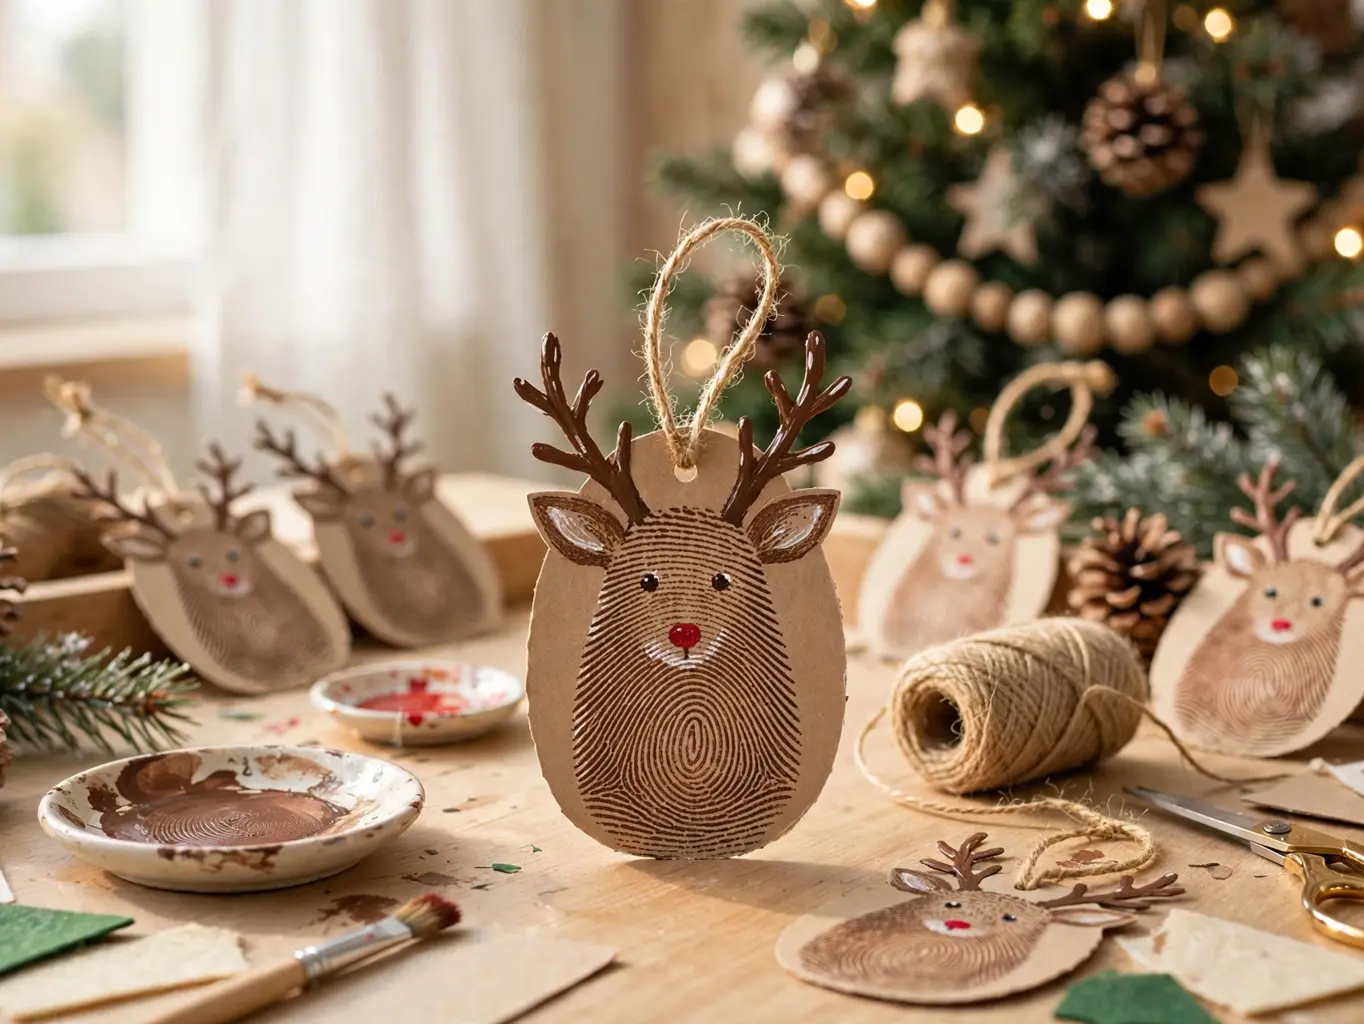
Seasonal swap: in spring the same thumbprint discs become chicks and bunnies for an Easter branch.
4. Stamped Snowflake Discs
For the most elegant set in this whole list, roll plain discs and press a real snowflake stamp, a lace doily corner, or even a knitted glove into the surface before drying. The impression does all the decorating: leave the discs white, seal them well, and hang them on dark green branches where the pattern shows like frost. Group them in odd numbers down one side of the tree rather than scattering them, and the repeated motif starts to look like a bought designer set instead of a kitchen project.
Budget note: the stamps cost nothing when you borrow texture from things already in your drawers.
5. Cinnamon Salt Dough Hearts
Stir a spoonful of cinnamon into the dough and the whole batch turns a warm spice brown that needs no paint at all. Cut plump hearts, dry them slowly, and the scent holds through the season when they hang near warm lights. Tie each one with rough twine and stack a few as gifts alongside your other homemade christmas gift ideas – a scented heart on a parcel does the job of a card and a bow at once. On the tree, their deep color sits beautifully between white discs and anything green.

The formula: cinnamon heart + rough twine loop + one tiny pine sprig tucked under the knot.
6. Cookie-Cutter Tree Ornaments
If your kitchen already owns a Christmas tree cookie cutter, you own this ornament. Cut tree shapes from plain dough, and while they dry, decide on one green and stick to it across the whole set – mixed greens are what make homemade trees look accidental. Add the tiniest dots of color as baubles with the end of a paintbrush, or leave the trees plain and let a dusting of white on the branch edges suggest snow. A red ribbon hanger on every tree ties the set together on the real tree.
Color note: one green in two depths – dark branches, paler tips – gives a plain tree shape real dimension.
7. Dough Garland Beads on Twine
Roll leftover dough into marble-sized balls, flatten each one slightly, and push a skewer through the center before drying. Painted in one color or left natural, the beads thread onto twine with small gaps and a knot between every few, making a garland with a weight and rhythm that plastic bead strings never quite manage. Drape it along the mantel edge or wind it loosely around the tree, where the matte beads calm down shinier ornaments around them. Children who cannot manage cutters yet can roll beads all afternoon.
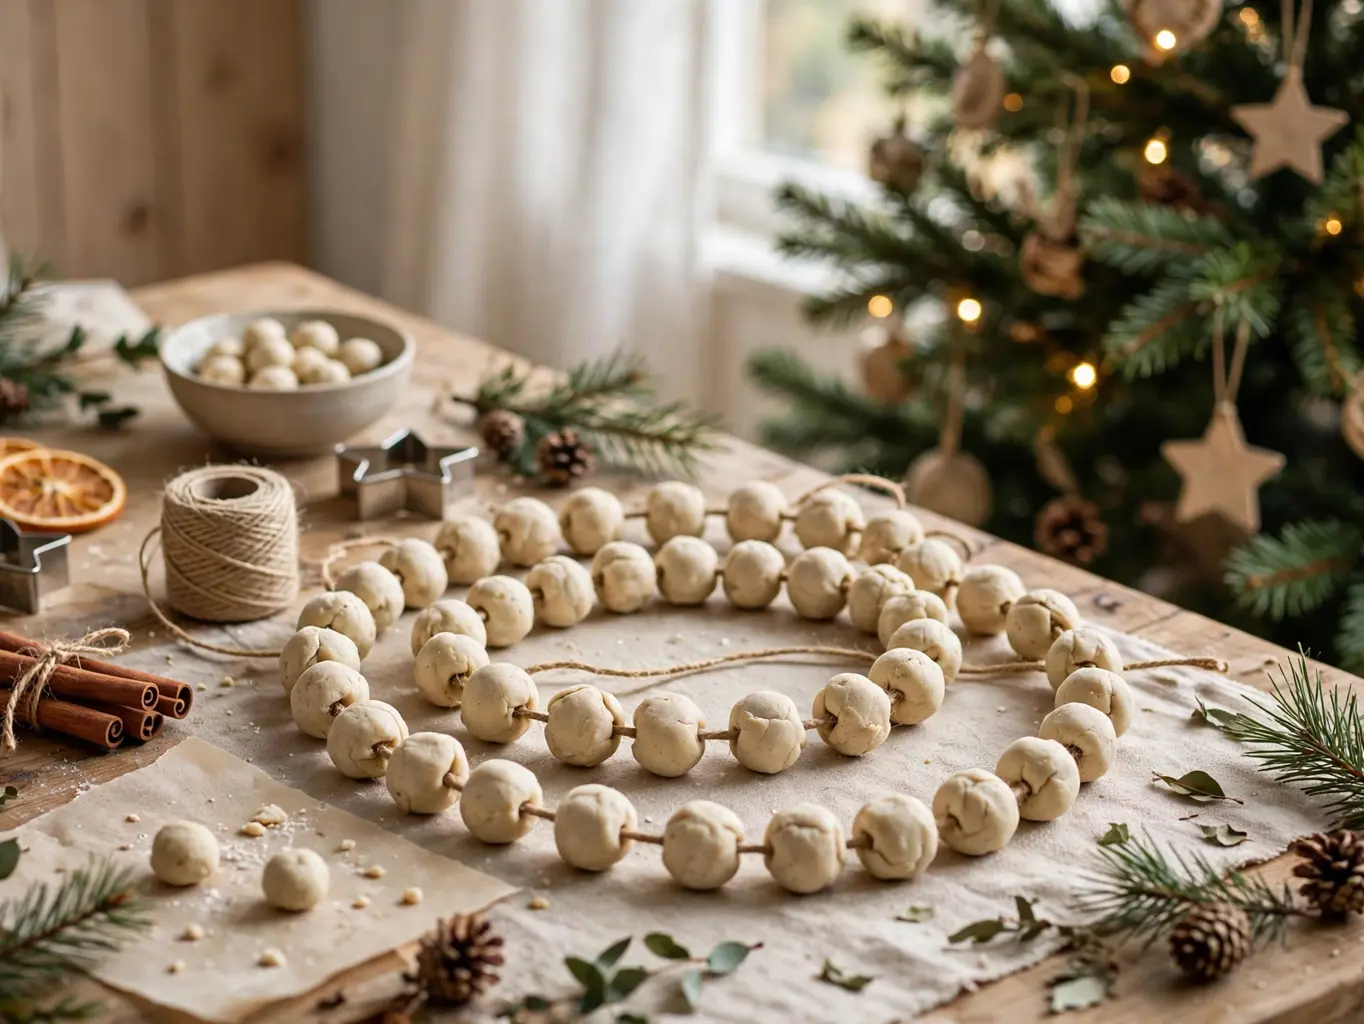
Best for: mantels and tree middles that need something soft between the lights and the baubles.
8. Initial Letter Ornaments
Cut or shape one bold initial for every person at your table, dry them flat, and paint each in the same color so the alphabet reads as a set. A letter on the tree finds its owner instantly on Christmas morning, and the same pieces double as present labels through the season. Straight-line letters (E, F, L, T) are easiest; curves need a slightly thicker roll so they do not snap at the narrow points.
Get the look:
- Main piece: small dough initial, one per person
- Supporting piece: matching ribbon hangers in a single color
- Texture or material: smooth matte paint on fine-salt dough
- Finishing touch: the year written small on the back
9. Dough Gift Tags with Names
Roll small rectangles or ovals, stamp or scratch a name into each before drying, and you have gift tags that survive the unwrapping and move onto the tree afterward. A stamped name reads best when the letters are pressed while the dough is fresh and deep enough to hold a shadow; a toothpick works for handwritten names. Leave the tags plain with twine, or paint just the letters so the name stands out. Year after year, a rescued tag on the tree brings back the present it once labeled.
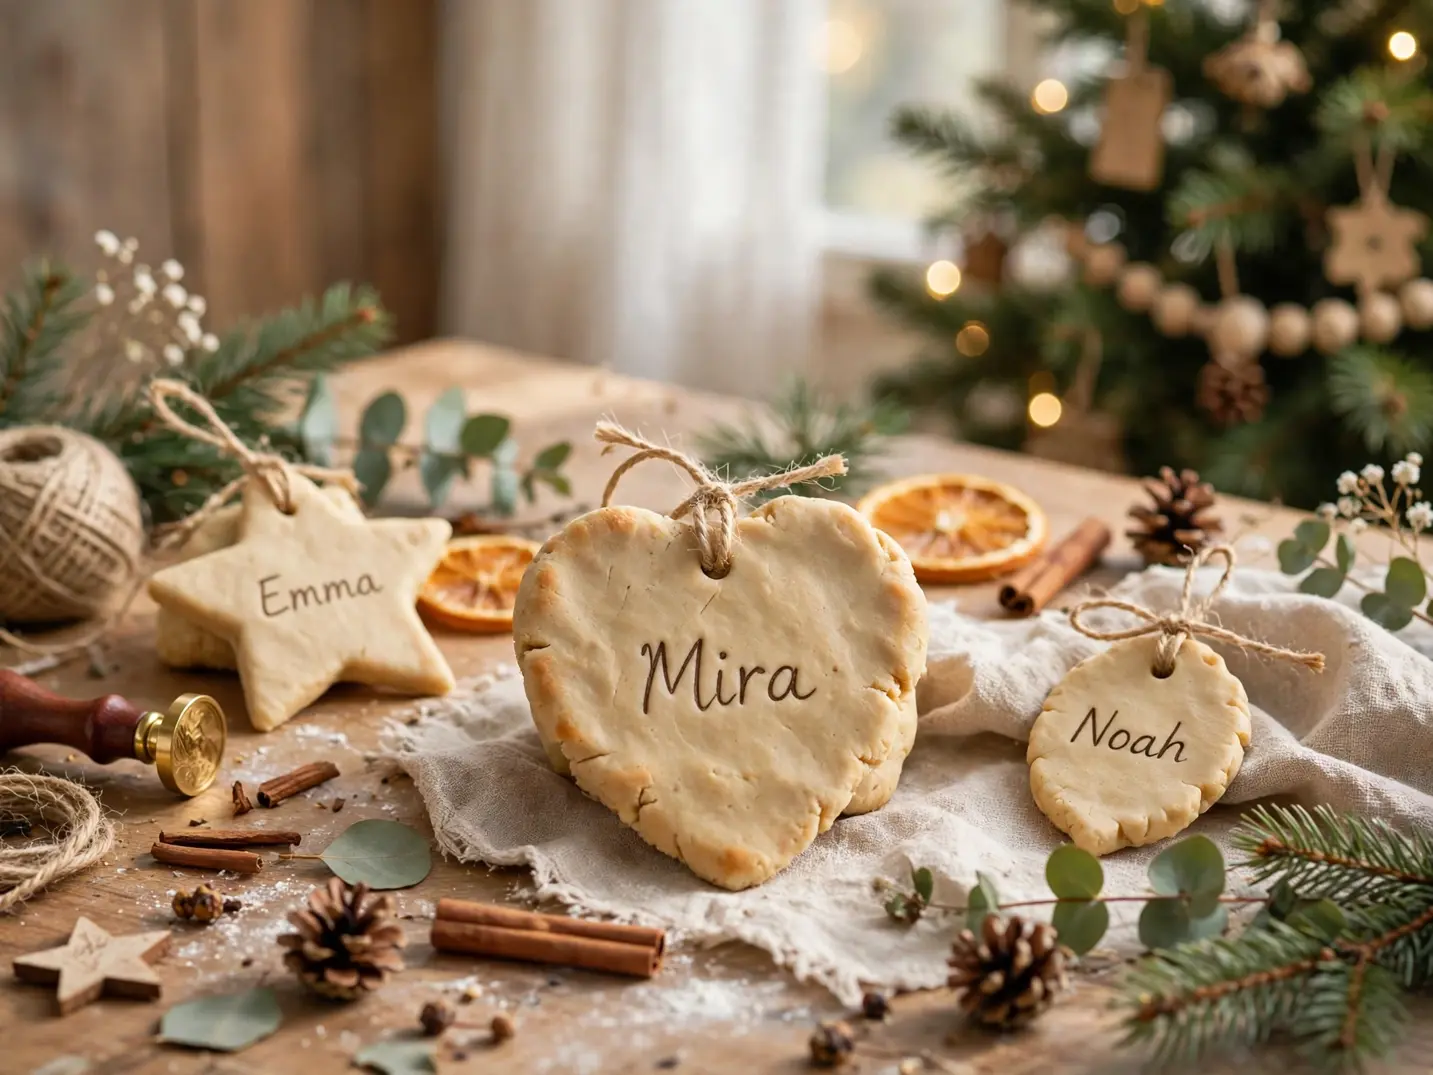
Texture note: press the whole tag against a linen cloth before stamping for a soft woven background.
10. Mini Wreath Dough Ornaments
Shape a small ring of dough, pinch tiny leaf marks around it with the edge of a knife, and you have a wreath small enough for a single branch. A ring dries faster and more evenly than a solid disc of the same size, so these are good early practice pieces. Paint the ring green and dot tiny red berries around it, or keep it white and tie the smallest red bow at the top. A row of three matching mini wreaths down the tree’s front looks quietly expensive.
Space note: mini wreaths fill the thin top branches where heavy baubles bend the tips down.
11. Angel Cut-Out Ornaments
An angel is the shape most likely to already sit in a family cookie cutter tin, passed down with the shortbread recipe. Roll the dough a touch thicker than usual, because an angel’s neck and wing tips are narrow and snap easily when thin. Painted white with a gold halo line, or left plain with a stamped dress pattern, angels gather beautifully on the upper branches where the lights catch them. They are also the ornament relatives most often ask to take home, so cut a few spares.

Why it works:
- Angels carry family tradition better than any other shape.
- The simple silhouette reads clearly from across the room.
- White paint and one gold line suit every tree.
12. Dough Snowman Faces
Cut simple circles and paint the face directly on the disc – two coal eyes, a carrot triangle nose, and a dotted smile need no sculpting at all. A smaller circle glued on top before drying, or painted as a hat brim line, suggests the hat, and a ribbon hanger in scarf colors finishes the joke. Snowman faces are the friendliest first painting project for small children, because the features sit in a row and a wobbly smile only adds character to this particular gentleman.
Fit check: keep faces under three inches wide so they sit flat against the branches, not on them.
13. Leaf-Print Dough Ornaments
Press a real leaf – fern, sage and ivy print sharpest – firmly into a rolled disc, peel it away, and the vein pattern stays behind like a fossil. These ornaments need almost no paint: seal them white, or wash a pale green into the veins and wipe the surface so only the print holds color. A set of leaf prints suits a tree dressed with pinecones and wood, and they make the most convincing case that dough can look grown-up. Gather leaves before the first hard frost flattens them.
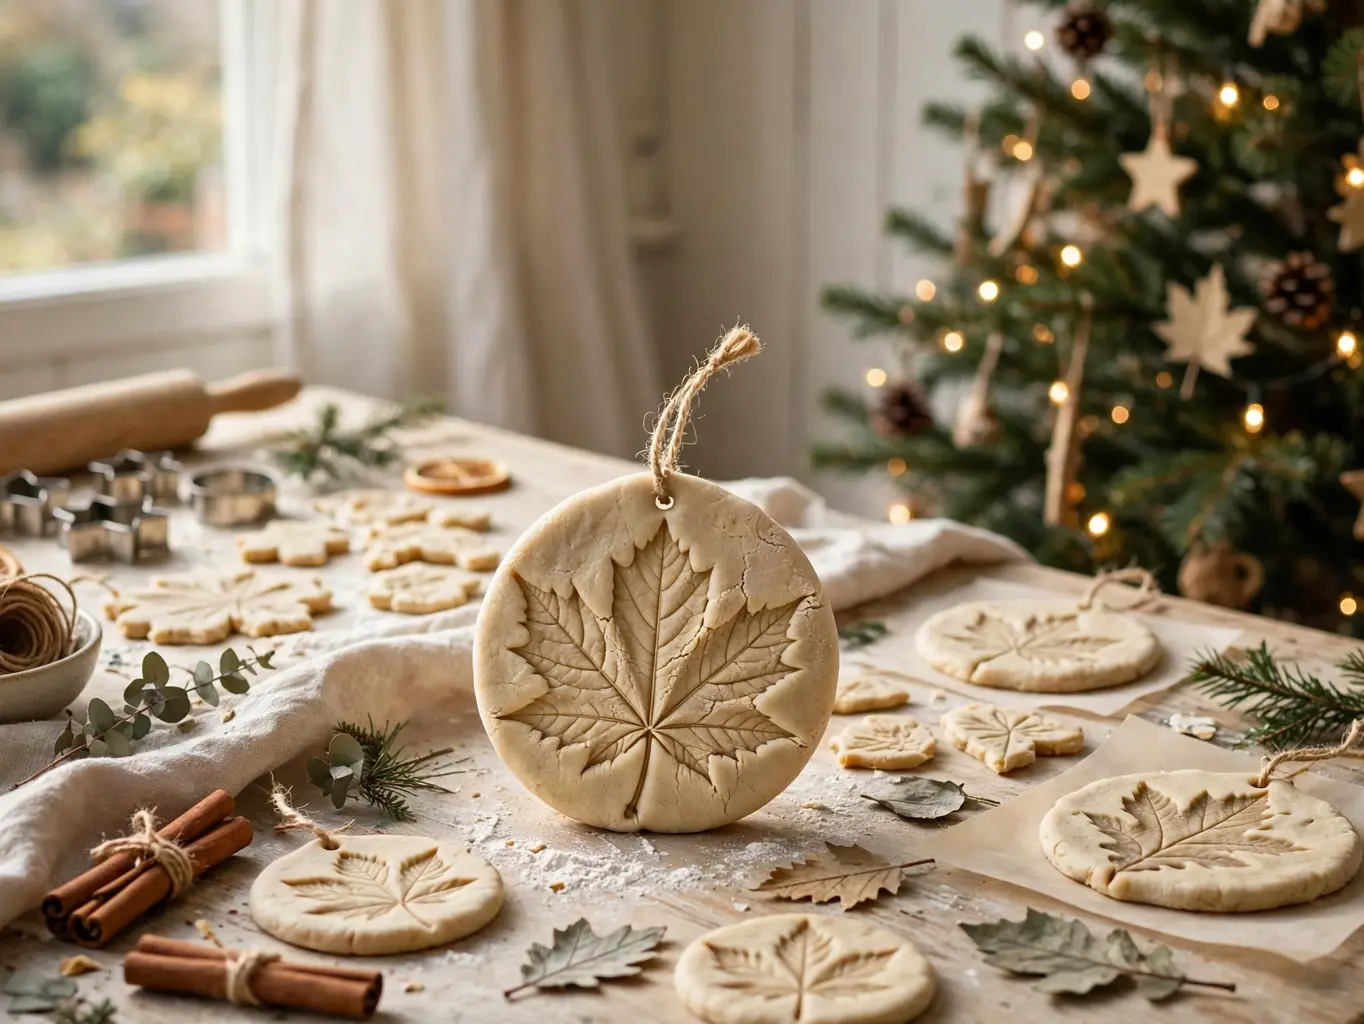
Style note: hang leaf prints together in one quiet corner of the tree rather than scattering them.
14. Dough Candy Cane Twists
Roll two thin ropes of dough, tint one red (or paint it later), and twist them together into the most recognizable shape of the season. Twists are the one dough ornament that teaches itself: the spiral hides uneven rolling, and a gentle curve at the top while the cane is still soft makes the hook. Dry canes flat and turn them once so both sides set evenly. They belong on a kitchen tree or lined along a mantel garland, anywhere their peppermint colors already speak the room’s language.
Easy swap: swap red for gold on half the twists to stretch one batch across two color schemes.
15. Pressed Lace Dough Ornaments
Roll a lace doily or a piece of crochet trim across the dough with the rolling pin, and the pattern transfers in one pass – the fastest way to an ornament that looks genuinely heirloom. Cut discs or hearts from the patterned sheet, dry them, and leave them unpainted: the relief shadows do the decorating under tree lights. These suit a vintage or white tree best, and they pair naturally with the lace already on a family tablecloth, echoing a textile somebody loved onto the tree above it.
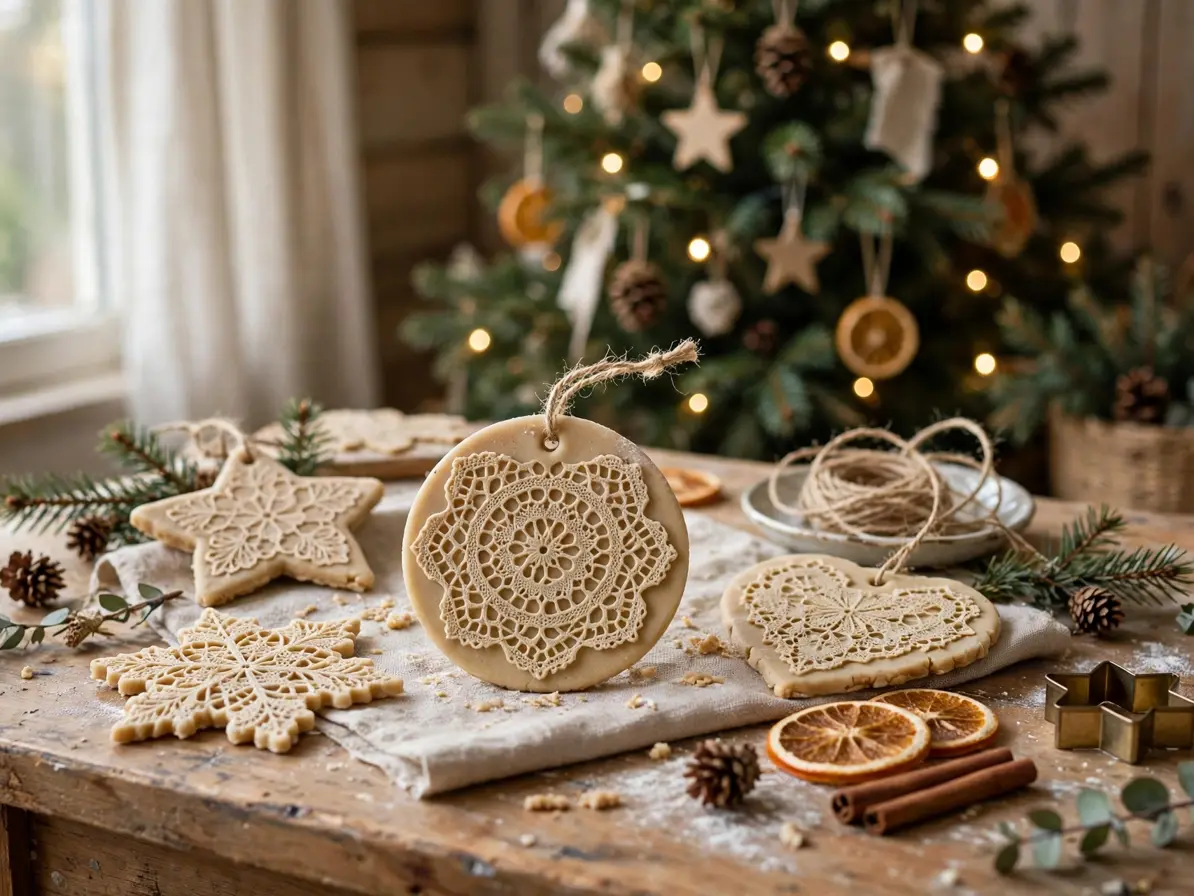
Seasonal swap: the same lace press works on spring dough hearts and eggs for an Easter tree.
16. Dough Reindeer Head Silhouettes
Cut a simple reindeer head profile – forehead, ear, nose, and two antlers – from a slightly thicker roll, because antler points are the thinnest part of any dough shape. Brown paint or cinnamon dough both suit the silhouette, and one tiny black eye is the only detail it needs. A matching pair flanking the tree’s center looks like bookends; a whole herd in descending sizes down one side looks like a story. On a rustic tree with burlap and wood, these are often the ornaments guests ask about.
Budget note: one thicker batch covers the whole herd; antler scraps re-roll into beads for the garland.
17. Glitter-Dusted Dough Icicles
Roll a tapered spiral – fat at the top, thinning to a point – and an icicle forms that catches light like the real thing. Dough icicles solve a real problem: glass icicles shatter, and plastic ones look flat, while a dough spiral sealed and dusted with fine glitter at the tips genuinely sparkles. Hang them at the branch ends all around the tree, where icicles belong, and keep the glitter to the last inch so the sparkle reads as frost rather than decoration. They store safely in tissue for years.
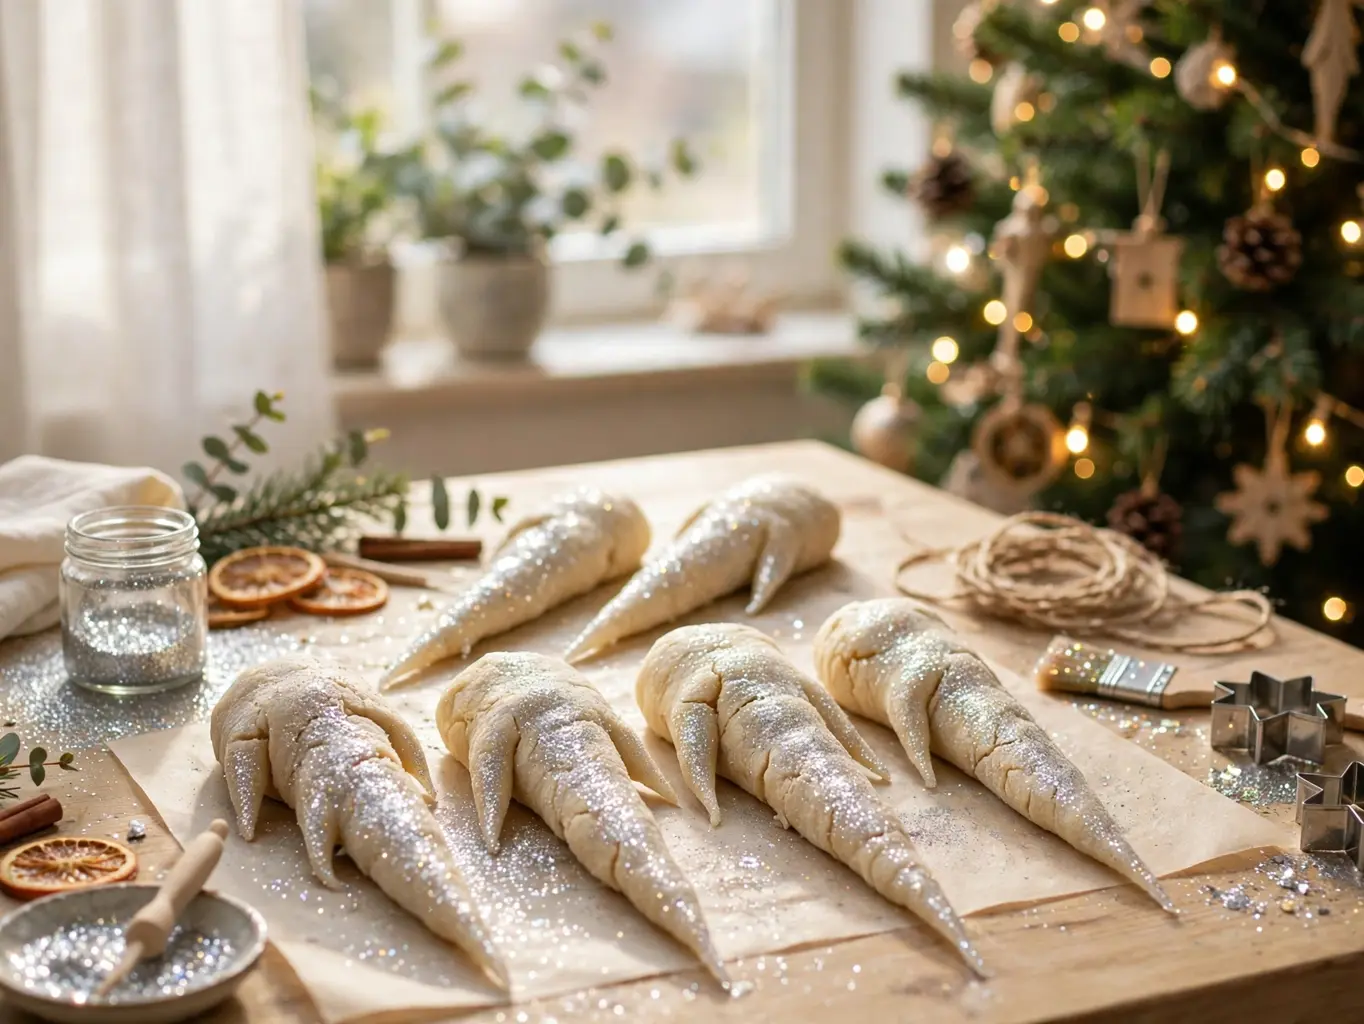
The formula: tapered dough spiral + clear seal + glitter dusted on the tip only.
18. Dough House Ornaments
Cut a house front – square walls, triangle roof, one door, two windows – and a whole village street becomes possible in dough. Houses reward slow painting: white walls, a colored door, snow dabbed along the roofline with the tip of a brush. Build three or five in the same palette and group them on one branch cluster like a street, or line them along the mantel between trees. If flat houses feel simple, the folded houses among these paper christmas ornament ideas make a good companion project for older kids.
Color note: paint every door in the village the same red and the street instantly looks planned.
19. Paw Print Dough Ornaments
Press a cat’s or dog’s paw gently into a small dough disc and you have the ornament pet people treasure most and talk about longest. Work quickly with a treat ready, press once, and lift straight up so the toes stay distinct; a smudged print can be re-rolled and tried again. Paint the print itself in a contrasting color so the pads read clearly, add the pet’s name around the rim, and seal it twice – this is the ornament that must not be the one that crumbles.
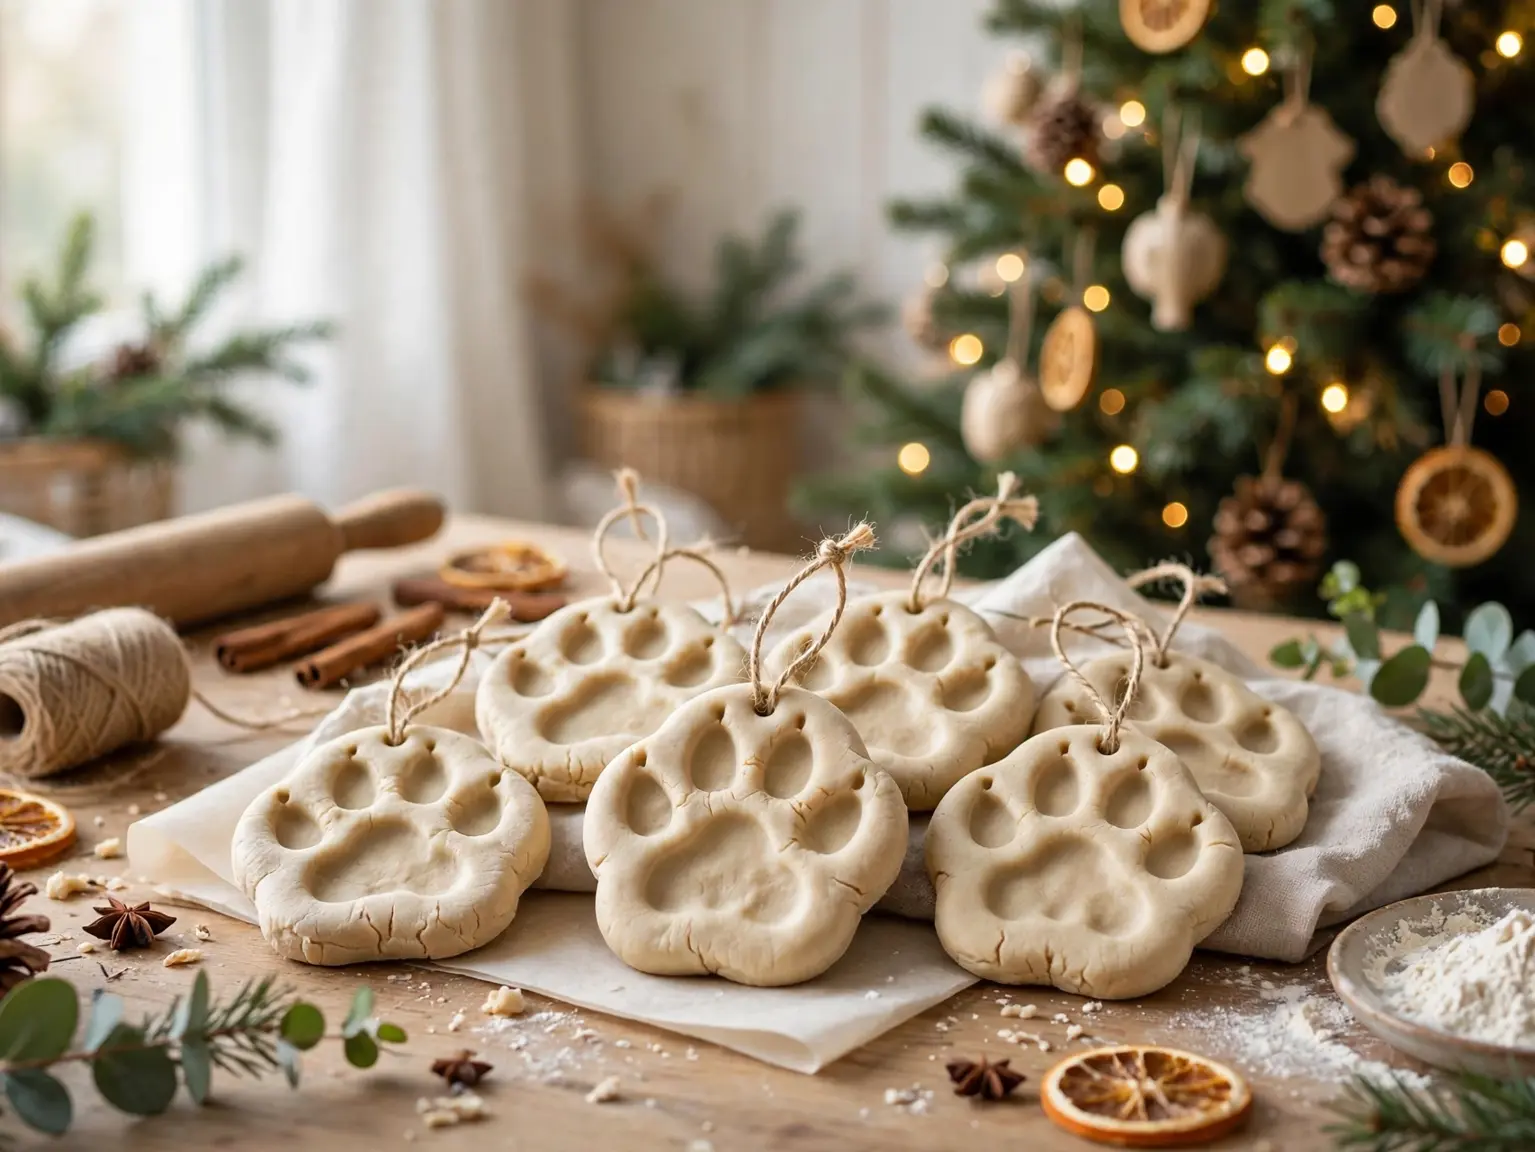
Best for: the family tree’s front row, beside the handprints it will be compared with every year.
20. Dough Star Garland String
Cut small stars – an inch or two across – pierce two holes in each, and thread them onto one long string with a knot holding each star in place. A star garland is lighter and softer than tinsel, and it drapes without shedding. Keep the stars plain white for a Scandinavian mantel, or paint every third star red for a patterned rhythm along the string. Hung in a gentle swag across a window, the small repeated shapes catch the evening light.
Get the look:
- Main piece: small dough stars strung on twine
- Supporting piece: knots spacing each star evenly
- Texture or material: matte white dough against rough twine
- Finishing touch: one red star in the middle
21. Marbled Dough Swirl Discs
Twist two ropes of differently tinted dough together, roll the twist flat, and every disc you cut carries its own marble swirl – no two alike, which is exactly the point. Red and white reads as peppermint; green and white feels like frost on a leaf; natural dough twisted with cinnamon dough gives a wood-grain swirl. Marble discs need no paint and no glitter, because the pattern is inside the material itself. They are the fastest route to a dough set that looks designed rather than decorated.
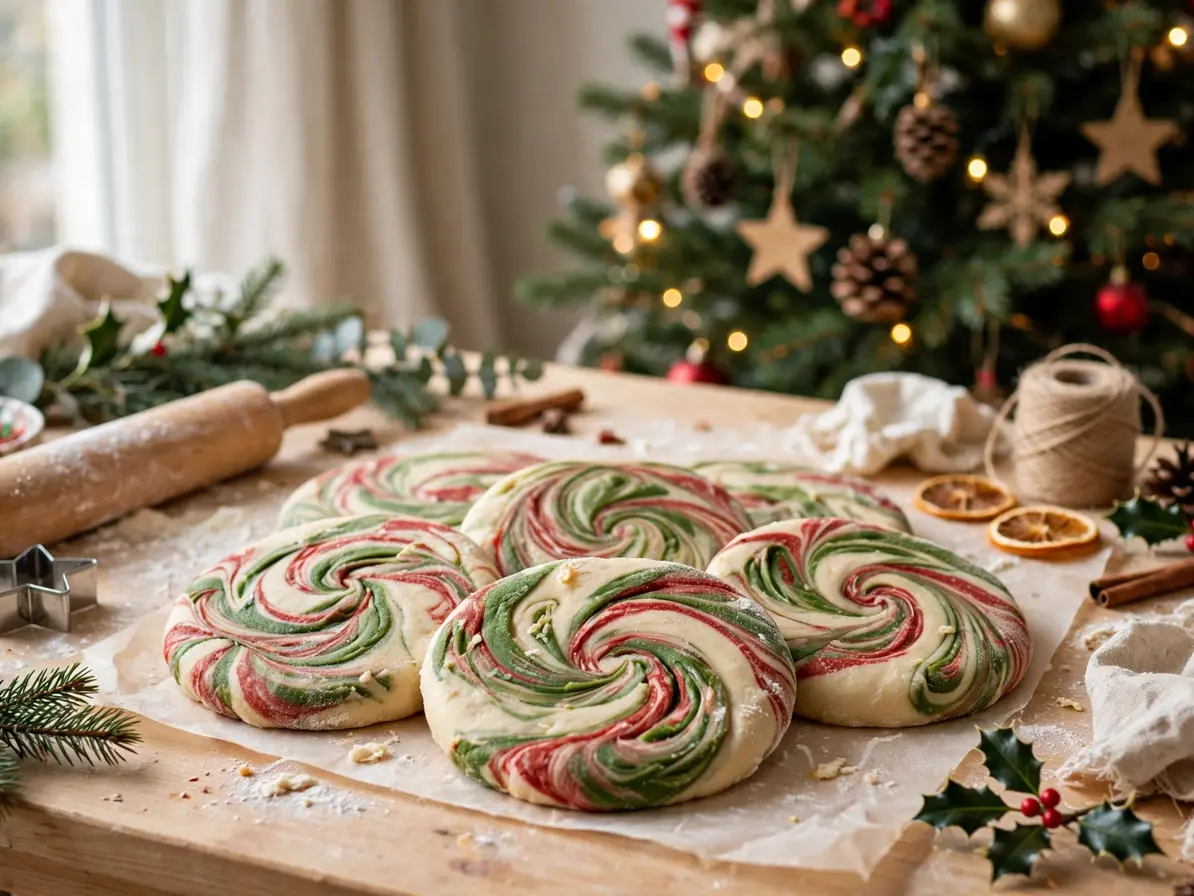
Texture note: roll marbled dough a touch thinner so the swirl stretches into long elegant veins.
22. Dough Bell Ornaments with Ribbon
Shape a bell by hand – a flared cone with a small ball at the rim – or use a bell cutter, then tie a real ribbon bow at its neck so the ornament announces itself. Dough bells are satisfyingly heavy for their size, so hang them on mid-strength branches rather than the tips. Painted gold or silver, a pair hung on a door knob gives a soft knock when the door opens, the closest a dough ornament gets to actually ringing. Bells also mark the tree’s corners well.
Space note: door knobs, cabinet pulls and chair backs all take a bell where branch space runs out.
23. Tiny Dough Tree Place Cards
Cut miniature trees, write a name along the trunk line of each, and stand them on folded card at every place setting on the Christmas table. A place card that is also an ornament gives each guest a made thing to take home, which changes how the table feels before anyone sits down. Keep the trees one color, with names in a contrasting paint, so the table reads as a forest rather than a craft project. After dinner, the cards migrate to the tree with their owners.
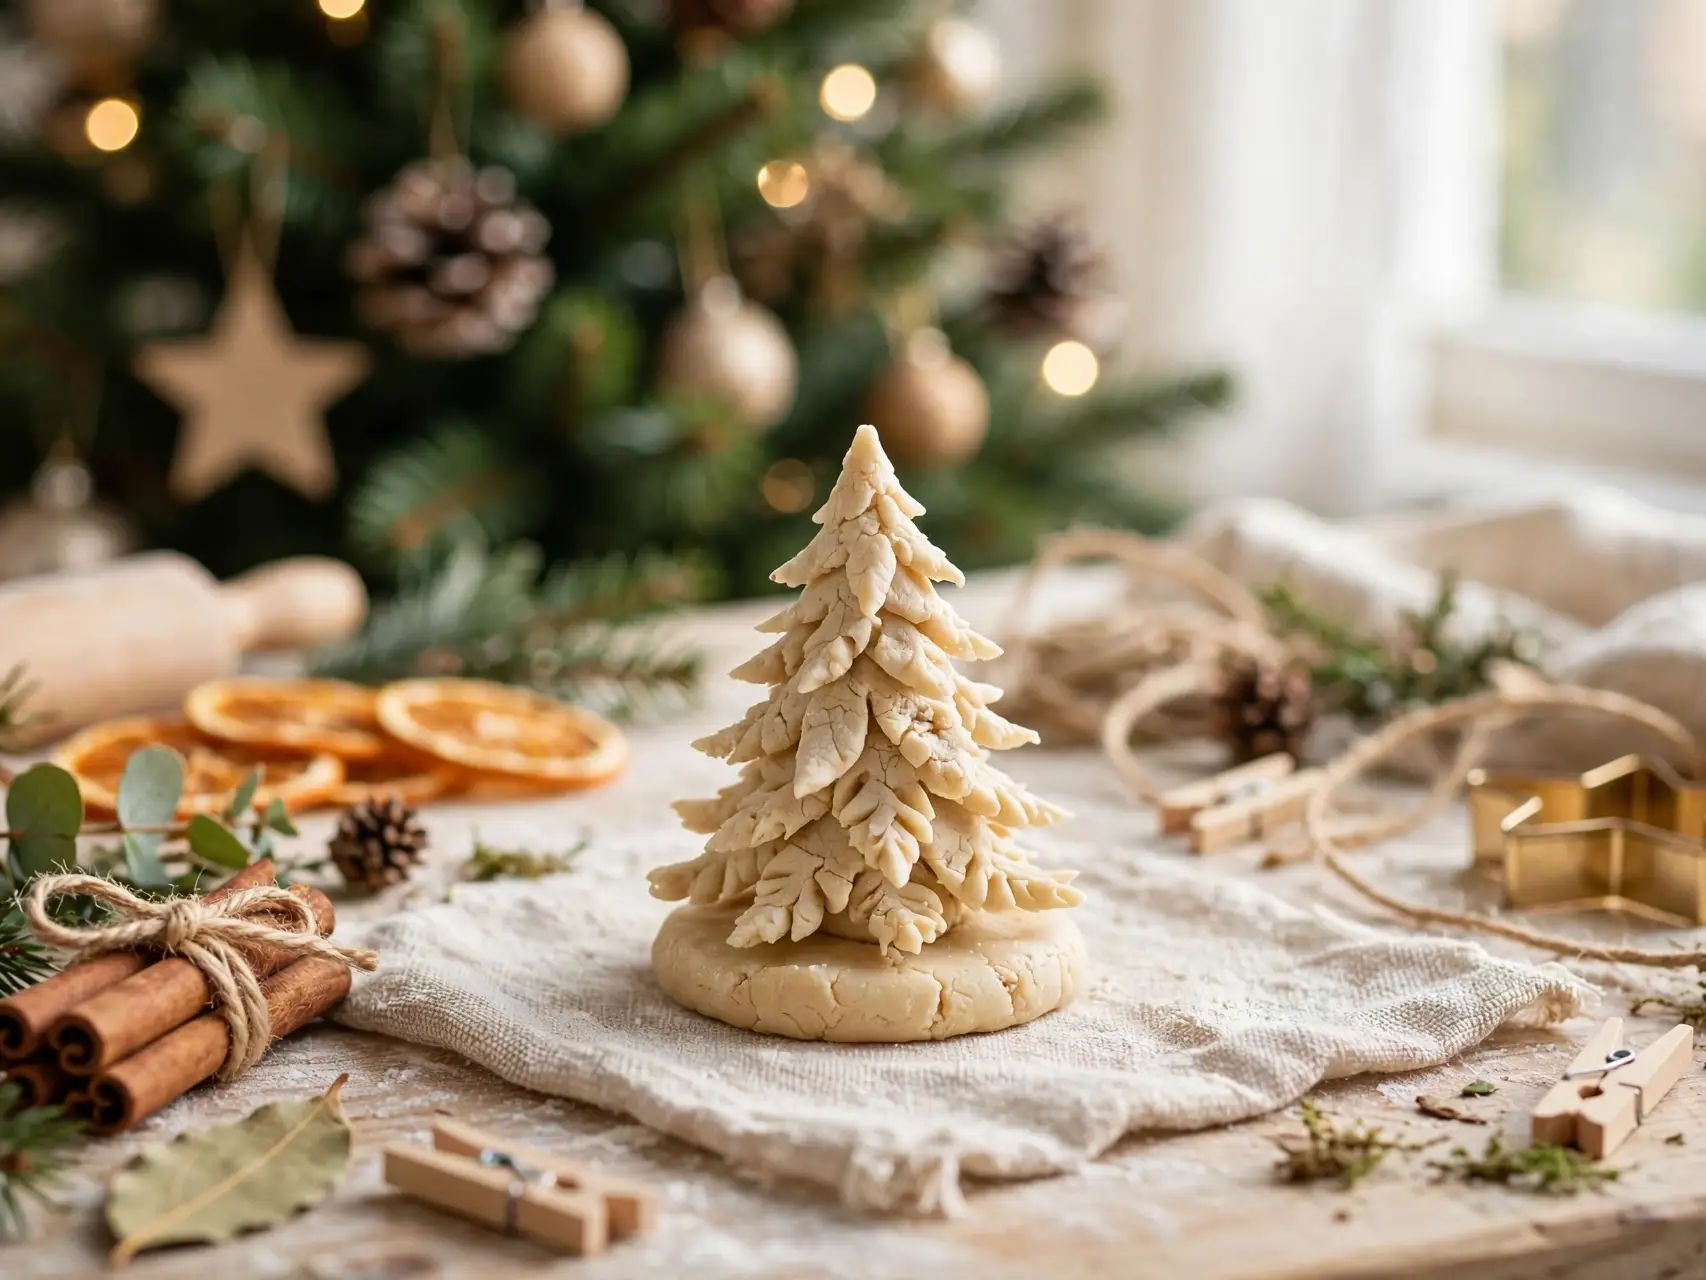
Why it works:
- Each guest leaves with a handmade keepsake, not a paper card.
- Matching trees turn place settings into one small forest.
- Names in contrasting paint read easily in candlelight.
24. Dough Snowflake Window Hangings
Cut larger snowflakes by stamping and punching a plain disc: a hexagon stamp for the outline, then small triangles and diamonds punched around the center with straws and knife tips. At four or five inches across they are big enough to read from the street when hung in a window on clear thread, and daylight through the cut-outs does what no paint can. Three at different heights in one window look like weather arriving indoors.
Fit check: measure the pane first – snowflakes wider than a third of the glass crowd the window.
25. Numbered Dough Advent Ornaments
Cut twenty-four small discs or stars, stamp a number on each, and hang them on a small branch or tabletop tree to be turned, moved or taken down one per day. An advent set in dough survives years of small fingers in a way chocolate calendars never try to. Number with a stamp if you have one; a toothpick-written number, painted over in gold afterward, looks just as deliberate. It pairs well with other homemade family christmas ideas that build the season slowly instead of all at once.
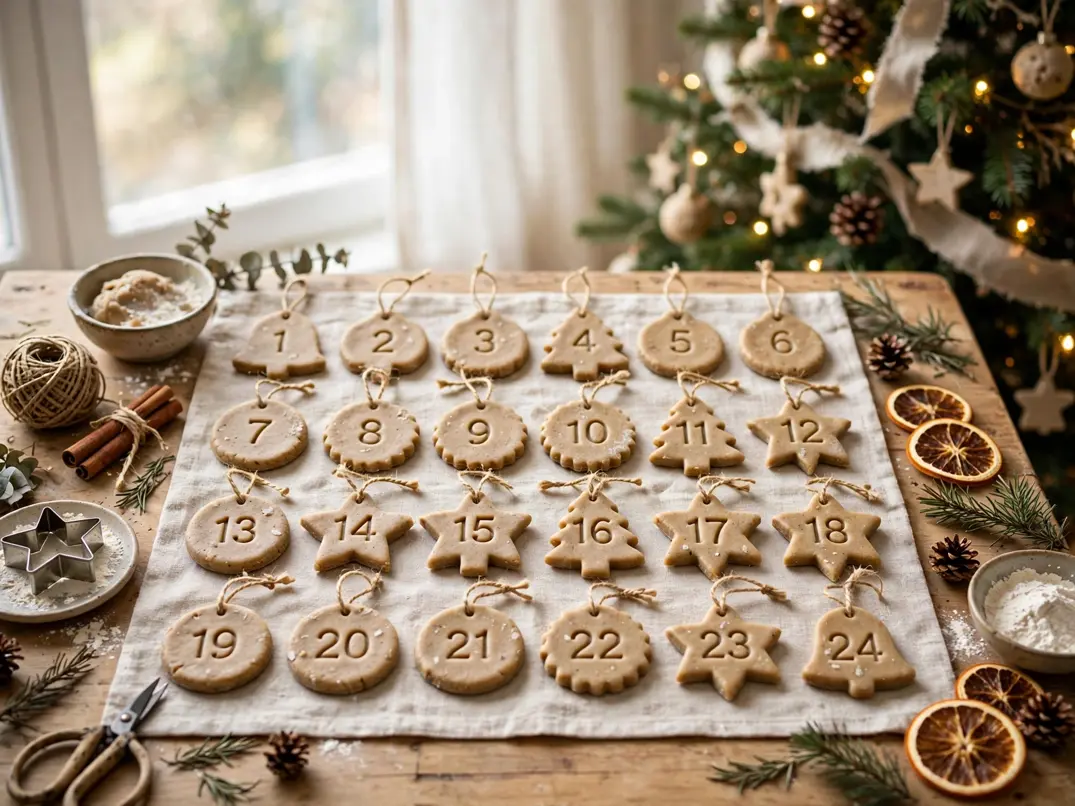
Style note: keep the numbers large and the discs plain – the countdown is the decoration here.
26. Dough Mitten Pair Ornaments
Cut two mittens per ornament – the cutter shape is forgiving, with no thin points to snap except the thumb – and join each pair at the top with one ribbon loop so they hang as they would on a child’s string. Paint the pair in matching colors with a white cuff line, or knit-pattern them with a fork’s tines pressed lightly across the surface. Mittens belong on a cozy tree, near the hearth end if your tree has one, and they charm hardest in odd, slightly mismatched pairs.
Easy swap: swap the ribbon loop for a tiny clothespin to clip mittens along a garland instead.
27. Rustic Dough Heart Garland
String a dozen cinnamon or plain hearts on a length of jute, knotting the string at each heart so the spacing stays even, and you have the garland rustic rooms are always missing. Hearts are the sturdiest dough shape – no points, no necks – so a heart garland survives being draped, moved and re-draped better than any other in this list. Hang it across the mantel, over a doorway, or down a banister, and let a few spare hearts drop onto wrapped presents as instant tags along the way.

Seasonal swap: the same jute-and-heart string in pale pink hearts works for Valentine’s Day on a mantel.
28. Kids-Painted Dough Ornaments
Cut a batch of plain shapes – stars, circles, trees, whatever the cutters give you – dry them unpainted, and hand the whole box to the children with brushes and one rule: these hang on the tree forever. Kids’ painting is gloriously uneven, and that is the treasure: a wobbly red star from a five-year-old outranks every polished ornament on the tree within a decade. Write the painter’s name and age on the back of each piece before sealing, in your handwriting, while you still remember whose is whose.
Budget note: one shared box of craft paint covers every child and every shape in the batch.
29. Dough Keepsake Disc Ornaments
A plain round disc, stamped with a year and one small symbol – a star for a birth, two rings for a wedding, a tiny house for a move – becomes the ornament that marks a family’s timeline. Keepsake discs are deliberately plain everywhere except the stamp, which is what makes them read as records rather than decorations. Start one for this year even if you missed the earlier years; a timeline that begins now still gathers meaning fast, and next year you will be glad the first disc exists.
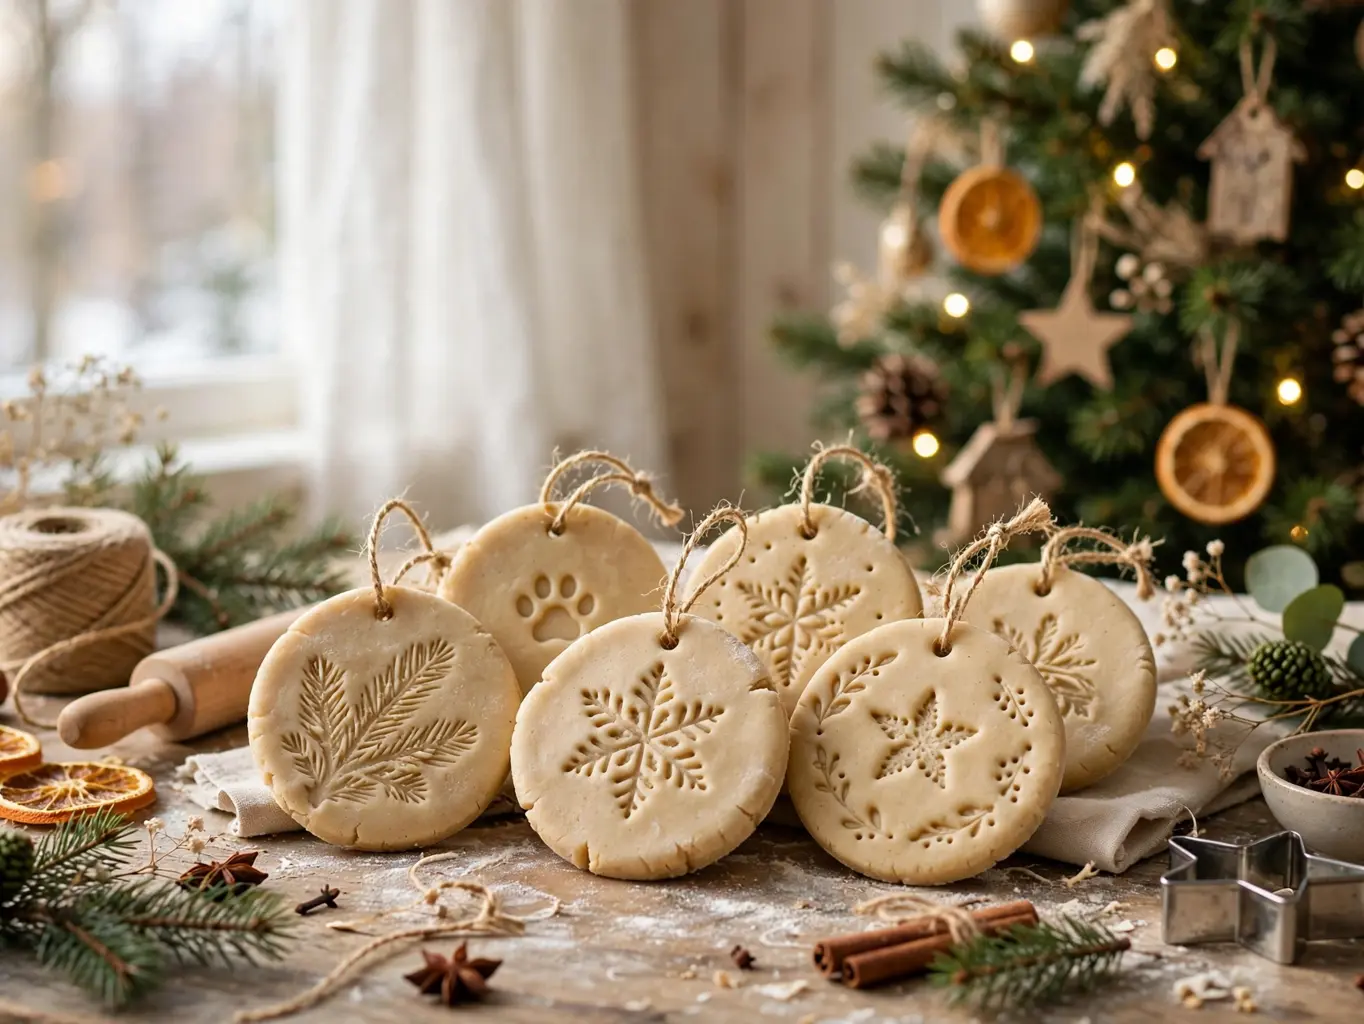
The formula: plain disc + one stamped symbol + the year in clear figures.
30. Two-Tone Dough Twist Ornaments
Finish the set with twists rolled from two colors at once – natural and cinnamon, white and red, plain and green – spiraled into canes, braids and simple knots. Two-tone twists need no painting session at all, because the color is in the dough itself, and the spiral keeps both colors moving so no side is the plain side. They are a good last batch: by now your rolling is even, your drying is patient, and the twists show off everything the earlier ornaments quietly taught your hands.
Color note: keep one of the two tones constant across every twist so the set still matches.
The Dough Itself: What Matters Most
Before any shape gets cut, four quiet decisions decide how the whole batch turns out.
| Item | What to Look For | Why It Works |
|---|---|---|
| Salt | Fine table salt, never coarse | Fine salt dissolves into a smooth surface; coarse salt leaves a rough, crumbly finish |
| Rolling thickness | An even quarter-inch, guided | Even thickness is the whole secret to flat drying without cracks or puffing |
| Drying | Lowest heat, hours not minutes | Slow drying sets the dough hard and white; fast heat browns and bubbles it |
| Sealing | Clear coat on front AND back | Moisture enters from the unsealed side – sealing both is what makes them last |
Old Dough Habits, Better Ornaments
Most dough disappointments trace back to four old habits – and each one has a simple replacement.
| Old Rule | What Works Better Now |
|---|---|
| Roll freehand any thickness | Roll between two guides for one even thickness |
| Bake hot to finish faster | Dry low and slow, or air-dry two days |
| Paint straight on raw dough | Seal or prime first so colours stay bright |
| Hang with string through a punched hole later | Poke the hanging hole with a straw before drying |
Rustic Dough, Refined Finish
Salt dough is honest material: matte, slightly uneven, warmly rustic at heart. Left entirely rustic, a full set can look heavy on the tree – which is why each ornament earns one refined touch and only one. A silk ribbon instead of twine on the handprint. A gold-painted edge on a plain star. A dusting of glitter on just the icicle tips. The contrast is the design: the rough dough makes the refined detail glow, and the refined detail stops the dough reading as unfinished. One lift per ornament, thirty ornaments, one lifted set.
Let the Keepsakes Take the Front of the Tree
Hang the memory pieces first. The handprints, the fingerprint reindeer, the paw prints and the kids-painted shapes go at the front of the tree at eye level, where they are seen every time someone passes. Everything else – the plain stars, the stamped discs, the beads – fills the sides and back as a quiet supporting set that makes the front row look deliberate. This one decision, keepsakes forward and fillers back, is what turns a box of homemade ornaments into a tree that tells your family’s story in the right order.
When Dough Ornaments Disappoint
- If the dough cracks feel like too much trouble, try air-drying thinner shapes for two full days instead of using the oven.
- If the painting feels like too much, try leaving the set plain white with only twine hangers – the Scandinavian look needs no paint.
- If the glitter feels like too much, try a single gold-painted edge on each ornament instead.
- If thirty shapes feel like too much, try one cutter shape in three sizes – a matching set looks deliberate.
Build Your Own Dough Formula
Pick the set you want, then follow its row – every formula below uses the same basic dough.
| Situation | Formula | Why It Works |
|---|---|---|
| Baby keepsake set | Handprint + footprint + name tag, sealed twice | Prints are the memory; the double seal is the insurance |
| Elegant white set | Stamped discs + lace prints + plain twine | Texture replaces colour, so the set reads refined, not plain |
| Kids’ activity set | Cut-outs + bright paint + glitter edges | Simple shapes survive small hands; bright paint forgives wobbles |
| Rustic set | Hearts + stars + cinnamon dough + jute string | Warm spice colour and rough string keep the farmhouse feel |
| Gift topper set | Initials + names + tiny stars | An ornament that labels the gift becomes part of the present |
The Air-Dry, No-Oven Version
Skip the oven entirely if timing it feels like one task too many. Roll, cut, stamp and punch your ornaments in one session, then lay them on a wire rack somewhere out of the way and simply wait. Two days of air does the same work as the low oven – turn each piece once, halfway through, so both faces dry flat. Nothing can brown, nothing can puff, and the only skill involved is patience. Seal and paint at the end exactly as usual; the finished ornaments are indistinguishable from oven-dried ones.
Making Dough Ornaments Ahead of the Season
Salt dough’s one demand is drying time, and December is the worst month to owe it. So borrow November instead. Make the blanks on a quiet autumn weekend – rolling, cutting, stamping and drying take one afternoon – and store the plain white shapes in a tin like biscuits. When the tree goes up, hold the painting afternoon then: the slow part is already done, the fun part lands exactly when the house wants it, and children paint ornaments for a tree they can already see standing in the corner.
Salt Dough Questions, Answered
What are salt dough ornaments?
Christmas ornaments made from a simple dough of flour, salt and water, rolled, cut or printed into shapes, dried hard, then painted and sealed to keep for years.
Can beginners and kids make salt dough ornaments?
Yes – the dough is softer than pastry and needs no skill; children manage cutting, printing and painting while an adult handles drying and sealing.
How do I make salt dough ornaments last longer?
Dry them fully, seal front and back with a clear coat, and store them dry with tissue between layers – sealed dough ornaments keep for many Christmases.
Do I need special craft supplies to make them?
No – flour, salt, water, a rolling pin and cookie cutters cover almost every idea here; paint and ribbon are optional finishes.
How do I make ornaments without them cracking?
Roll one even thickness, dry low and slow rather than hot, and let pieces cool fully before painting – even drying is what prevents cracks.
One Batch This Weekend
The ornaments your family keeps forever turn out to cost three kitchen staples and one slow afternoon. So mix one two-one-one batch this weekend, roll it between two guides, and cut a dozen plain stars – they can dry all week, and you will paint them the day the tree goes up.